Prettiest Cakes Ever
I remember my daughter Lily’s fifth birthday. We had planned a big party, but a sudden flu bug hit our house. The party was postponed, and Lily was so disappointed.
That evening, as she snuggled on the couch, I knew I had to do something special. I wanted to bake a cake that would bring a sparkle back to her eyes, something truly magical. I decided right then to create the *Prettiest Cakes Ever* – not just delicious, but a feast for the eyes, even if it was just for our little family.
What I discovered was a simple way to make stunning cakes that look like they came straight from a bakery, yet are incredibly easy to whip up. As a mom of three, I live for those moments of joy food brings. These beautiful cakes prove that you do not need hours of intricate decorating to make something truly special.
This recipe for the *Prettiest Cakes Ever* became a staple in our home, transforming ordinary days into celebrations and making every bite feel like a hug. It’s all about simple ingredients, a little love, and a desire to create a visual delight. You can achieve amazing results with minimal fuss. Trust me, these are the *Prettiest Cakes Ever* you’ll bake, and your family will absolutely adore them.
Why You’ll Love These Prettiest Cakes Ever
You will adore this recipe for so many reasons. First, it delivers on its promise: these truly are the *Prettiest Cakes Ever*. Imagine baking a cake that rivals any professional confection, yet requires no advanced skills.
Second, this recipe is surprisingly simple. We use straightforward ingredients and easy-to-follow steps. As a busy mom, I appreciate efficiency.
This means you can create a showstopper without spending all day in the kitchen. Moreover, the flavors are absolutely divine. This cake offers a moist, tender crumb and a perfectly balanced sweetness.
It is a genuine crowd-pleaser for both kids and adults. Finally, making these *Prettiest Cakes Ever* allows for wonderful creative expression. You can customize the look with simple, elegant decorations.
This recipe is designed to bring joy and beauty to your table with minimal stress. It proves that wholesome, simple ingredients can produce truly gorgeous cakes.
Ingredients You’ll Need

To create these stunning and delicious *Prettiest Cakes Ever*, gather these pantry staples. Each ingredient plays a crucial role in achieving the perfect texture and flavor. Using high-quality ingredients always elevates the final result.
| Category | Ingredient | Quantity |
|---|---|---|
| Dry Ingredients | All-purpose flour | 2 ½ cups |
| Granulated sugar | 1 ¾ cups | |
| Baking powder | 1 tablespoon | |
| Salt | ½ teaspoon | |
| Wet Ingredients | Unsalted butter, softened | ¾ cup (1 ½ sticks) |
| Large eggs, room temperature | 3 | |
| Whole milk, room temperature | 1 cup | |
| Vanilla extract | 2 teaspoons | |
| Frosting | Unsalted butter, softened | 1 cup (2 sticks) |
| Powdered sugar | 4 cups | |
| Whole milk or cream | 2-3 tablespoons | |
| Vanilla extract | 1 teaspoon | |
| Optional Decorations | Fresh berries, edible flowers, sprinkles | As desired |
Substitutions & Variations
One of the beautiful aspects of baking these *Prettiest Cakes Ever* is their adaptability. You can easily tailor this recipe to suit your taste preferences or dietary needs. Do not hesitate to experiment a little!
* Flour Alternatives: For a gluten-free version, substitute the all-purpose flour with a 1:1 gluten-free baking flour blend. Ensure it contains xanthan gum for best results. The texture will remain wonderfully tender.
* Dairy-Free Options: Swap whole milk for your favorite plant-based milk, like almond, soy, or oat milk. Use a high-quality dairy-free butter alternative in both the cake and the frosting. These changes still yield truly beautiful cakes.
* Flavor Twists: Infuse your *Prettiest Cakes Ever* with different essences.
* Lemon Zest: Add 2 tablespoons of lemon zest to the batter for a bright, citrusy flavor. You can also add a tablespoon of lemon juice to the frosting.
* Almond Extract: Replace half of the vanilla extract with almond extract for a rich, nutty profile.
* Chocolate: Whisk in ¼ cup of unsweetened cocoa powder with the dry ingredients for a subtle chocolate cake. Or, melt ½ cup of chocolate chips and fold them into the batter for a marbled effect.
* Frosting Creativity:
* Cream Cheese Frosting: Reduce the powdered sugar by ½ cup and add 8 ounces of softened cream cheese to the butter before beating. This creates a tangy, delightful frosting.
* Whipped Cream Frosting: For a lighter option, use stabilized whipped cream instead of buttercream.
You can sweeten it lightly and pipe it onto the cooled cake. This is perfect for those who prefer less sweetness on their stunning cakes.
* Ganache: Drizzle a simple chocolate ganache over the top for an elegant finish.
This always makes for visually appealing desserts.
* Added Textures: Fold in ½ cup of chocolate chips, sprinkles, or finely chopped nuts into the batter for an extra surprise in every bite.
No matter how you adapt it, this recipe promises to deliver the *Prettiest Cakes Ever*.
Adapting your cake recipes opens up a world of creative possibilities, letting you match any theme or preference. If you’re looking for an equally stunning and customizable design, consider our delightful Mermaid Ocean Cake.
Step-by-Step Instructions
Note: This video is for demonstration purposes and may use a slightly different method.
Creating these *Prettiest Cakes Ever* is a straightforward process. Follow these simple steps for a perfect, beautiful result every time. Precision helps, but do not stress; baking should be enjoyable!
- Prepare Your Pans: Preheat your oven to 350°F (175°C). Grease and flour two 8-inch round cake pans or line with parchment paper circles. This prevents sticking and ensures your beautiful cakes release easily.
- Combine Dry Ingredients: In a large bowl, whisk together the all-purpose flour, granulated sugar, baking powder, and salt. Make sure these ingredients are well combined. This distributes leavening agents evenly.
- Cream Butter and Eggs: In a separate, medium bowl, cream the softened unsalted butter with an electric mixer until light and fluffy. This usually takes about 2-3 minutes. Gradually beat in the large eggs, one at a time, mixing well after each addition. Scrape down the sides of the bowl as needed.
- Alternate Dry and Wet: Gradually add the dry ingredient mixture to the wet mixture, alternating with the whole milk. Begin and end with the dry ingredients. Mix on low speed until just combined. Be careful not to overmix the batter. Overmixing develops too much gluten, which can lead to a tough cake.
- Add Flavor: Stir in the vanilla extract until just incorporated. This imparts that classic, comforting aroma and taste to your *Prettiest Cakes Ever*.
- Divide and Bake: Divide the batter evenly between the two prepared cake pans. Smooth the tops with a spatula. Bake for 28-32 minutes, or until a wooden skewer inserted into the center comes out clean. The cakes will be lightly golden.
- Cool Completely: Remove the cakes from the oven. Let them cool in the pans on a wire rack for 10-15 minutes. Then, invert them onto the wire rack to cool completely. This is a crucial step for beautiful frosting.
- Prepare Frosting: While the cakes cool, prepare the buttercream frosting. In a large bowl, beat the softened butter until creamy. Gradually add the powdered sugar, one cup at a time, beating until smooth. Add the milk or cream, 1 tablespoon at a time, until you reach your desired consistency. Stir in the vanilla extract.
- Assemble and Decorate: Once the cakes are completely cool, level the tops with a serrated knife if needed. Place one cake layer on your serving plate or cake stand. Spread a generous layer of frosting over the top. Carefully place the second cake layer on top. Frost the entire cake with the remaining buttercream, creating smooth sides and a beautiful top.
- Garnish (Optional): This is where your *Prettiest Cakes Ever* truly shine. Adorn with fresh berries, delicate edible flowers, or a scattering of colorful sprinkles. Simple decorations often make the biggest impact.
Pro Tips for Success

Achieving the *Prettiest Cakes Ever* is simpler than you think. These expert tips will elevate your baking and decorating game. Remember, practice makes perfect, but these pointers give you a head start.
- Room Temperature Ingredients: Always ensure your butter, eggs, and milk are at room temperature. This allows them to emulsify properly, creating a smooth, cohesive batter. It results in a lighter, more evenly baked cake.
- Measure Accurately: Baking is a science. Use a kitchen scale for flour if possible for the most accurate measurement. Otherwise, spoon flour into your measuring cup and level it off; do not pack it.
- Do Not Overmix: Mix the batter only until the ingredients are just combined. Overmixing develops gluten, making your cake tough and dense. A light hand creates a tender crumb.
- Cool Completely: This tip is non-negotiable for the *Prettiest Cakes Ever*. Frosting a warm cake will cause the buttercream to melt and slide off. Patience here ensures a beautiful, stable finish.
- Level Your Cakes: For a professional look, use a serrated knife to gently level the tops of your cooled cake layers. This creates flat surfaces for stacking and frosting, making your visual delights appear flawless.
- Crumb Coat: For a smooth, crumb-free final frosting layer, apply a thin “crumb coat” of frosting first. Chill the cake in the refrigerator for 15-20 minutes until the crumb coat sets. Then, apply your final, thicker layer of frosting. This technique guarantees truly stunning cakes.
- Simple Decorations are Best: You do not need intricate piping skills to make these the *Prettiest Cakes Ever*. Fresh berries (strawberries, raspberries, blueberries), a few sprigs of mint, or edible flowers create an elegant, natural look. A simple scattering of quality sprinkles also adds a festive touch.
- Invest in a Good Spatula: An offset spatula makes frosting cakes incredibly easy, giving you smooth, even layers.
Mastering a few key techniques can transform your home baking into a professional art form, making every dessert a masterpiece. For more advanced yet achievable designs that impress, explore our guide to Elegant Ocean Inspired Cakes.
Storage & Reheating Tips
Proper storage ensures your *Prettiest Cakes Ever* remain fresh and delicious for as long as possible. Cakes generally do not require reheating, as their charm lies in their tender, moist texture at room temperature or chilled.
* Countertop Storage: If your cake is covered in buttercream and will be eaten within 2-3 days, you can store it at room temperature in an airtight cake dome or container. Keep it away from direct sunlight or heat sources. This maintains its delightful texture.
* Refrigerator Storage: For longer storage, or if your frosting contains perishable ingredients like cream cheese, refrigerate the cake. Place the frosted cake in an airtight container. It will keep well for up to 5 days.
Before serving, allow the cake to come to room temperature for about 30-60 minutes. This restores its tender crumb and optimal flavor.
* Freezing Whole Cake: You can freeze an unfrosted cake.
Wrap each cooled cake layer tightly in plastic wrap, then in aluminum foil. Freeze for up to 2-3 months. Thaw wrapped layers in the refrigerator overnight, then unwrap and bring to room temperature before frosting.
* Freezing Frosted Slices: To enjoy the *Prettiest Cakes Ever* later, slice the cake and wrap individual slices tightly in plastic wrap, then place them in an airtight container or freezer bag. Freeze for up to 1 month. Thaw at room temperature for an hour or so before enjoying. This is perfect for meal prepping a little joy!
What to Serve With This Recipe

The *Prettiest Cakes Ever* are undoubtedly the star of any gathering. However, pairing them with the right accompaniments can enhance the experience even further. Think simple, elegant pairings that complement without overpowering.
- Coffee or Tea: A freshly brewed cup of coffee, a robust espresso, or your favorite herbal tea provides a wonderful counterpoint to the cake’s sweetness. It is a classic combination.
- A Glass of Cold Milk: For the kids (and many adults!), a tall, cold glass of milk is the perfect companion. It is simple, nourishing, and nostalgic.
- Fresh Berries: A small side of mixed fresh berries (strawberries, blueberries, raspberries) adds a burst of tartness and freshness. Their vibrant colors also beautifully complement these gorgeous cakes.
- Light Whipped Cream: A dollop of unsweetened or lightly sweetened whipped cream offers a cloud-like texture and balances the richness of the buttercream.
- Simple Fruit Compote: A homemade fruit compote made with seasonal fruits provides another layer of flavor and moisture.
- Sparkling Water with Lemon: For a refreshing, non-sweet drink, sparkling water with a slice of lemon or lime cleanses the palate beautifully.
Remember, these *Prettiest Cakes Ever* are a celebration in themselves. Keep the accompaniments light and simple to let their beauty and flavor truly shine.
While a beautiful cake is often the centerpiece, selecting complementary pairings can elevate the entire dessert experience for your guests. If you’re planning a themed celebration, you might also be inspired by our fun and festive Beach Themed Birthday Cake.
FAQs
Can I make these Prettiest Cakes Ever ahead of time?
Absolutely! You can bake the cake layers up to 2 days in advance. Once completely cooled, wrap them tightly in plastic wrap and store them at room temperature.
You can also freeze unfrosted layers for up to 2 months. Prepare the frosting a day ahead and store it in the refrigerator; bring it to room temperature and re-whip before frosting. Assembling the day of serving ensures the freshest-looking and tasting *Prettiest Cakes Ever*.
What makes these cakes the Prettiest Cakes Ever?
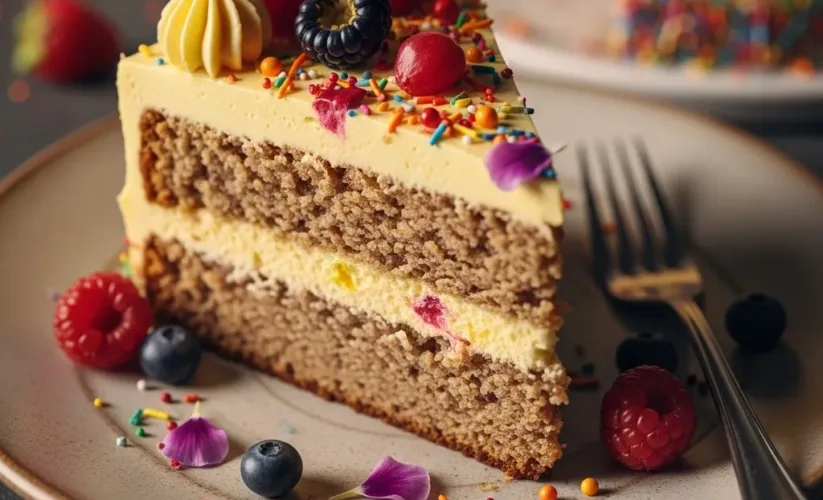
The beauty of these *Prettiest Cakes Ever* lies in their simplicity and elegance. We achieve a moist, tender crumb with a smooth buttercream, creating a perfect canvas. Then, we use natural, simple decorations like fresh berries, edible flowers, or minimalist sprinkles.
These elements combine to create a visually stunning cake without requiring complex decorating skills. It’s about showcasing natural beauty.
Can I bake this recipe in different pan sizes?
Yes, you can! This recipe is designed for two 8-inch round pans. If using two 9-inch round pans, the baking time will be slightly shorter (around 25-28 minutes), and the cakes will be a bit thinner.
For a single 9×13-inch sheet cake, increase baking time to approximately 35-40 minutes. Always use the skewer test for doneness. Adjusting pan sizes can still result in truly beautiful cakes.
How do I prevent the cake from sticking to the pan?
Thoroughly grease and flour your cake pans. You can also line the bottoms with parchment paper circles for extra assurance. After greasing, dust with flour, tapping out any excess.
This creates a non-stick barrier. Allowing the cakes to cool in the pans for 10-15 minutes before inverting also helps them release cleanly, ensuring your *Prettiest Cakes Ever* stay intact.
The artistry of cake decoration extends beyond mere taste, transforming desserts into visual spectacles that enhance celebratory occasions. Historically, elaborate confectionery designs have been symbols of status and festivity across various cultures worldwide, demonstrating how presentation can be as vital as flavor.
Nutrition Information (per serving)
Please note that this nutrition information is an estimate based on standard ingredients and a typical serving size. Actual values may vary depending on specific brands and portion sizes. This estimate is for one slice of these *Prettiest Cakes Ever*.
| Nutrient | Amount |
|---|---|
| Calories | 450 kcal |
| Total Fat | 22g |
| Saturated Fat | 13g |
| Cholesterol | 90mg |
| Sodium | 250mg |
| Total Carbohydrates | 60g |
| Dietary Fiber | 1g |
| Total Sugars | 40g |
| Protein | 5g |
Prettiest Cakes Ever

The Prettiest Cakes Ever recipe creates stunning, easy-to-make cakes that look professional but require minimal skill. It features a moist, tender crumb, balanced sweetness, and allows for creative, simple decorations, making it a staple for transforming ordinary days into celebrations. This recipe is designed to bring joy and beauty to your table with minimal stress, proving that wholesome, simple ingredients can produce truly gorgeous cakes.
- Prep Time: 30 mins
- Cook Time: 30 mins
- Total Time: 60 mins
- Yield: 12 servings 1x
- Category: Dessert
- Method: Baking
- Cuisine: American
Ingredients
2 ½ cups All-purpose flour
1 ¾ cups Granulated sugar
1 tablespoon Baking powder
½ teaspoon Salt
¾ cup Unsalted butter, softened
3 Large eggs, room temperature
1 cup Whole milk, room temperature
2 teaspoons Vanilla extract
1 cup Unsalted butter, softened
4 cups Powdered sugar
2–3 tablespoons Whole milk or cream
1 teaspoon Vanilla extract
As desired Fresh berries
As desired Edible flowers
As desired Sprinkles
Instructions
- Prepare Your Pans: Preheat your oven to 350°F (175°C). Grease and flour two 8-inch round cake pans or line with parchment paper circles. This prevents sticking and ensures your beautiful cakes release easily
- Combine Dry Ingredients: In a large bowl, whisk together the all-purpose flour, granulated sugar, baking powder, and salt. Make sure these ingredients are well combined. This distributes leavening agents evenly
- Cream Butter and Eggs: In a separate, medium bowl, cream the softened unsalted butter with an electric mixer until light and fluffy. This usually takes about 2-3 minutes. Gradually beat in the large eggs, one at a time, mixing well after each addition. Scrape down the sides of the bowl as needed
- Alternate Dry and Wet: Gradually add the dry ingredient mixture to the wet mixture, alternating with the whole milk. Begin and end with the dry ingredients. Mix on low speed until just combined. Be careful not to overmix the batter. Overmixing develops too much gluten, which can lead to a tough cake
- Add Flavor: Stir in the vanilla extract until just incorporated. This imparts that classic, comforting aroma and taste to your Prettiest Cakes Ever
- Divide and Bake: Divide the batter evenly between the two prepared cake pans. Smooth the tops with a spatula. Bake for 28-32 minutes, or until a wooden skewer inserted into the center comes out clean. The cakes will be lightly golde
- Cool Completely: Remove the cakes from the oven. Let them cool in the pans on a wire rack for 10-15 minutes. Then, invert them onto the wire rack to cool completely. This is a crucial step for beautiful frosting
- Prepare Frosting: While the cakes cool, prepare the buttercream frosting. In a large bowl, beat the softened butter until creamy. Gradually add the powdered sugar, one cup at a time, beating until smooth. Add the milk or cream, 1 tablespoon at a time, until you reach your desired consistency. Stir in the vanilla extract
- Assemble and Decorate: Once the cakes are completely cool, level the tops with a serrated knife if needed. Place one cake layer on your serving plate or cake stand. Spread a generous layer of frosting over the top. Carefully place the second cake layer on top. Frost the entire cake with the remaining buttercream, creating smooth sides and a beautiful top
- Garnish (Optional): This is where your Prettiest Cakes Ever truly shine. Adorn with fresh berries, delicate edible flowers, or a scattering of colorful sprinkles. Simple decorations often make the biggest impact
Notes
Always ensure your butter, eggs, and milk are at room temperature for proper emulsification and an evenly baked cake.
Do not overmix the batter; mix only until the ingredients are just combined to prevent a tough cake.
Cool cakes completely on a wire rack before frosting. Frosting a warm cake will cause the buttercream to melt and slide off.
For a professional look, use a serrated knife to gently level the tops of your cooled cake layers before stacking.
Apply a thin 'crumb coat' of frosting first, chill the cake for 15-20 minutes, then apply the final, thicker layer for a smooth, crumb-free finish.
Simple decorations like fresh berries, edible flowers, or quality sprinkles often make the biggest visual impact.
Store buttercream-frosted cake in an airtight container at room temperature for 2-3 days, or refrigerate for up to 5 days (bring to room temperature before serving). Unfrosted layers can be frozen for 2-3 months when wrapped tightly.
Nutrition
- Serving Size: 1 slice
- Calories: 450 kcal
- Sugar: 40g
- Sodium: 250mg
- Fat: 22g
- Saturated Fat: 13g
- Carbohydrates: 60g
- Fiber: 1g
- Protein: 5g
- Cholesterol: 90mg