Aesthetic Cake Designs Collection
I remember my daughter Lily’s fifth birthday like it was yesterday. We had planned a simple backyard party, but she had one request: a ‘princess cake that looks like a dream.’ As a mom of three, I usually lean towards wholesome, fuss-free recipes. However, seeing her eyes sparkle with that specific vision, I knew I had to try.
That day, amidst sprinkles and frosting, I discovered the sheer joy of creating something truly beautiful. It wasn’t just about the taste; it was about the art, the delight, the memory. This experience ignited my passion for exploring the world of stunning dessert presentations, leading me to curate what I lovingly call my Aesthetic Cake Designs Collection.
This isn’t about being a professional baker; it’s about finding simple, achievable ways to make cakes look absolutely breathtaking, turning any occasion into a celebration. Every time I pull out my favorite tools and ingredients, I feel that same creative spark.
Whether you’re a seasoned baker or just starting, preparing beautiful cakes can be surprisingly simple and incredibly rewarding. Join me as we dive into this delightful journey, making everyday moments feel a little more special with our very own Aesthetic Cake Designs Collection.
Why You’ll Love This Aesthetic Cake Designs Collection
You will absolutely adore bringing these beautiful cake designs to life. First, these recipes empower you to create truly show-stopping desserts right in your own kitchen. You do not need professional training.
Instead, you unlock your inner artist, crafting cakes that impress everyone. Furthermore, the satisfaction of presenting a cake from this Aesthetic Cake Designs Collection is unmatched. Your guests will gasp in delight, and your family will cherish the effort.
I find immense joy in personalizing each cake, making it truly unique. This collection focuses on simple techniques with maximum impact, ensuring your success. You will discover that making a visually stunning cake does not require hours of complex work.
Rather, it means thoughtful application of basic skills. This Aesthetic Cake Designs Collection celebrates creativity, bringing beauty and love to your table.
Ingredients You’ll Need
Creating a beautiful cake starts with quality ingredients. For our foundational aesthetic cake designs, you need a reliable cake recipe. This usually means pantry staples.
You also need a stable, delicious frosting. Let’s gather everything before we begin.

| Component | Ingredient | Quantity |
|---|---|---|
| For the Cake Layers: | All-purpose flour | 2 ½ cups |
| Granulated sugar | 1 ¾ cups | |
| Baking powder | 1 tablespoon | |
| Salt | ½ teaspoon | |
| Unsalted butter (softened) | ¾ cup | |
| Large eggs | 4 | |
| Whole milk | 1 cup | |
| Vanilla extract | 2 teaspoons | |
| For the Buttercream Frosting: | Unsalted butter (softened) | 1 ½ cups |
| Powdered sugar (sifted) | 5-6 cups | |
| Heavy cream or milk | 3-4 tablespoons | |
| Vanilla extract | 1 teaspoon | |
| Pinch of salt | ||
| For Aesthetic Decoration: | Food coloring (gel preferred) | As needed |
| Edible flowers (organic, pesticide-free) | Small bunch | |
| Fresh berries or fruit slices | ½ cup | |
| Sprinkles (various shapes/colors) | 2 tablespoons | |
| Chocolate ganache or melted chocolate | ¼ cup |
Substitutions & Variations
Making these aesthetic cake designs your own is part of the fun! This collection invites creativity and flexibility. Do not hesitate to customize flavors and designs.
* Flour Alternatives: For a gluten-free option, substitute a 1:1 gluten-free baking flour blend for the all-purpose flour. This works beautifully for our Aesthetic Cake Designs Collection.
* Dairy-Free: Replace butter with a plant-based butter substitute.
Use a non-dairy milk (almond, oat, soy) in both the cake and frosting. Ensure your frosting has a good consistency.
* Flavor Twists: Infuse your cake layers with citrus zest, almond extract, or a touch of coffee powder.
Experiment with different extracts in the buttercream like lemon, orange, or even a hint of mint. A chocolate cake base works wonderfully for many aesthetic styles.
* Buttercream Variations: Beyond classic vanilla, try cream cheese frosting for a tangy touch.
You can also make a fruit-flavored buttercream by folding in fruit purees (like raspberry or strawberry) into your frosting. Just make sure the puree is thick and cooled.
* Design Styles: Our Aesthetic Cake Designs Collection embraces many looks.
* Minimalist Chic: Use plain white or pastel frosting. Add a few carefully placed edible flowers or a simple drizzle.
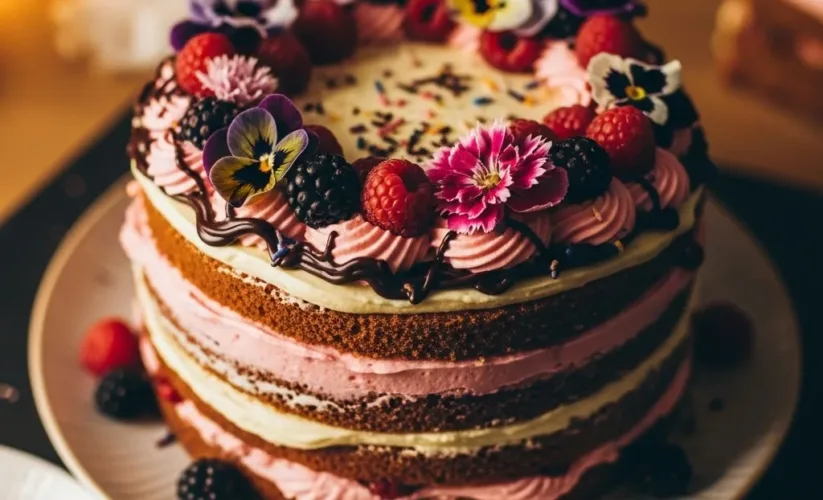
* Rustic Elegance: Apply frosting in a “naked cake” style, showing the layers.
Decorate with fresh herbs (rosemary, mint) and berries.
* Geometric Modern: Use stencils or masking tape to create sharp lines and shapes with different colored frosting or edible paint.
* Textural Delight: Use various piping tips to create different textures on your cake, like ruffles or rosettes.
These visually stunning cakes truly pop.
* Nature Inspired: Incorporate real flowers, leaves, or even small branches (ensure they are food-safe). This creates a very organic feel for your beautiful cake designs.
* Color Palette: Experiment with natural food colorings from beet powder or spirulina for soft hues. Or go bold with vibrant gel colors. This greatly influences the overall aesthetic cake design.
Beyond these helpful adaptations, don’t shy away from infusing your own personality into each bake. If you’re looking for inspiration on how to adapt designs with a unique twist, explore the vibrant hues and imaginative elements of a Mermaid Ocean Cake.
Step-by-Step Instructions
Creating an aesthetic cake involves two main stages: baking perfect cake layers and then decorating them with artistic flair. Follow these steps for beautiful, impressive results.
Part 1: Baking the Cake Layers
1. Preheat & Prep: Preheat your oven to 350°F (175°C). Grease and flour three 8-inch round cake pans.
Line the bottoms with parchment paper. This prevents sticking.
2.
Combine Dry Ingredients: In a large bowl, whisk together the flour, sugar, baking powder, and salt. Make sure they are well combined.
3.
Cream Butter & Eggs: In a separate large bowl, beat the softened butter with an electric mixer until light and fluffy. Gradually add the eggs one at a time, beating well after each addition. Scrape down the sides of the bowl as needed.
4. Alternate Wet & Dry: With the mixer on low speed, add about a third of the dry ingredients to the butter mixture, mixing until just combined. Next, pour in half of the milk and vanilla extract, mixing gently.
Repeat this process, ending with the dry ingredients. Do not overmix; overmixing develops gluten and makes the cake tough.
5.
Bake: Divide the batter evenly among the prepared cake pans. Bake for 25-30 minutes, or until a wooden skewer inserted into the center comes out clean.
6.
Cool: Let the cakes cool in the pans for 10 minutes. Then, invert them onto a wire rack to cool completely. Completely cooled cakes are essential before frosting.
Note: This video is for demonstration purposes and may use a slightly different method.
Part 2: Assembling and Decorating Your Aesthetic Cake
1. Make the Buttercream: While the cakes cool, prepare your frosting. Beat the softened butter in a large bowl until creamy.
Gradually add the sifted powdered sugar, alternating with splashes of heavy cream or milk and vanilla extract. Beat until light, fluffy, and smooth. Add a pinch of salt.
Adjust consistency with more powdered sugar (for thicker) or cream (for thinner).
2. Level the Cakes: Once cooled, use a serrated knife to level the tops of your cake layers, creating flat surfaces.
This ensures a stable, even cake.
3. Crumb Coat: Place one cake layer on your serving plate or cake stand.
Spread a thin layer of buttercream over the top. Add the second layer, more buttercream, and then the third layer. Apply a very thin layer of frosting all over the entire cake.
This “crumb coat” traps any loose crumbs. Chill the cake in the refrigerator for 20-30 minutes. This step is crucial for achieving a smooth finish for your Aesthetic Cake Designs Collection.
4. Final Frosting: Once the crumb coat is firm, apply a thicker, even layer of frosting to the top and sides of the cake. Use an offset spatula or bench scraper to smooth the frosting.
Strive for neat edges and a clean finish. This becomes your canvas for aesthetic cake designs.
5.
Decorate: Now for the fun part! This is where your Aesthetic Cake Designs Collection comes to life.
* Simple Elegance: Arrange fresh edible flowers strategically on top or cascading down the side.
A sprinkle of edible gold dust adds shimmer.
* Berry Burst: Place fresh berries (strawberries, raspberries, blueberries) in a neat pattern or scattered artistically.
* Drips & Drizzles: Gently spoon or pipe a chocolate ganache or melted white chocolate around the top edge, allowing it to drip down the sides.
* Minimalist Strokes: Use an offset spatula to create textured swirls or lines in the frosting for a modern look.
* Sprinkle Magic: Apply sprinkles around the base or artfully on the top.
* Piped Details: Use a basic round or star tip to pipe simple borders, dots, or small rosettes.
Even simple piped elements contribute to beautiful cake designs.
6. Chill Again: For best results, chill the decorated cake for at least 30 minutes before serving. This sets the frosting and ensures your aesthetic cake design holds beautifully.
Pro Tips for Success
Achieving those Instagram-worthy aesthetic cake designs is simpler than you think with a few smart tricks.
* Room Temperature Ingredients: Always use room temperature butter and eggs for your cake batter and frosting. This ensures a smooth, emulsified batter and fluffy, consistent buttercream. Cold ingredients separate and clump.
* Sift Your Dry Ingredients: Sifting flour and powdered sugar removes lumps and aerates them. This results in a lighter cake and smoother frosting, essential for clean aesthetic cake designs.
* Do Not Overmix: Overmixing cake batter develops gluten, leading to a tough, dense cake.
Mix only until ingredients are just combined. This creates a tender crumb.
* Crumb Coat is Your Best Friend: Never skip the crumb coat.
This thin layer of frosting traps crumbs and provides a stable, smooth base for your final frosting layer. It’s the secret to professional-looking smooth finishes on your beautiful cake designs.
* Achieve Smooth Frosting: After applying your final frosting, use a bench scraper or a long offset spatula held at a 45-degree angle to smooth the sides.
Heat your scraper briefly under hot water and wipe it dry for an even smoother finish. Chill the cake briefly between smoothing passes for best results.
* Gel Food Coloring: Opt for gel food coloring over liquid.
Gels provide vibrant colors without adding too much moisture to your frosting, maintaining its perfect consistency for these aesthetic cake designs.
* Patience with Decorating: Take your time with the aesthetic cake design elements. Step back and assess your work.
A steady hand and careful placement make all the difference, especially when using edible flowers or intricate piping.
* Less is More for Elegance: For truly aesthetic cake designs, sometimes simplicity shines brightest. Do not overcrowd your cake with too many elements.
A few perfectly placed flowers, berries, or a simple textured swipe often create the most elegant and visually stunning cakes.
* Clean Edges: Use parchment paper strips tucked under the cake before frosting. These catch drips and smears.
Pull them away gently before serving for a perfectly clean cake board.

Mastering foundational baking techniques, like ensuring room temperature ingredients and sifting dry goods, is key to stunning results. These precision tips are especially useful when crafting delicate details, as seen in our guide to Elegant Ocean Inspired Cakes.
Storage & Reheating Tips
Proper storage ensures your beautiful cake designs remain fresh and delicious. These aesthetic cakes deserve careful handling to preserve their beauty.
* Room Temperature (Short-Term): If your cake is plain or minimally decorated and will be eaten within 24 hours, you can store it at cool room temperature (below 70°F/21°C) under a cake dome. This keeps the frosting soft.
* Refrigeration (Long-Term): For longer storage or cakes with perishable fillings/decorations (like fresh fruit or dairy-based fillings), refrigerate them.
Place the cake in an airtight cake carrier or cover it loosely with plastic wrap. This prevents it from drying out or absorbing refrigerator odors. Aesthetic cake designs with intricate elements benefit from chilling.
* Bringing to Room Temperature: For the best flavor and texture, always bring refrigerated cake to room temperature before serving. Remove it from the fridge 1-2 hours before you plan to serve. This allows the frosting to soften and the cake layers to become moist again.
* Freezing Cake Layers (Unfrosted): You can freeze unfrosted cake layers for up to 2-3 months. Wrap each cooled layer tightly in plastic wrap, then in aluminum foil. Thaw them in the refrigerator overnight before frosting.
This is a great way to prep for future aesthetic cake designs.
* Freezing Frosted Cake: For a fully frosted cake, chill it until the frosting is firm. Then, wrap it tightly in plastic wrap and then foil.
Place it in an airtight container if possible. Thaw overnight in the refrigerator. This method works well for preserving your beautiful cake designs for special occasions.
What to Serve With This Recipe
An exquisite cake from your Aesthetic Cake Designs Collection often becomes the centerpiece of any gathering. Consider what complements its beauty and flavor profile without overpowering it.
* Coffee & Tea: A freshly brewed pot of coffee or a selection of fine teas (black, herbal, green) always pairs wonderfully with cake. The bitterness of coffee or the subtle notes of tea cut through the cake’s sweetness.
* Sparkling Wine or Champagne: For truly celebratory aesthetic cake designs, a glass of sparkling wine or champagne adds an elegant touch.
The effervescence and crispness are a lovely contrast.
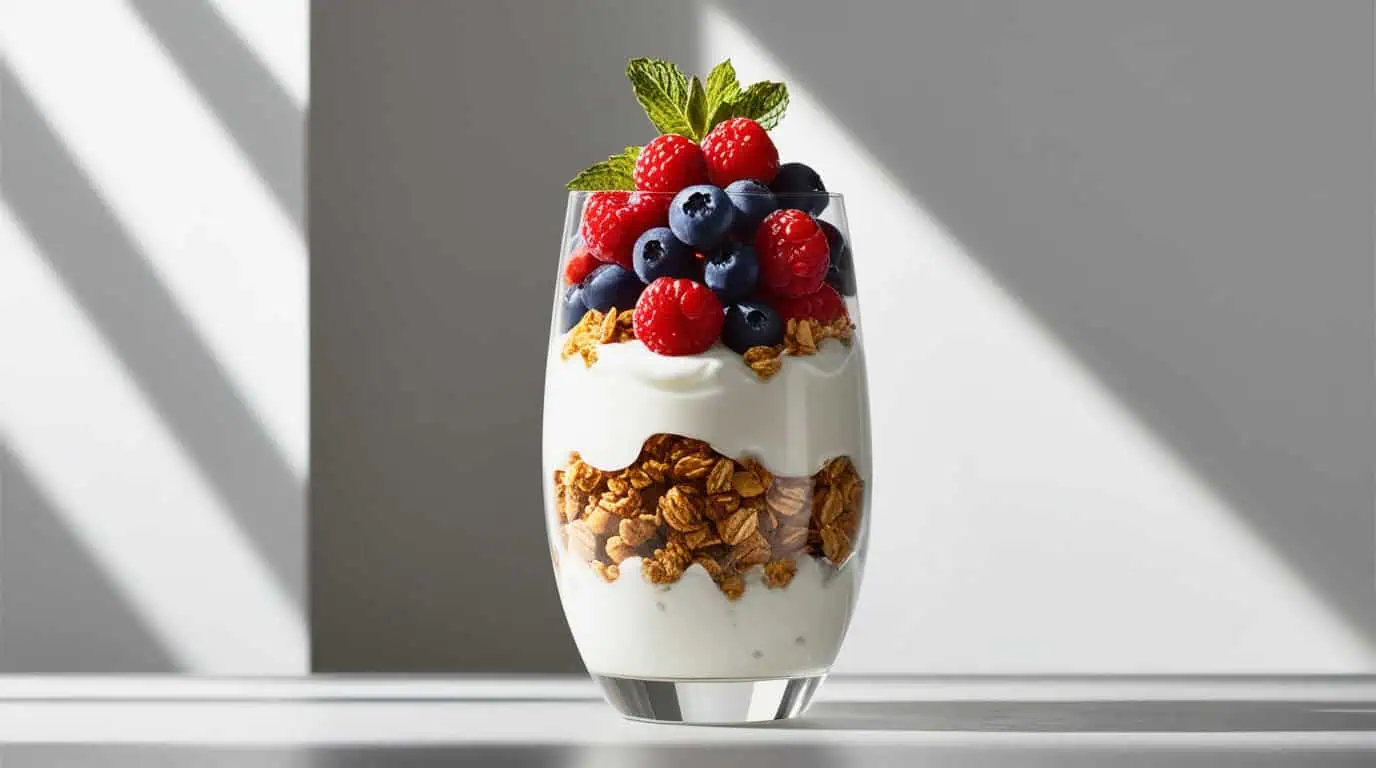
* Fresh Fruit Salad: A light, refreshing fruit salad provides a vibrant counterpoint to the richness of the cake. Think seasonal berries, melon, or citrus segments.
This keeps the spread balanced.
* Sorbet or Gelato: A small scoop of fruit sorbet or a delicate gelato can accompany the cake beautifully. Choose a flavor that harmonizes with your cake’s profile, perhaps lemon or raspberry with a vanilla cake.
* Simple Cookies or Macarons: If you’re hosting a dessert bar, offer a few other small, elegant treats. French macarons, small shortbread cookies, or delicate madeleines enhance the aesthetic without competing with the main event.
* Milk: For kids and the young at heart, a cold glass of milk remains a classic and comforting pairing for any cake, especially one from an Aesthetic Cake Designs Collection.
* Homemade Lemonade or Iced Tea: In warmer months, a refreshing glass of homemade lemonade or iced tea is a fantastic choice.

Choosing the perfect accompaniment for your magnificent cake can elevate the entire dessert experience, complementing its beauty and flavor profile. Imagine serving a light, refreshing beverage alongside a delightful Beach Themed Birthday Cake.
FAQs
What makes a cake “aesthetic”?
An aesthetic cake focuses on visual appeal, balance, and often a minimalist or natural elegance. It prioritizes clean lines, thoughtful color palettes, and artful decoration over excessive ornamentation. The overall look is pleasing to the eye and often evokes a sense of calm and sophistication. Many styles fall into the Aesthetic Cake Designs Collection, from rustic to modern.
Do I need special tools for these designs?
Not necessarily! While some tools like an offset spatula, bench scraper, and a few basic piping tips are helpful, you can achieve beautiful aesthetic cake designs with everyday kitchen items. A butter knife can spread frosting, a fork can create texture, and fresh flowers or fruit from your garden become your decor. Simplicity defines many beautiful cake designs.
How can I achieve smooth frosting?
The key to smooth frosting involves several steps: use room-temperature butter, sift your powdered sugar, ensure your buttercream has the right consistency (add more liquid for softer, more powdered sugar for firmer), and apply a crumb coat. After the crumb coat chills, use a bench scraper or offset spatula to smooth the final layer, heating the tool if needed for extra smoothness. This technique is vital for our Aesthetic Cake Designs Collection.
Can kids help with aesthetic cake decorating?
Absolutely! Involve your children in the process. They can help mix batter, level cakes (with supervision), and certainly assist with decorating.
Provide them with sprinkles, small berries, or simple piping bags with large tips. They will love adding their personal touch to these visually stunning cakes, fostering their creativity.
How far in advance can I decorate an aesthetic cake?
You can generally decorate most aesthetic cakes with buttercream frosting 1-2 days in advance. Store them in an airtight container in the refrigerator. If using fresh fruit or delicate edible flowers, add those elements closer to serving time (a few hours before) to ensure they look their best. This preserves the integrity of your beautiful cake designs.
The artistry of transforming simple ingredients into visually stunning desserts has a rich and ancient history, evolving over centuries into the intricate forms we see today. Modern cake decoration encompasses a wide range of techniques, from elaborate fondant sculptures to delicate buttercream piping, all designed to make celebratory cakes truly unforgettable.
Nutrition Information (per serving)
Please note this is an estimate for a typical slice of vanilla cake with buttercream frosting, based on 12 servings. Actual values will vary based on specific ingredients and serving size. This provides a general idea for your Aesthetic Cake Designs Collection treat.
| Nutrient | Amount |
|---|---|
| Calories | 450 kcal |
| Total Fat | 25 g |
| Saturated Fat | 15 g |
| Cholesterol | 100 mg |
| Sodium | 200 mg |
| Total Carbohydrates | 55 g |
| Dietary Fiber | 1 g |
| Total Sugars | 40 g |
| Protein | 5 g |
Aesthetic Cake Designs Collection

This collection empowers you to create show-stopping aesthetic cake designs in your own kitchen without professional training. It focuses on simple techniques with maximum impact, ensuring success and bringing beauty and love to your table, turning any occasion into a celebration. Discover the joy of crafting visually stunning cakes that impress everyone.
- Prep Time: 1 hour 30 mins
- Cook Time: 30 mins
- Total Time: 4 hours 30 mins
- Yield: 12 servings 1x
- Category: Dessert
- Method: Baking
- Cuisine: American
- Diet: Vegetarian
Ingredients
2.5 cups All-purpose flour
1.75 cups Granulated sugar
1 tablespoon Baking powder
0.5 teaspoon Salt
0.75 cup Unsalted butter (softened)
4 Large eggs
1 cup Whole milk
2 teaspoons Vanilla extract
1.5 cups Unsalted butter (softened)
5.5 cups Powdered sugar (sifted)
3.5 tablespoons Heavy cream or milk
1 teaspoon Vanilla extract
Pinch salt
As needed Food coloring (gel preferred)
Small bunch Edible flowers (organic, pesticide-free)
0.5 cup Fresh berries or fruit slices
2 tablespoons Sprinkles (various shapes/colors)
0.25 cup Chocolate ganache or melted chocolate
Instructions
- Preheat your oven to 350°F (175°C). Grease and flour three 8-inch round cake pans. Line the bottoms with parchment paper
- In a large bowl, whisk together the flour, sugar, baking powder, and salt. Make sure they are well combined
- In a separate large bowl, beat the softened butter with an electric mixer until light and fluffy. Gradually add the eggs one at a time, beating well after each addition. Scrape down the sides of the bowl as needed
- With the mixer on low speed, add about a third of the dry ingredients to the butter mixture, mixing until just combined. Next, pour in half of the milk and vanilla extract, mixing gently. Repeat this process, ending with the dry ingredients. Do not overmix
- Divide the batter evenly among the prepared cake pans. Bake for 25-30 minutes, or until a wooden skewer inserted into the center comes out clea
- Let the cakes cool in the pans for 10 minutes. Then, invert them onto a wire rack to cool completely
- While the cakes cool, prepare your frosting. Beat the softened butter in a large bowl until creamy. Gradually add the sifted powdered sugar, alternating with splashes of heavy cream or milk and vanilla extract. Beat until light, fluffy, and smooth. Add a pinch of salt. Adjust consistency with more powdered sugar (for thicker) or cream (for thinner)
- Once cooled, use a serrated knife to level the tops of your cake layers, creating flat surfaces
- Place one cake layer on your serving plate or cake stand. Spread a thin layer of buttercream over the top. Add the second layer, more buttercream, and then the third layer. Apply a very thin layer of frosting all over the entire cake for a "crumb coat". Chill the cake in the refrigerator for 20-30 minutes
- Once the crumb coat is firm, apply a thicker, even layer of frosting to the top and sides of the cake. Use an offset spatula or bench scraper to smooth the frosting
- Decorate the cake using your desired elements: arrange fresh edible flowers, place fresh berries in a pattern, spoon or pipe chocolate ganache for drips, create textured swirls with an offset spatula, apply sprinkles, or pipe simple borders, dots, or rosettes
- Chill the decorated cake for at least 30 minutes before serving
Notes
Always use room temperature butter and eggs for both cake batter and frosting to ensure smooth, emulsified results.
Sift flour and powdered sugar to remove lumps and achieve a lighter cake and smoother frosting.
Avoid overmixing cake batter to prevent gluten development, which can lead to a tough, dense cake.
A crumb coat is essential to trap loose crumbs and create a stable, smooth base for your final frosting layer.
For extra smooth frosting, use a bench scraper or offset spatula at a 45-degree angle, heating the tool briefly under hot water and wiping dry if needed.
Opt for gel food coloring for vibrant colors without altering frosting consistency.
Take your time with decorating; patience and careful placement make a significant difference in the final aesthetic.
For elegant designs, often less is more; do not overcrowd the cake with too many elements.
Use parchment paper strips tucked under the cake before frosting to catch drips and ensure clean edges on your cake board.
For short-term storage (under 24 hours), store the cake at cool room temperature (below 70°F/21°C) under a cake dome. For longer storage or cakes with perishable fillings/decorations, refrigerate in an airtight cake carrier or covered loosely with plastic wrap.
Always bring refrigerated cake to room temperature (1-2 hours) before serving for best flavor and texture.
Nutrition
- Serving Size: 1 slice
- Calories: 450 kcal
- Sugar: 40 g
- Sodium: 200 mg
- Fat: 25 g
- Saturated Fat: 15 g
- Unsaturated Fat: 9.5 g
- Trans Fat: 0.5 g
- Carbohydrates: 55 g
- Fiber: 1 g
- Protein: 5 g
- Cholesterol: 100 mg