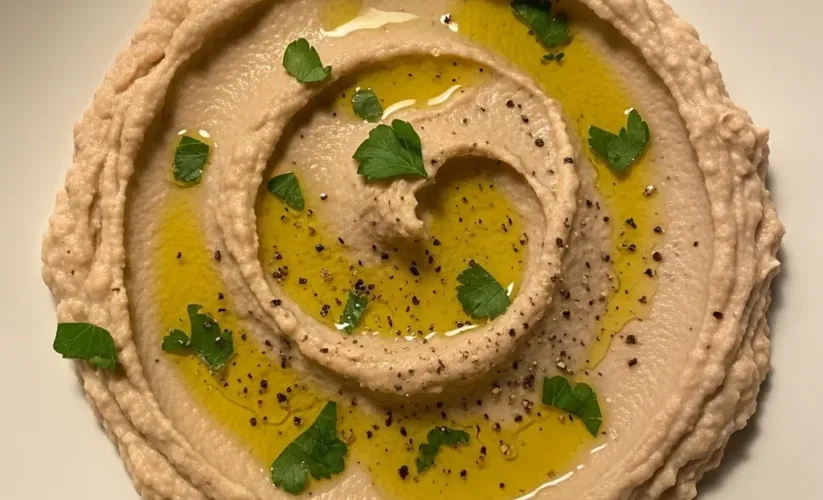
White bean dip recipe
The kitchen hums with the beautiful chaos of three little ones, often a symphony of giggles, questions, and the occasional clatter. In our home, food is more than just sustenance; it’s a language of love, a way to gather, and a simple joy. I remember one busy afternoon, the kids were starving, and I needed something quick, healthy, and genuinely delicious.
That’s when my trusty white bean dip recipe saved the day. I opened a can of cannellini beans, grabbed some garlic, and a squeeze of lemon, and in minutes, I had a creamy, dreamy dip that everyone devoured. It became a staple, a go-to for after-school snacks, quick lunches, and even impromptu playdates.
This homemade white bean dip is proof that nourishment doesn’t require hours in the kitchen, just a little love and a handful of wholesome ingredients. It brings smiles, fills bellies, and adds a touch of simple elegance to any spread. This particular white bean dip recipe has seen countless iterations, always adapted to what we have on hand, always a hit. It’s truly a testament to easy, nourishing food.
Why You’ll Love This Easy White Bean Dip Recipe
You will absolutely adore this white bean dip recipe for so many reasons! First, it is incredibly quick. We are talking about literally five minutes of prep time, making it perfect for those frantic weeknights or last-minute gatherings.
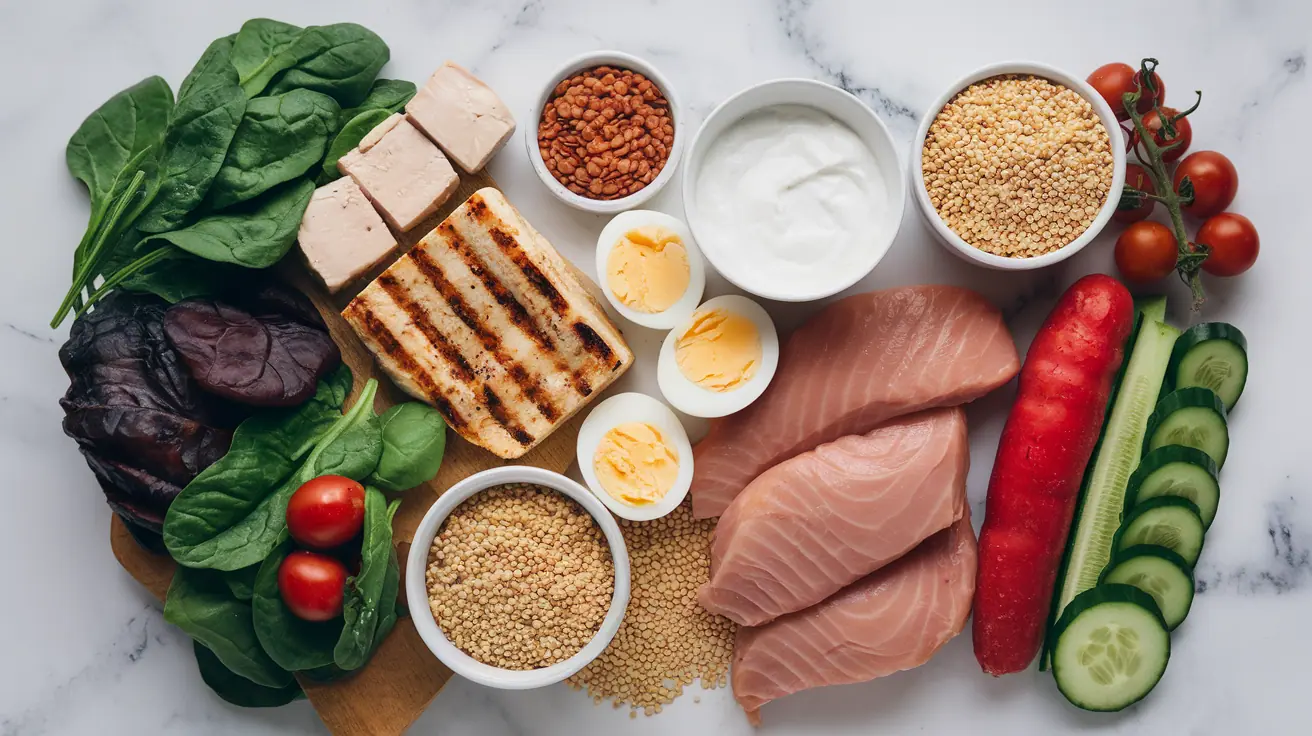
Second, it is undeniably healthy. Packed with plant-based protein and fiber from the humble cannellini bean, this creamy white bean dip offers a nutritious boost without any fuss. You get satisfying goodness in every spoonful.
Third, its versatility is unmatched. Serve it with fresh veggies, pita bread, crackers, or even spread it in a sandwich. The possibilities are endless!
Fourth, this simple white bean dip recipe appeals to almost everyone. Even picky eaters often fall for its mild, garlicky flavor and smooth texture. It’s a fantastic way to introduce wholesome ingredients to your family.
Finally, it uses minimal ingredients, most of which you probably already have in your pantry. This means less stress, fewer grocery runs, and more time enjoying delicious, nourishing food with your loved ones. Once you try this amazing white bean dip recipe, you will understand why it is a consistent favorite in our home.
Ingredients You’ll Need
Making this incredible white bean dip recipe requires just a few pantry staples. I always recommend using good quality ingredients; it truly elevates the flavor of this simple dish. You are just minutes away from enjoying this delightful dip.

| Ingredient | Quantity | Notes |
|---|---|---|
| Cannellini Beans (canned) | 2 cans (15-ounce each) | Rinsed and drained thoroughly. These give the best creamy texture. |
| Extra Virgin Olive Oil | 1/4 cup + more for drizzling | Use a good quality oil for rich flavor. |
| Fresh Lemon Juice | 2 tablespoons | Brightens the dip; always use fresh. |
| Garlic Cloves | 2-3 cloves | Minced or roughly chopped; adjust to your taste. |
| Salt | 1/2 teaspoon | Or to taste; I prefer sea salt. |
| Black Pepper | 1/4 teaspoon | Freshly ground is best. |
| Water (or reserved bean liquid) | 2-4 tablespoons | For adjusting consistency. |
| Fresh Parsley or Chives (optional) | 1 tablespoon, chopped | For garnish, adds freshness. |
Substitutions & Variations
One of the beautiful aspects of this white bean dip recipe is its adaptability. You can easily tweak it based on what you have, or to suit different tastes. No cannellini beans?
No problem! You can successfully swap them out.
* Bean Alternatives: If you do not have cannellini beans, great northern beans or even chickpeas work wonderfully in this white bean dip recipe. Chickpeas will give it a slightly different, more hummus-like texture and flavor, which is also delicious.
* Herb Power: Fresh herbs truly elevate the flavor.
Stir in a tablespoon of fresh rosemary, thyme, or oregano along with the beans for an aromatic twist. A sprinkle of fresh basil makes this easy white bean dip sing.
* Spice It Up: For a bit of a kick, add a pinch of red pepper flakes or a dash of hot sauce to your homemade white bean dip.
A roasted jalapeño could also provide a wonderful smoky heat.
* Roasted Garlic: Instead of raw garlic, try roasted garlic for a milder, sweeter, and more complex flavor in your creamy white bean dip. Simply roast a head of garlic in the oven until soft, then squeeze out the cloves.
* Sun-Dried Tomato: For a Mediterranean flair, add 1/4 cup of oil-packed sun-dried tomatoes (drained) to the food processor with the beans. This makes a vibrant and flavorful white bean dip recipe.
* Roasted Red Pepper: Transform this into a roasted red pepper white bean dip.
Simply add half a roasted red pepper (from a jar, drained) to the mix. It adds a lovely sweetness and depth.
* Citrus Swap: While lemon juice is my favorite, a splash of lime juice can also work in a pinch, giving it a slightly different bright tang.
* Nutty Flavor: A teaspoon of tahini can add a wonderful nutty depth, making it even creamier, somewhat like a hummus. This variation of the white bean dip recipe is also very popular.
Since this dip is so adaptable with beans, you might find yourself exploring other bean-based dishes that offer similar comfort. For another hearty and creamy meal that uses white beans beautifully, try this Creamy White Chicken Chili with Sour Cream.
Step-by-Step Instructions
Preparing this white bean dip recipe is almost ridiculously simple. You will wonder why you have not been making it all along! This simple process ensures a perfect, creamy consistency every time.
1. Prepare the Beans: First, open your cans of cannellini beans. Drain them thoroughly in a colander.
Rinse them under cold running water for about 30 seconds to remove any excess starch and can liquid. This step is crucial for the best flavor and texture of your homemade white bean dip.
2.
Combine Ingredients: Transfer the rinsed and drained beans to the bowl of a food processor. Add the 1/4 cup of extra virgin olive oil, fresh lemon juice, garlic cloves, salt, and black pepper.
3.
Process to Smooth: Pulse the mixture a few times to start breaking down the beans. Then, process continuously until the mixture becomes smooth and creamy. Scrape down the sides of the bowl as needed to ensure everything gets incorporated.
4. Adjust Consistency: As it processes, if the dip appears too thick or chunky, add water (or reserved bean liquid) one tablespoon at a time through the feed tube until you reach your desired creamy consistency. You want it smooth but still thick enough to scoop.
This ensures you get the best creamy white bean dip.
5. Taste and Season: Stop the food processor, then taste the white bean dip recipe.
Adjust the seasoning as necessary. You might want more salt, a little more lemon juice for brightness, or even an extra garlic clove.
6.
Serve and Garnish: Transfer the finished dip to a serving bowl. Drizzle a little extra virgin olive oil over the top for a beautiful sheen and added flavor. Garnish with chopped fresh parsley or chives, if using. Serve immediately and enjoy your delicious white bean dip recipe!
Note: This video is for demonstration purposes and may use a slightly different method.
Pro Tips for Success
Making this white bean dip recipe is incredibly straightforward, but a few simple tricks can take it from good to absolutely phenomenal. These tips ensure you achieve the creamiest texture and the most vibrant flavor possible.
* Rinse Those Beans Well: Do not skip rinsing the canned beans! This removes excess sodium and the starchy liquid that can give the dip a slightly “canned” flavor. A good rinse ensures a fresh, clean taste for your creamy white bean dip.
* Fresh Lemon Juice is Key: Always use fresh lemon juice. Bottled lemon juice simply does not offer the same bright, zesty flavor that truly elevates this white bean dip recipe. It makes a huge difference in the overall taste profile.
* Taste as You Go: Seasoning is personal. Start with the recommended amounts of salt, pepper, and lemon juice, but then taste and adjust. You might prefer more garlic, a little extra tang from the lemon, or a pinch more salt to make all the flavors pop.
This step is crucial for your homemade white bean dip.
* Quality Olive Oil: Since olive oil is a prominent flavor, use the best extra virgin olive oil you can. A good quality oil adds a rich, fruity note that enhances the entire dip.
* Don’t Over-Process: While you want a smooth dip, avoid over-processing. Process just until creamy. Too much processing can sometimes make the dip gummy.
Add liquid slowly to achieve the perfect texture for this easy white bean dip recipe.
* Chill for Flavor Development: While you can serve this white bean dip recipe immediately, letting it chill in the refrigerator for at least 30 minutes (or even a few hours) allows the flavors to meld and deepen beautifully.
This simple step truly improves the taste.
* Garnish for Impact: A drizzle of good olive oil and a sprinkle of fresh herbs (parsley, chives, or even basil) not only makes your white bean dip visually appealing but also adds another layer of fresh flavor.

Mastering simple techniques like rinsing beans makes all the difference in achieving a clean, fresh taste, a principle that extends to many recipes. If you enjoy the wholesome flavors of white beans and chicken, you’ll love the classic comfort of this White Chicken Chili.
Storage & Reheating Tips
This white bean dip recipe is fantastic for making ahead, which is a huge bonus for busy parents like me! Proper storage ensures it stays fresh and delicious for days.
* Storage: Once you make your homemade white bean dip, transfer it to an airtight container. Store it in the refrigerator. It will stay fresh and flavorful for up to 4-5 days.
I love having a batch ready for quick snacks.
* Reheating (or not): This creamy white bean dip is best served chilled or at room temperature. There is no need to “reheat” it in the traditional sense.
Simply take it out of the refrigerator about 15-30 minutes before serving to allow it to warm up slightly and for the flavors to become more pronounced.
* Stir Before Serving: After storing, the dip might thicken slightly. Give it a good stir before serving.
If it seems too thick, you can stir in a tablespoon or two of cold water or a little extra lemon juice to bring it back to your desired consistency.
* Freezing: While you technically *can* freeze white bean dip, I generally do not recommend it. The texture can sometimes change upon thawing, becoming a bit grainy or watery.
If you must freeze it, store it in an airtight, freezer-safe container for up to 1-2 months. Thaw in the refrigerator overnight, then stir very well and adjust consistency and seasoning as needed. For the best flavor and texture, I always prefer to enjoy this white bean dip recipe fresh.
What to Serve With This Recipe
The versatility of this white bean dip recipe is one of its greatest strengths! It pairs beautifully with a wide array of dippers and serves as a wonderful component in many meals.

* Classic Dippers:
* Pita Bread/Pita Chips: Warm pita bread or crispy pita chips are my absolute favorite alongside this easy white bean dip.
* Fresh Vegetables: A colorful platter of carrot sticks, cucumber slices, bell pepper strips (any color!), celery sticks, radishes, and cherry tomatoes provides a healthy and refreshing crunch.
* Crackers: Whole-grain crackers, seeded crackers, or even simple water crackers work perfectly.
* Crusty Bread: Slices of a good quality baguette or sourdough bread are excellent for scooping up this creamy white bean dip.
* Beyond the Dip Bowl:
* Sandwich Spread: Spread a generous layer of this homemade white bean dip onto your favorite sandwich or wrap instead of mayonnaise or hummus. It adds incredible flavor and moisture.
* Burger Topping: Dollop some onto grilled burgers (beef, chicken, or veggie!) for a Mediterranean-inspired twist. This elevates any burger experience.
* Salad Component: Add a scoop to your salad bowls for an extra boost of protein and creaminess.
It can even be thinned with a little more lemon juice and olive oil to make a creamy dressing.
* Breakfast Toast: Yes, really! Spread it on toast and top with a sprinkle of everything bagel seasoning or red pepper flakes for a quick, savory breakfast.
* Grain Bowls: Use it as a base or an accompaniment to vibrant grain bowls featuring quinoa, farro, roasted vegetables, and greens.
* Appetizer Platter: This white bean dip recipe is a star on any charcuterie or appetizer board, complementing cheeses, olives, and cured meats beautifully.
Just as this dip pairs well with many foods, white beans are incredibly versatile for creating fulfilling meals, especially convenient slow-cooked options. For an effortlessly delicious dish that brings together white beans, chicken, and rich flavors, consider making this Crockpot White Bean Chicken Chili.
FAQs
You have questions, and I have answers! Here are some common inquiries about making and enjoying this incredible white bean dip recipe.
Is this white bean dip recipe healthy?
Absolutely! This white bean dip recipe is incredibly healthy. It features cannellini beans, which are packed with plant-based protein, dietary fiber, and essential minerals.
It uses healthy fats from olive oil and fresh lemon juice for vitamins. It is a fantastic, nourishing snack or meal component.
Can I make this white bean dip recipe ahead of time?
Yes, you certainly can! In fact, making this easy white bean dip ahead of time often allows the flavors to meld and deepen even further. Prepare it up to 4-5 days in advance and store it in an airtight container in the refrigerator. It is perfect for meal prepping.
What kind of beans are best for white bean dip?
Cannellini beans are my top choice for this creamy white bean dip because of their smooth texture and mild flavor. Great Northern beans also work very well. You can use chickpeas for a slightly different, more hummus-like consistency.
Can I freeze leftover white bean dip?
While you technically can freeze white bean dip, I usually do not recommend it. The texture can sometimes become a bit watery or grainy upon thawing. For the best results with this homemade white bean dip, it is best enjoyed fresh or stored in the refrigerator for up to 5 days.
How can I make my white bean dip recipe extra smooth?
To achieve an extra smooth texture for your white bean dip recipe, ensure you drain and rinse the beans thoroughly. Then, process the dip in your food processor for an extra minute or two, adding water or reserved bean liquid slowly until it reaches your desired silky consistency. A high-speed blender can also achieve an incredibly smooth result.
White bean dip is a popular appetizer often found in Mediterranean and Middle Eastern cuisines, known for its creamy texture and rich, savory flavor. It typically features puréed cannellini beans, olive oil, garlic, and lemon juice, offering a nutritious and versatile spread or dip due to the high protein and fiber content of the primary legume ingredient.
Nutrition Information (per serving)
This nutrition information for our white bean dip recipe is an estimate based on approximately 8 servings per batch. Exact values may vary depending on specific brands and quantities used. This provides a good general idea of the nourishing qualities of this simple dip.
| Nutrient | Amount (estimated) |
|---|---|
| Calories | 160 kcal |
| Total Fat | 9g |
| Saturated Fat | 1.5g |
| Cholesterol | 0mg |
| Sodium | 280mg |
| Total Carbohydrates | 16g |
| Dietary Fiber | 6g |
| Sugars | 0g |
| Protein | 6g |
white bean dip recipe

This homemade white bean dip is a quick, healthy, and genuinely delicious recipe, perfect for busy families. Made with cannellini beans, garlic, and lemon, it comes together in minutes, offering a creamy, satisfying snack or versatile meal component that is incredibly easy to adapt to various tastes and occasions.
- Prep Time: 5 mins
- Cook Time: 0 mins
- Total Time: 10 mins
- Yield: 8 servings 1x
- Category: Appetizer
- Method: Blending
- Cuisine: Mediterranean
- Diet: Vegan, Vegetarian, Gluten Free
Ingredients
2 cans (15-ounce each) Cannellini Beans
1/4 cup Extra Virgin Olive Oil
2 tablespoons Fresh Lemon Juice
3 cloves Garlic Cloves
1/2 teaspoon Salt
1/4 teaspoon Black Pepper
4 tablespoons Water (or reserved bean liquid)
1 tablespoon Fresh Parsley or Chives
Instructions
- Prepare the Beans: Drain cans of cannellini beans thoroughly in a colander. Rinse them under cold running water for about 30 seconds to remove any excess starch and can liquid
- Combine Ingredients: Transfer the rinsed and drained beans to the bowl of a food processor. Add the 1/4 cup of extra virgin olive oil, fresh lemon juice, garlic cloves, salt, and black pepper
- Process to Smooth: Pulse the mixture a few times to start breaking down the beans. Then, process continuously until the mixture becomes smooth and creamy. Scrape down the sides of the bowl as needed
- Adjust Consistency: If the dip appears too thick or chunky, add water (or reserved bean liquid) one tablespoon at a time through the feed tube until you reach your desired creamy consistency
- Taste and Season: Stop the food processor, then taste the white bean dip. Adjust the seasoning as necessary, potentially adding more salt, lemon juice, or garlic
- Serve and Garnish: Transfer the finished dip to a serving bowl. Drizzle a little extra virgin olive oil over the top. Garnish with chopped fresh parsley or chives, if using. Serve immediately
Notes
Always rinse canned beans well to remove excess sodium and starchy liquid for a fresh flavor.
Use fresh lemon juice for the brightest, most zesty flavor profile.
Taste and adjust seasonings (salt, pepper, lemon, garlic) to your personal preference.
Opt for a good quality extra virgin olive oil as its flavor is prominent in the dip.
Process just until creamy to avoid a gummy texture, adding liquid slowly as needed.
For best flavor development, chill the dip in the refrigerator for at least 30 minutes before serving.
Garnish with olive oil and fresh herbs for enhanced visual appeal and flavor.
Store leftovers in an airtight container in the refrigerator for up to 4-5 days. Stir well before serving and adjust consistency with water or lemon juice if needed.
Freezing is generally not recommended as it can lead to a grainy or watery texture upon thawing.
Nutrition
- Serving Size: 1 serving
- Calories: 160 kcal
- Sugar: 0g
- Sodium: 280mg
- Fat: 9g
- Saturated Fat: 1.5g
- Unsaturated Fat: 7.5g
- Trans Fat: 0g
- Carbohydrates: 16g
- Fiber: 6g
- Protein: 6g
- Cholesterol: 0mg