Gluten Free Sandwich Bread
Oh, sweet friends, let me tell you about a little miracle that happened in my kitchen. With three busy bees buzzing around, packing lunches often felt like a daily marathon. My youngest, bless her heart, developed a sensitivity to gluten, and suddenly, our go-to store-bought sandwich bread was off the table.
I tried everything – pricey, crumbly loaves that fell apart before the peanut butter even touched them, or dense, heavy bricks that just didn’t taste right. My heart ached seeing her feel left out. So, armed with a mother’s determination and a love for good, wholesome food, I set out on a quest to bake the perfect gluten free sandwich bread.
And guess what? I found it! This isn’t just any homemade GF bread; this is *the* gluten free sandwich bread that brought smiles back to lunchboxes and made our family table feel whole again.
It’s soft, it’s fluffy, it holds up to all your favorite fillings, and most importantly, it tastes absolutely delicious. I promise, making your own gluten free sandwich bread at home is easier than you think, and the reward is truly immeasurable.
Say goodbye to sad, brittle slices and hello to the most incredible gluten free sandwich bread you’ll ever bake! This recipe will revolutionize your kitchen and delight every sandwich lover, proving that amazing gluten free sandwich bread is absolutely within reach.
Why You’ll Love This Homemade Gluten Free Sandwich Bread
This isn’t just about avoiding gluten; it’s about pure joy and embracing deliciousness. First, the taste. This homemade gluten free sandwich bread boasts a wonderfully mild flavor that complements everything from savory deli meats to sweet jam.
It never overpowers your fillings, instead, it enhances them. Next, the texture. Forget those dry, crumbly store-bought versions.
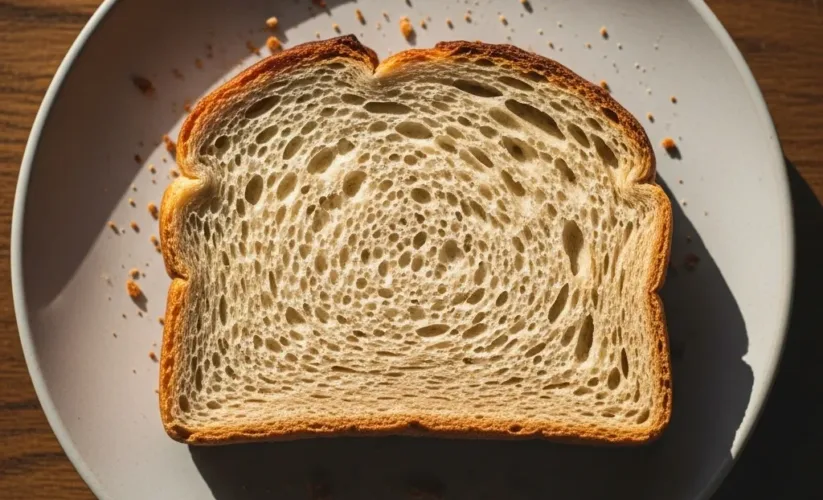
Our gluten free sandwich bread is delightfully soft, with a tender, airy crumb that makes every bite a pleasure. It slices beautifully without tearing, toasts perfectly, and never falls apart, even with generous toppings.
You also control the ingredients, a huge bonus for any family. No mysterious additives or preservatives here, just simple, nourishing goodness you recognize. Plus, baking your own gluten free sandwich bread saves money in the long run.
Those specialized loaves can be so incredibly expensive! Finally, the satisfaction of pulling a warm, fragrant loaf of homemade gluten free sandwich bread from your oven is truly unmatched. It fills your home with an aroma of comfort and love. This recipe truly simplifies making delicious, healthy gluten free sandwich bread a part of your everyday life, ensuring everyone can enjoy a fantastic sandwich.
Ingredients You’ll Need

| Ingredient | Quantity |
|---|---|
| Warm Water | 1 ½ cups (105-115°F) |
| Granulated Sugar | 2 tablespoons |
| Active Dry Yeast | 2 ¼ teaspoons (1 standard packet) |
| Gluten-Free All-Purpose Flour Blend* | 3 cups (420g) |
| Xanthan Gum | 1 teaspoon |
| Salt | 1 teaspoon |
| Olive Oil (or other neutral oil) | ¼ cup |
| Large Eggs | 2, room temperature |
| Apple Cider Vinegar | 1 tablespoon |
*A note on GF Flour Blends: I highly recommend using a high-quality, cup-for-cup gluten-free all-purpose flour blend that contains a mix of starches and flours like rice flour, potato starch, tapioca starch, and sorghum flour. Different blends absorb liquid differently, so slight adjustments (a tablespoon more or less water) might sometimes be needed.
Crucially, ensure your chosen blend does NOT already contain xanthan gum, or if it does, omit the separate xanthan gum addition from our recipe. This ensures your gluten free sandwich bread has the best possible texture.
Substitutions & Variations
This recipe for gluten free sandwich bread is incredibly versatile. Don’t hesitate to make it your own and experiment a little!
* Flour Blends: While I recommend a specific blend type for this reliable gluten free sandwich bread, if your preferred cup-for-cup blend already contains xanthan gum, simply omit the separate xanthan gum from the ingredient list.
Using a blend without sorghum or millet might alter the flavor profile slightly, but the excellent structure of this homemade gluten free sandwich bread should remain consistent.
* Egg-Free: For an egg-free version of this delicious gluten free sandwich bread, you can successfully substitute the two large eggs with two “flax eggs” (combine 2 tablespoons ground flaxseed with 6 tablespoons warm water, then allow it to sit for 5-10 minutes until a gel forms).
The resulting texture might be a little denser, but it will still be wonderfully satisfying and hold up well.
* Oil Alternatives: Avocado oil or melted coconut oil (ensure it’s completely melted and slightly cooled before adding) work beautifully in place of olive oil. They are neutral in flavor and contribute to a moist crumb in your gluten free sandwich bread.
* Sweetener Options: You can easily swap the granulated sugar for an equal amount of honey or maple syrup if you prefer a different kind of sweetness. Just be mindful that liquid sweeteners can slightly affect dough consistency, so your dough might feel a touch wetter.
* Add-ins for Flavor: Elevate your gluten free sandwich bread with delightful additions!
Stir in 1/4 cup of sunflower seeds, pumpkin seeds, or even a mix of dried herbs like rosemary and thyme for a savory loaf perfect with soups. For a slightly sweeter bread, a sprinkle of ground cinnamon, a teaspoon of orange zest, or a handful of plump raisins can be absolutely lovely. These small touches make your gluten free sandwich bread truly unique.
The versatility of homemade gluten-free bread goes beyond just sandwiches. Imagine transforming your delicious loaf into a delightful breakfast treat. For another fantastic way to utilize your gluten-free baking skills, why not try making a batch of incredibly fluffy Gluten Free French Toast?
Step-by-Step Instructions
Baking this fantastic gluten free sandwich bread is a joyful and rewarding process. Follow these simple steps carefully for the absolute best results!
Note: This video is for demonstration purposes and may use a slightly different method.
1.
Activate the Yeast: In the bowl of your stand mixer (or a large mixing bowl if kneading by hand), combine the warm water and granulated sugar. Sprinkle the active dry yeast evenly over the top. Stir gently with a spoon.
Let it sit undisturbed for 5-10 minutes, or until the mixture becomes wonderfully foamy and bubbly. This visual cue tells you your yeast is alive, active, and ready to make your gluten free sandwich bread rise beautifully. If it doesn’t foam, your yeast might be old; discard and start again with fresh yeast.
2. Combine Dry Ingredients: In a separate medium bowl, thoroughly whisk together the gluten-free all-purpose flour blend, xanthan gum, and salt. Make sure these dry components are very well combined and evenly distributed.
This prevents pockets of unmixed ingredients in your finished gluten free sandwich bread.
3. Add Wet Ingredients: Once your yeast mixture is gloriously foamy, add the olive oil, the room temperature eggs, and the apple cider vinegar to the yeast mixture in the stand mixer bowl.
Mix lightly with a spoon or whisk just to combine these wet ingredients.
4. Form the Dough: Gradually add the whisked dry ingredient mixture to the wet ingredients in the stand mixer bowl.
Attach the paddle attachment. Begin mixing on low speed for 1 minute to initially incorporate everything, then increase to medium speed and continue mixing for another 3-4 minutes. The dough for your gluten free sandwich bread will be noticeably thick and sticky, much more like a very thick batter rather than the elastic dough you’d expect from traditional wheat flour.
This consistency is perfectly normal and exactly how it should be for this type of gluten free sandwich bread!
5. Prepare the Loaf Pan: Generously grease a 9×5-inch loaf pan with oil or cooking spray.
For even easier removal of your finished gluten free sandwich bread, you can also line the pan with a piece of parchment paper, leaving an overhang on the longer sides.
6. Shape and Rise: Using a rubber spatula (it helps with the sticky dough) or hands lightly dampened with water (to prevent sticking), transfer the sticky dough evenly into the prepared loaf pan.
Gently smooth the top of the dough with the spatula or your wet hands. Cover the loaf pan loosely with plastic wrap or a clean, damp kitchen towel. Place it in a warm, draft-free place to rise for 45-60 minutes, or until the dough has nearly doubled in size and has crowned nicely above the rim of the pan.
This rising step is absolutely crucial for achieving a light and airy gluten free sandwich bread.
7. Preheat Oven & Bake: While the dough rises, preheat your oven to 375°F (190°C).
Once the dough has sufficiently risen, carefully remove the plastic wrap or towel. Bake the gluten free sandwich bread for 45-55 minutes, or until the crust is a deep golden brown and an instant-read thermometer inserted into the very center of the loaf reads 200-205°F (93-96°C). If you notice the top browning too quickly during baking, loosely tent it with aluminum foil for the remaining bake time.
8. Cool Completely: This step is incredibly vital for gluten-free bread and cannot be rushed! Immediately remove the baked loaf from the pan and carefully place it on a wire rack to cool completely.
This means a minimum of 2-3 hours, but ideally, let it cool until it reaches room temperature. Slicing warm gluten free sandwich bread can unfortunately lead to a gummy, dense texture. Patience is truly key for achieving that perfect, airy slice of this wonderful gluten free sandwich bread!
Pro Tips for Success

* Accurate Measuring is Non-Negotiable: Gluten-free baking is precise. For the most consistent and reliable results, always use a kitchen scale to measure your flour blend by weight (420g for 3 cups). If you must measure by volume, spoon the flour gently into the measuring cup and then level it off with a straight edge; never scoop directly from the bag, as this compacts the flour and leads to too much.
Precise measurements prevent overly dense or dry gluten free sandwich bread.
* Room Temperature Ingredients are Best: Ensure your eggs are at room temperature before adding them to the dough. This helps them incorporate better and more smoothly into the mixture, contributing to a lighter, more even batter for your gluten free sandwich bread.
Take them out of the fridge at least 30 minutes before you plan to start baking.
* Yeast Activation is the Foundation: Never skip the step of proofing your yeast. If your yeast doesn’t get wonderfully foamy and bubbly after 5-10 minutes, it’s likely dead or inactive, and your gluten free sandwich bread simply won’t rise.
In this case, it’s best to discard the mixture and start again with fresh yeast and ensure your water temperature is correct.
* Avoid Over-Rising: While rising is undoubtedly important for a fluffy loaf, be careful not to let the dough over-rise, especially if you place it in a very warm spot. Dough that has over-risen can often rise beautifully in the pan, only to collapse dramatically in the oven, resulting in a dense middle.
Aim for roughly double in size, just crowning over the top of the pan.
* Resist Slicing Warm: I know, I know! The incredible aroma of freshly baked gluten free sandwich bread is intoxicating and makes it nearly impossible to resist.
But seriously, resist the urge to slice it warm. Gluten-free bread continues to set its internal structure and texture as it cools. Slicing it prematurely, while still warm, can result in a frustratingly gummy or crumbly texture.
Wait for it to be completely cool for that perfectly structured, delightful slice of gluten free sandwich bread.
* Verify Oven Temperature: Always ensure your oven is accurately preheated to the correct temperature. An inexpensive oven thermometer can be an incredibly helpful tool to verify your oven’s accuracy, as many ovens run hot or cold. Consistent and correct heat helps the gluten free sandwich bread bake evenly all the way through, giving it a good crust and cooked interior.
Mastering precise measurements and techniques is crucial for consistent results in gluten-free baking, whether you’re making bread or other delicious goods. If you’re looking for another satisfying gluten-free baking project that benefits from careful attention to detail, consider whipping up some savory Gluten Free Cornbread Muffins.
Storage & Reheating Tips
Proper storage ensures your delicious homemade gluten free sandwich bread stays fresh, soft, and enjoyable for as long as possible.
* Countertop Storage: Once your gluten free sandwich bread has completely cooled to room temperature, slice the entire loaf. Then, store the slices in an airtight container or a large, resealable plastic bag at room temperature. It will stay wonderfully fresh for up to 3-4 days.
For optimal freshness and to prevent drying, some people prefer to keep the loaf unsliced until they are ready to use it, then slice only what’s needed.
* Refrigeration (Not Recommended): I generally don’t recommend refrigerating this gluten free sandwich bread. Surprisingly, placing bread in the refrigerator can actually make it go stale faster due to a process called retrogradation of starches.
* Freezing for Longer Term: This is absolutely my favorite method for preserving this amazing gluten free sandwich bread! Once the loaf is completely cool, slice it entirely. To prevent the slices from sticking together, place small squares of parchment paper between each slice.
Then, transfer the stack of slices into a heavy-duty freezer-safe bag or an airtight container. Your gluten free sandwich bread freezes beautifully for up to 3 months, making it perfect for meal prep.
* Reheating for Freshness:
* From Frozen: One of the best parts of freezing is the convenience!
You can pop a frozen slice of gluten free sandwich bread directly into the toaster for a minute or two until it’s golden, warmed through, and deliciously crisp on the outside. It’s perfect for a quick breakfast or a last-minute sandwich.
* From Room Temperature: To refresh a slice of gluten free sandwich bread that’s been stored at room temperature, a quick toast in the toaster or just a few seconds (10-15) in the microwave can work wonders. This brings back some of that lovely fresh-baked softness and warmth.
What to Serve With This Recipe

* Classic Sandwiches: Of course, this is what it was made for! Think hearty turkey and avocado, a classic ham and cheese melt, a timeless PB&J for the kids, or a delightful veggie sandwich loaded with creamy hummus and fresh crisp greens. This amazing gluten free sandwich bread holds up wonderfully to all your favorite fillings, without crumbling or falling apart.
* Amazing Toast: Elevate your breakfast or snack game. Slather a warm, toasted slice with creamy butter and homemade jam, mashed avocado topped with everything bagel seasoning, or a smear of whipped cream cheese and delicate smoked salmon. It toasts up beautifully crisp on the outside and remains wonderfully soft on the inside.
* French Toast Perfection: This gluten free sandwich bread makes incredibly decadent gluten-free French toast. Its slightly denser yet tender texture (compared to a typical airy GF white bread) absorbs the rich egg custard perfectly without becoming soggy, leading to a golden, flavorful breakfast.
* Gooey Grilled Cheese: Oh, the ultimate comfort food!
A golden, gooey grilled cheese sandwich made with this sturdy, flavorful gluten free sandwich bread is simply divine. It crisps up beautifully in the pan and melts cheese perfectly.
* Flavorful Croutons or Breadcrumbs: If you happen to have any leftover pieces that are getting a little stale, absolutely do not waste them!
Cube them, dry them out further in a low oven, and then toss with olive oil and herbs for homemade gluten-free croutons for salads and soups. Or, process them into fresh gluten-free breadcrumbs for coating chicken, topping casseroles, or making meatballs. This gluten free sandwich bread is useful to the very last crumb.
This versatile gluten-free sandwich bread is an excellent foundation for countless meals, from savory sandwiches to sweet spreads. If you enjoy having a dedicated loaf for your morning routine, you might also love exploring our Easy Gluten Free Breakfast Bread Recipe for another delicious staple.
FAQs
Can I make this gluten free sandwich bread in a bread machine?
Yes, you absolutely can make this delicious gluten free sandwich bread in a bread machine! Many modern bread machines come equipped with a specific gluten-free cycle, which is perfect for this recipe. Generally, you would add the wet ingredients first (water, oil, eggs, vinegar), followed by the dry ingredients (flour blend, sugar, xanthan gum, salt), with the active dry yeast placed directly on top of the dry ingredients.
Always refer to your specific bread machine’s instructions for the correct order of adding ingredients for its gluten-free cycle. The texture of your bread machine-baked gluten free sandwich bread might vary ever so slightly compared to oven-baked, but it will still be wonderfully delicious and convenient.
Why is my gluten free sandwich bread crumbly?
Crumbly gluten free sandwich bread often points to a few common culprits. The most frequent reason is too much flour or insufficient liquid in the dough. Gluten-free flours absorb liquid differently than wheat flour, so ensuring accurate measurements, preferably by weight with a kitchen scale, is paramount.
Another significant factor is improper cooling; slicing the bread while it is still warm can easily make it appear crumbly and gummy, as it hasn’t fully set internally. Finally, ensuring you use the correct amount of xanthan gum (or that your flour blend already contains it) is crucial, as xanthan gum acts as the primary binder in gluten-free baking, mimicking gluten’s elasticity and preventing your gluten free sandwich bread from falling apart.
Is xanthan gum necessary for this recipe?
For homemade gluten free sandwich bread, xanthan gum is indeed a crucial ingredient. It plays an essential role in providing the necessary structure, elasticity, and binding properties that gluten naturally provides in traditional wheat bread. Without xanthan gum, your gluten free sandwich bread would likely be very dense, crumbly, and struggle to hold its shape.
It helps create that desirable soft texture and prevents the bread from falling apart. However, if your chosen gluten-free all-purpose flour blend explicitly states that it already contains xanthan gum (or guar gum), you can and should omit the separate addition from our recipe to avoid a gummy texture in your finished gluten free sandwich bread.
How can I make my gluten free sandwich bread rise higher?
Achieving a good rise in your gluten free sandwich bread depends on several key factors. First, always ensure your active dry yeast is fresh and active – proofing it first is a great indicator. The temperature of your water is also vital; too hot will kill the yeast, while too cold won’t activate it sufficiently.
Providing the dough with a consistently warm, draft-free place to rise (like a slightly warmed oven turned off) is critical. Sometimes, a slightly wetter dough (you can add an extra tablespoon or two of warm water if the dough seems overly stiff) can also help promote a better and higher rise for your gluten free sandwich bread. Over-rising can also lead to collapse, so watch the dough closely.
Can I use a different type of gluten-free flour?
This recipe for gluten free sandwich bread is specifically formulated for a general gluten-free all-purpose flour blend, which typically combines various flours and starches for optimal results. While you can certainly experiment with individual gluten-free flours like almond, coconut, or oat flour, be aware that they each have very different absorption rates and protein structures.
Using them individually or in different ratios would require significant adjustments to liquid ratios, egg content, and other ingredients to achieve a similar soft, fluffy gluten free sandwich bread texture. For the best and most reliable results with this specific recipe, I strongly recommend sticking to a high-quality, cup-for-cup gluten-free all-purpose blend as specified.
Gluten-free sandwich bread is a popular alternative for individuals avoiding gluten due to celiac disease or gluten sensitivity. These specialized breads often use a blend of flours like rice, potato, tapioca, and corn, along with binders such as xanthan gum, to achieve a texture similar to traditional wheat bread. The development of diverse and palatable gluten-free diet options has significantly improved the quality of life for many.
Nutrition Information (per serving)
I always find it helpful to have a general idea of what nourishment I’m putting into my family’s bodies. While this is an estimated calculation based on standard ingredient values, it provides a good guideline for a slice of this hearty gluten free sandwich bread.
| Nutrient | Amount (per slice) |
|---|---|
| Calories | 160 kcal |
| Total Fat | 5g |
| Saturated Fat | 0.5g |
| Cholesterol | 25mg |
| Sodium | 200mg |
| Total Carbohydrates | 26g |
| Dietary Fiber | 2g |
| Total Sugars | 3g |
| Protein | 3g |
*These are estimated values and may vary based on specific brands of ingredients used and exact serving size of your gluten free sandwich bread.
Print
gluten free sandwich bread
This is the most incredible gluten free sandwich bread you'll ever bake! It's soft, fluffy, holds up to all your favorite fillings, and tastes absolutely delicious. This homemade gluten free sandwich bread boasts a wonderfully mild flavor that complements everything, a tender, airy crumb, and slices beautifully without tearing. It's delightful and a joy to bake, offering control over ingredients, cost savings, and the unmatched satisfaction of pulling a warm, fragrant loaf from your oven.
- Total Time: 270 mins
- Yield: 1 loaf (16 slices) 1x
Ingredients
1 ½ cups Warm Water (105-115°F)
2 tablespoons Granulated Sugar
2 ¼ teaspoons Active Dry Yeast (1 standard packet)
3 cups Gluten-Free All-Purpose Flour Blend (420g)
1 teaspoon Xanthan Gum
1 teaspoon Salt
¼ cup Olive Oil (or other neutral oil)
2 Large Eggs, room temperature
1 tablespoon Apple Cider Vinegar
Instructions
- Activate the Yeast: In the bowl of your stand mixer (or a large mixing bowl if kneading by hand), combine the warm water and granulated sugar. Sprinkle the active dry yeast evenly over the top. Stir gently with a spoon. Let it sit undisturbed for 5-10 minutes, or until the mixture becomes wonderfully foamy and bubbly. This visual cue tells you your yeast is alive, active, and ready to make your gluten free sandwich bread rise beautifully. If it doesn't foam, your yeast might be old; discard and start again with fresh yeast
- Combine Dry Ingredients: In a separate medium bowl, thoroughly whisk together the gluten-free all-purpose flour blend, xanthan gum, and salt. Make sure these dry components are very well combined and evenly distributed. This prevents pockets of unmixed ingredients in your finished gluten free sandwich bread
- Add Wet Ingredients: Once your yeast mixture is gloriously foamy, add the olive oil, the room temperature eggs, and the apple cider vinegar to the yeast mixture in the stand mixer bowl. Mix lightly with a spoon or whisk just to combine these wet ingredients
- Form the Dough: Gradually add the whisked dry ingredient mixture to the wet ingredients in the stand mixer bowl. Attach the paddle attachment. Begin mixing on low speed for 1 minute to initially incorporate everything, then increase to medium speed and continue mixing for another 3-4 minutes. The dough for your gluten free sandwich bread will be noticeably thick and sticky, much more like a very thick batter rather than the elastic dough you'd expect from traditional wheat flour. This consistency is perfectly normal and exactly how it should be for this type of gluten free sandwich bread!
- Prepare the Loaf Pan: Generously grease a 9×5-inch loaf pan with oil or cooking spray. For even easier removal of your finished gluten free sandwich bread, you can also line the pan with a piece of parchment paper, leaving an overhang on the longer sides
- Shape and Rise: Using a rubber spatula (it helps with the sticky dough) or hands lightly dampened with water (to prevent sticking), transfer the sticky dough evenly into the prepared loaf pan. Gently smooth the top of the dough with the spatula or your wet hands. Cover the loaf pan loosely with plastic wrap or a clean, damp kitchen towel. Place it in a warm, draft-free place to rise for 45-60 minutes, or until the dough has nearly doubled in size and has crowned nicely above the rim of the pan. This rising step is absolutely crucial for achieving a light and airy gluten free sandwich bread
- Preheat Oven & Bake: While the dough rises, preheat your oven to 375°F (190°C). Once the dough has sufficiently risen, carefully remove the plastic wrap or towel. Bake the gluten free sandwich bread for 45-55 minutes, or until the crust is a deep golden brown and an instant-read thermometer inserted into the very center of the loaf reads 200-205°F (93-96°C). If you notice the top browning too quickly during baking, loosely tent it with aluminum foil for the remaining bake time
- Cool Completely: This step is incredibly vital for gluten-free bread and cannot be rushed! Immediately remove the baked loaf from the pan and carefully place it on a wire rack to cool completely. This means a minimum of 2-3 hours, but ideally, let it cool until it reaches room temperature. Slicing warm gluten free sandwich bread can unfortunately lead to a gummy, dense texture. Patience is truly key for achieving that perfect, airy slice of this wonderful gluten free sandwich bread!
Notes
A note on GF Flour Blends: I highly recommend using a high-quality, cup-for-cup gluten-free all-purpose flour blend that contains a mix of starches and flours like rice flour, potato starch, tapioca starch, and sorghum flour. Different blends absorb liquid differently, so slight adjustments (a tablespoon more or less water) might sometimes be needed. Crucially, ensure your chosen blend does NOT already contain xanthan gum, or if it does, omit the separate xanthan gum addition from our recipe. This ensures your gluten free sandwich bread has the best possible texture.
Substitutions & Variations: For an egg-free version, substitute two large eggs with two 'flax eggs' (combine 2 tablespoons ground flaxseed with 6 tablespoons warm water, then allow it to sit for 5-10 minutes until a gel forms). Avocado oil or melted coconut oil (ensure it's completely melted and slightly cooled before adding) work beautifully in place of olive oil. Granulated sugar can be swapped for an equal amount of honey or maple syrup. For flavor, stir in 1/4 cup of sunflower seeds, pumpkin seeds, a mix of dried herbs like rosemary and thyme, ground cinnamon, a teaspoon of orange zest, or a handful of plump raisins.
Pro Tips for Success: For the most consistent results, use a kitchen scale to measure flour by weight (420g for 3 cups); if measuring by volume, spoon flour gently into the cup and level. Ensure eggs are at room temperature. Always proof your yeast; if it doesn't foam, discard and start again. Avoid over-rising, which can lead to collapse. Resist the urge to slice warm bread, as it can result in a gummy or crumbly texture; allow it to cool completely (2-3 hours) for best structure. Verify oven temperature with an oven thermometer for even baking.
Storage & Reheating Tips: Once completely cooled, slice the entire loaf and store slices in an airtight container or resealable bag at room temperature for up to 3-4 days. Do not refrigerate, as it can make bread go stale faster. For longer term, slice the cooled loaf, place small parchment squares between slices, and freeze in a heavy-duty freezer-safe bag for up to 3 months. From frozen, pop a slice directly into the toaster. To refresh room temperature slices, quickly toast or microwave for 10-15 seconds.
- Prep Time: 20 mins
- Cook Time: 50 mins
- Category: Bread
- Method: Baking
- Cuisine: American
- Diet: Gluten Free
Nutrition
- Serving Size: 1 slice
- Calories: 160 kcal
- Sugar: 3g
- Sodium: 200mg
- Fat: 5g
- Saturated Fat: 0.5g
- Unsaturated Fat: 4.5g
- Trans Fat: Not available
- Carbohydrates: 26g
- Fiber: 2g
- Protein: 3g
- Cholesterol: 25mg