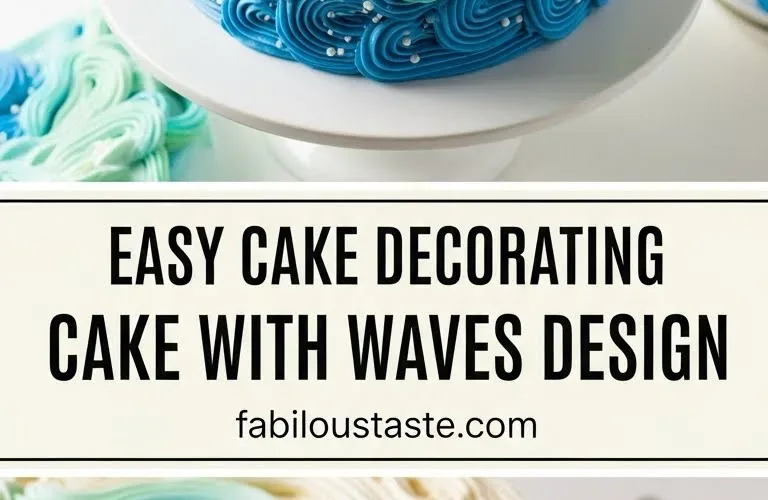
Cake with Waves Design
Oh, the simple joys of a homemade cake! I remember the day this “Cake with Waves Design” first came to life in my kitchen. We had just returned from a wonderful family trip to the coast, the sound of the ocean waves still ringing in our ears, and my littlest one, Leo, was absolutely enchanted by the water.
He kept talking about the “whooshing waves.” I wanted to capture that magic, that serene blue beauty, in a way we could all enjoy. So, on a quiet afternoon, with the kids napping, I got to work. I envisioned a cake that wasn’t overly complicated but looked utterly enchanting, like a slice of the ocean itself.
This “Cake with Waves Design” became that special treat, a sweet reminder of sandy toes and salty air, a piece of edible art that even a busy mom like me could achieve with love and a few simple steps.
It truly brought the beach right into our home, and it quickly became a family favorite, especially for birthday parties or just a “because it’s Tuesday” kind of celebration. Every time I make this `Cake with Waves Design`, it fills our home with warmth and happy memories.
Why You’ll Love This Cake with Waves Design Recipe
You will absolutely adore this “Cake with Waves Design” recipe, not just for its stunning appearance but also for the pure joy it brings to your kitchen and your family. First and foremost, it’s a beautiful cake that makes an impressive statement without demanding hours of intricate work. As a mom of three, I promise you, simplicity is key, and this “ocean wave cake” delivers on that promise.
The method for creating the wave effect is surprisingly straightforward, using everyday tools. Furthermore, this recipe focuses on classic flavors everyone loves: a moist, tender vanilla cake paired with a creamy, dreamy buttercream. It is comforting and familiar, a true crowd-pleaser for all ages.
This “Cake with Waves Design” is also incredibly versatile. You can easily adjust the colors to reflect different ocean moods, from a vibrant turquoise to a serene deep blue. It’s perfect for birthdays, baby showers, or simply as a special weekend treat.
Imagine the delight on your children’s faces when they see this magnificent `Cake with Waves Design` gracing your table! It offers a lovely opportunity for creativity in the kitchen, making it a wonderful project to share with older children, letting them help choose the colors or gently spread the frosting.
Finally, every bite of this “homemade wave cake” tastes like a warm hug, full of the love and care you poured into making it. It truly embodies my belief that food is love, made simple and beautiful.
Ingredients You’ll Need
Gathering your ingredients is the first step towards creating this delightful “Cake with Waves Design.” You likely have many of these staples in your pantry already! We’ll make a classic vanilla cake and a smooth, vibrant buttercream.

| For the Cake: | Quantity |
|---|---|
| All-purpose flour | 2 ¾ cups |
| Granulated sugar | 2 cups |
| Baking powder | 1 tablespoon |
| Salt | ½ teaspoon |
| Unsalted butter, softened | 1 cup (2 sticks) |
| Large eggs | 4 |
| Whole milk | 1 cup |
| Vanilla extract | 2 teaspoons |
| For the Buttercream Frosting: | Quantity |
|---|---|
| Unsalted butter, softened | 3 cups (6 sticks) |
| Powdered sugar, sifted | 8-10 cups |
| Heavy cream or milk | ¼ cup, plus more if needed |
| Vanilla extract | 2 teaspoons |
| Gel food coloring (blue, green, white) | As desired |
Substitutions & Variations
One of the beautiful things about baking is the freedom to personalize! This “Cake with Waves Design” recipe offers plenty of room for creative adjustments. If you need to make changes, here are some ideas to inspire your unique `Cake with Waves Design`.
* Flour Alternatives: For a slightly denser cake, you can substitute 1 cup of all-purpose flour with 1 cup of cake flour. If you prefer a whole wheat option, swap up to half of the all-purpose flour for whole wheat pastry flour for a subtly nutty flavor, but note the texture will be different. For gluten-free needs, a 1:1 gluten-free baking blend can often be used, though results may vary.
* Dairy-Free Options: Replace the butter with a good quality plant-based butter substitute (like Miyoko’s Kitchen or Earth Balance sticks). Use unsweetened almond milk or oat milk instead of whole milk for the cake batter and the frosting. Ensure your powdered sugar is vegan if strictly dairy-free.
* Flavor Twists: Infuse your “Cake with Waves Design” with different flavors! Add lemon zest to the cake batter for a brighter taste, or a teaspoon of almond extract instead of vanilla for a subtle nuttiness. Coconut extract would also be delightful, enhancing the beachy theme of your `wave cake`.
For the frosting, you could swap some vanilla for a citrus zest, a touch of peppermint extract, or even a tablespoon of instant espresso powder for a coffee-flavored buttercream.
* Sugar Substitutions: You can reduce the sugar in the cake by ¼ cup if you prefer it less sweet, but remember sugar contributes to moisture. For the frosting, sugar-free powdered erythritol can be used, but you might need to adjust the liquid content to achieve the right consistency.
* Color Palette: The classic blue and white `ocean wave cake` is stunning, but don’t limit yourself! Consider shades of turquoise and teal for a tropical feel, or even deeper blues and purples for a stormy sea effect. A sunset-inspired “Cake with Waves Design” with pinks, oranges, and yellows would also be breathtaking.
You could even add a hint of edible glitter for a shimmering water effect.
* Decorating Tools: If you don’t have an offset spatula, the back of a spoon or even a small, flexible silicone spatula can help create those beautiful ripples for your “easy wave cake.” Experiment with different sized spatulas or even pastry combs for varied wave patterns on your `Cake with Waves Design`.
Baking offers incredible freedom for personalization and simple swaps can transform your desserts. If you’re looking for another quick and easy dessert hack to get creative with ingredients, explore this delightful Cottage Cheese Mug Cake No Egg: The Ultimate 3-Ingredient Dessert Hack.
Step-by-Step Instructions
Let’s dive into creating your gorgeous “Cake with Waves Design”! Follow these steps carefully for a delicious and visually stunning result.
Part 1: Baking the Cake Layers
1. Prepare Your Pans: Preheat your oven to 350°F (175°C). Grease and flour two 8-inch round cake pans, or line them with parchment paper circles.
This prevents sticking, ensuring your layers release perfectly for your `Cake with Waves Design`.
2. Combine Dry Ingredients: In a medium bowl, whisk together the flour, granulated sugar, baking powder, and salt.
Make sure everything is well combined; this ensures even distribution in your final `waves cake`.
3. Cream Butter and Eggs: In a large mixing bowl, using an electric mixer, cream the softened unsalted butter until light and fluffy.
Gradually beat in the large eggs, one at a time, mixing well after each addition. Scrape down the sides of the bowl as needed to incorporate everything fully.
4.
Alternate Dry and Wet: With the mixer on low speed, slowly add about one-third of the dry ingredient mixture to the butter mixture, mixing until just combined. Next, pour in half of the whole milk and vanilla extract, mixing until just incorporated. Repeat this process: add another third of the dry ingredients, then the remaining milk, and finally the last third of the dry ingredients.
Mix until just combined, being careful not to overmix. Overmixing develops gluten, which can lead to a tough cake, not the tender crumb we want for our “Cake with Waves Design.”
5. Divide and Bake: Divide the batter evenly between the two prepared cake pans.
Smooth the tops with a spatula. Bake for 28-32 minutes, or until a wooden skewer inserted into the center comes out clean.
6.
Cool: Let the cakes cool in their pans on a wire rack for 10-15 minutes. Then, carefully invert them onto the wire rack to cool completely. Fully cooled cakes are essential before frosting to prevent melting and sliding, crucial for your `Cake with Waves Design`.
Part 2: Preparing the Buttercream Frosting
1. Cream Butter: In a very large mixing bowl, beat the softened unsalted butter with an electric mixer on medium-high speed for 3-5 minutes until it becomes very pale and fluffy. This step incorporates air, making a light, airy frosting perfect for your “Cake with Waves Design.”
2.
Add Powdered Sugar: Gradually add the sifted powdered sugar, about 2 cups at a time, beating on low speed until combined, then increasing to medium speed. Continue until all sugar is incorporated.
3.
Add Liquid and Flavor: Pour in the heavy cream (or milk) and vanilla extract. Beat on high speed for another 2-3 minutes, until the frosting is light, fluffy, and smooth. If it’s too thick, add more cream a teaspoon at a time.
If it’s too thin, add more powdered sugar a tablespoon at a time.
4. Divide and Color: Divide the buttercream into several bowls, depending on how many shades of blue/green you want for your “Cake with Waves Design.” Leave one portion white.
Use gel food coloring to tint the remaining portions varying shades of blue and green. Start with a tiny drop and add more for deeper colors. Mix each color thoroughly.
Part 3: Assembling and Creating the Waves Design
1. Level Your Cakes: Once completely cool, use a serrated knife to level the tops of your cake layers if they domed during baking. This creates a flat surface for stable stacking for your `Cake with Waves Design`.
2. Crumb Coat: Place one cake layer on your serving plate or cake stand. Spread about ¾ cup of white buttercream evenly over the top.
Place the second cake layer on top. Apply a thin, even layer of white buttercream all over the entire cake (top and sides). This is the “crumb coat,” which traps any loose crumbs and provides a smooth base.
Chill the cake in the refrigerator for 20-30 minutes until the crumb coat is firm. This step is vital for a clean `Cake with Waves Design`.
3.
Apply Colored Frosting: Once the crumb coat is firm, apply thick dollops or stripes of your colored buttercreams (blue, green, white) randomly around the sides and top of the cake.
Don’t worry about neatness here; a random placement works best for a natural “ocean wave cake.”
4. Create the Waves: Using a long offset spatula or a bench scraper, gently drag it across the surface of the cake, starting from the bottom and working your way up, or from one side to the other.
Apply light pressure and create small, undulating motions, mimicking the movement of waves. Continue going around the cake, slightly overlapping your strokes, until you achieve your desired “waves design.” For the top, you can use the same technique or simply swirl the colors with your spatula. Practice makes perfect for creating the perfect `Cake with Waves Design`.
5. Final Chill: Chill the finished `Cake with Waves Design` in the refrigerator for at least 30 minutes to allow the frosting to set. This also ensures the waves hold their shape beautifully.
Pro Tips for Success
Baking this “Cake with Waves Design” is a rewarding experience, and these pro tips will help ensure your success, even if you’re a beginner baker!

* Room Temperature Ingredients are Key: For both the cake and the buttercream, ensure your butter, eggs, and milk are at room temperature. This allows them to emulsify properly, creating a smoother batter and a creamier frosting. Cold ingredients result in lumpy batters and tough cakes, which we definitely want to avoid for our `Cake with Waves Design`.
* Don’t Overmix: When making the cake batter, mix until just combined. Overmixing develops gluten, leading to a dense, chewy cake rather than a light, tender one. Once you add the flour, mix on the lowest speed until no dry streaks remain, then stop.
This ensures a delicate crumb for your `waves cake`.
* Sift Your Powdered Sugar: For the smoothest, lump-free buttercream, always sift your powdered sugar. This prevents grainy frosting, which can make creating the `Cake with Waves Design` a bit frustrating.
A silky smooth frosting is essential for those beautiful ripples.
* Use Gel Food Coloring: For vibrant colors without adding too much liquid to your frosting, opt for gel food coloring instead of liquid dyes. They are more concentrated and deliver intense hues.
Remember, a little goes a long way, especially for blues and greens for your `ocean wave cake`.
* Achieve the Right Frosting Consistency: Your buttercream needs to be the right consistency for creating the waves. If it’s too stiff, it will tear the cake or be hard to spread.
If it’s too soft, the waves won’t hold their shape. Aim for a consistency that holds a peak but is still easily spreadable. Adjust with a teaspoon of heavy cream or powdered sugar as needed.
This is crucial for a perfect `Cake with Waves Design`.
* Practice Your Waves: Don’t stress about making the perfect wave on your first try! Use an extra bowl of frosting or even practice on the back of a cookie sheet.
Light, sweeping motions with an offset spatula work best. You want to drag and lift, creating gentle undulations rather than harsh lines for your `wave pattern cake`.
* Chill, Chill, Chill: Chilling your cake at various stages is a game-changer.
Chill the layers before crumb coating, chill after the crumb coat, and chill the final `Cake with Waves Design`. This firms up the butter in the frosting, making it easier to work with, preventing smudges, and ensuring your beautiful `rippled cake` holds its shape.
* Level Cake Layers: Use a serrated knife to level any domed cake layers. Flat layers stack neatly, creating a professional-looking “Cake with Waves Design” without any wobbles.
Mastering the art of cake decoration enhances any baking project, especially when creating stunning visual effects. For more inspiration and practical guidance on transforming even smaller treats into works of art, check out these creative Bento Cake Decorating Ideas.
Storage & Reheating Tips
Proper storage ensures your beautiful “Cake with Waves Design” stays fresh and delicious for as long as possible. As a mom, I know sometimes we need to bake ahead or store leftovers!
* At Room Temperature: If your kitchen is cool (below 70°F/21°C), the frosted `Cake with Waves Design` can sit at room temperature for up to 2 days, loosely covered. Buttercream is stable at cool room temperatures. However, for maximum freshness and if your kitchen is warmer, refrigeration is best.
* In the Refrigerator: For longer storage, cover the entire `Cake with Waves Design` loosely with plastic wrap or place it in an airtight cake carrier. It will stay fresh in the refrigerator for up to 5-7 days. The plastic wrap helps prevent the cake from drying out and absorbing fridge odors.
* Freezing Frosted Cake: Yes, you can freeze your `Cake with Waves Design`! Place the cake (uncovered) in the freezer for about an hour until the frosting is firm. Then, wrap it tightly in several layers of plastic wrap, followed by a layer of aluminum foil.
This prevents freezer burn. The frozen “Cake with Waves Design” will keep for up to 2-3 months.
* Freezing Unfrosted Layers: If you want to bake ahead, cool your cake layers completely, then wrap each layer tightly in plastic wrap and then foil.
Freeze for up to 3 months. Thaw in the refrigerator overnight before frosting your `Cake with Waves Design`.
* Reheating (Thawing) Tips: If serving a refrigerated “Cake with Waves Design,” always let it come to room temperature for at least 30 minutes to an hour before serving.
This allows the buttercream to soften and the cake to become moist and tender again. For frozen cake, thaw it overnight in the refrigerator (still wrapped), then let it sit at room temperature for an hour or two before serving. Enjoying your “ocean wave cake” at room temperature truly brings out its best flavor and texture.
What to Serve With This Recipe
This “Cake with Waves Design” is a centerpiece in itself, but a few thoughtful accompaniments can elevate the experience even further! Think about enhancing the moment, whether it’s a casual treat or a special occasion.

* Fresh Fruit: A simple bowl of fresh berries (strawberries, blueberries, raspberries) or sliced peaches offers a lovely contrast to the sweetness of the `Cake with Waves Design`.
Their natural tartness and vibrant colors complement the cake beautifully, especially for a light summer dessert.
* A Scoop of Vanilla Bean Ice Cream: For an indulgent pairing, a scoop of high-quality vanilla bean ice cream or a light sorbet (lemon or raspberry would be fantastic) alongside a slice of this “ocean wave cake” creates a delightful hot-cold contrast.
* Coffee or Tea: A freshly brewed cup of coffee, a soothing herbal tea, or even a classic black tea makes a wonderful companion. The warm beverage cuts through the richness of the buttercream, making each bite of your `Cake with Waves Design` even more enjoyable.
* Milk: For the kids (and many adults!), a cold glass of milk is the quintessential pairing with a slice of cake.
It’s simple, classic, and always a hit with this “homemade wave cake.”
* A Light Meal: If you’re serving this “Cake with Waves Design” as part of a celebration, keep the main meal light and refreshing.
A simple grilled chicken salad, a fresh pasta primavera, or even delicate fish tacos would lead nicely into this dessert without making everyone feel too full.
* Sparkling Cider or Wine: For a more festive touch, offer sparkling cider for everyone or a crisp, dry sparkling wine for the adults.
The bubbles add a celebratory feel and cleanse the palate beautifully, making your `Cake with Waves Design` feel even more special.
* Other Sweet Treats: If creating a dessert spread, consider adding mini fruit tarts or light cookies that complement the ocean theme. However, this “stunning wave cake” is often enough on its own to truly impress.
Elevating your cake presentation can turn any gathering into a memorable event, making even a simple treat feel extra special. If you’re planning a celebration and want to ensure your dessert makes a statement with refined elegance, find inspiration for a charming Small Birthday Cake Aesthetic.
FAQs
You’ve got questions about this gorgeous “Cake with Waves Design,” and I have answers! Here are some common inquiries to help you master this recipe.
Can I use a cake mix for the base?
Absolutely! If you’re short on time or prefer a shortcut, you can certainly use a good quality vanilla or white cake mix. Just follow the package directions for baking your layers, then proceed with the homemade buttercream and the `Cake with Waves Design` instructions. The real magic of this recipe is in the decorating!
How do I get those perfect waves?
The key to creating the iconic `waves design` on your “Cake with Waves Design” is a combination of layering different colored frostings and then gently dragging an offset spatula or bench scraper. Apply your various shades of blue, green, and white buttercream in random patches or stripes on the sides of the crumb-coated cake. Then, hold your offset spatula nearly parallel to the cake and gently drag it, creating small, undulating motions as you go around.
Don’t press too hard; it’s more about a light touch and letting the colors blend. Practice on a small area first if you’re nervous!
What if I don’t have an offset spatula for the Cake with Waves Design?
No problem at all! You can use the back of a large spoon, a regular flexible silicone spatula, or even a butter knife. The goal is to create gentle ridges and valleys in the frosting, mimicking water movement for your `wavy cake`. Experiment with what you have on hand; sometimes the most unexpected tools yield the best results for your `Cake with Waves Design`.
Can I make this Cake with Waves Design ahead of time?
Yes, absolutely! You can bake the cake layers up to 2-3 days in advance and store them tightly wrapped at room temperature, or freeze them for up to 3 months.
The buttercream can be made up to 5 days ahead and stored in an airtight container in the refrigerator; just let it come to room temperature and re-whip it with your mixer until fluffy before frosting. Once assembled and decorated, the `Cake with Waves Design` will keep well in the refrigerator for 5-7 days.
Why is my buttercream not smooth for the Cake with Waves Design?
Several factors can cause grainy or lumpy buttercream. Ensure your butter is truly softened to room temperature. Always sift your powdered sugar to remove any lumps.
If it still feels grainy, try beating it on medium-high speed for an extra few minutes; sometimes aeration helps. If it’s still an issue, gently warm a small portion of it over a double boiler, then reincorporate it into the main batch and beat again. This often helps dissolve stubborn sugar crystals for a silky smooth `Cake with Waves Design`.
Creating a cake with a waves design often involves specific techniques in cake decorating, utilizing frosting and tools to mimic the gentle undulations of the ocean. These methods are part of a broader field that allows bakers to transform simple ingredients into edible art, showcasing creativity and skill. The extensive world of cake decorating encompasses everything from basic piping to elaborate sculpted designs.
Nutrition Information (per serving)
This “Cake with Waves Design” is a delicious treat, and while exact nutrition can vary based on specific ingredients and serving size, here’s an estimated nutritional breakdown per serving (assuming 12 servings per 8-inch cake):
| Nutrient | Amount (Estimate) |
|---|---|
| Calories | 580 kcal |
| Total Fat | 35 g |
| Saturated Fat | 21 g |
| Cholesterol | 120 mg |
| Sodium | 250 mg |
| Total Carbohydrates | 65 g |
| Dietary Fiber | 1 g |
| Total Sugars | 50 g |
| Protein | 6 g |

Cake with Waves Design
Oh, the simple joys of a homemade cake! I remember the day this "Cake with Waves Design" first came to life in my kitchen. We had just returned from a wonderful family trip to the coast, the sound of the ocean waves still ringing in our ears, and my littlest one, Leo, was absolutely enchanted by the water. He kept talking about the "whooshing waves." I wanted to capture that magic, that serene blue beauty, in a way we could all enjoy. So, on a quiet afternoon, with the kids napping, I got to work. I envisioned a cake that wasn't overly complicated but looked utterly enchanting, like a slice of the ocean itself. This "Cake with Waves Design" became that special treat, a sweet reminder of sandy toes and salty air, a piece of edible art that even a busy mom like me could achieve with love and a few simple steps. It truly brought the beach right into our home, and it quickly became a family favorite, especially for birthday parties or just a "because it's Tuesday" kind of celebration. Every time I make this Cake with Waves Design, it fills our home with warmth and happy memories.
- Total Time: 1 hour 45 mins
- Yield: 12 servings 1x
Ingredients
2 ¾ cups All-purpose flour
2 cups Granulated sugar
1 tablespoon Baking powder
½ teaspoon Salt
1 cup Unsalted butter, softened
4 Large eggs
1 cup Whole milk
2 teaspoons Vanilla extract
3 cups Unsalted butter, softened
9 cups Powdered sugar, sifted
¼ cup Heavy cream
2 teaspoons Vanilla extract
As desired Gel food coloring (blue, green, white)
Instructions
- Prepare Your Pans: Preheat your oven to 350°F (175°C). Grease and flour two 8-inch round cake pans, or line them with parchment paper circles
- Combine Dry Ingredients: In a medium bowl, whisk together the flour, granulated sugar, baking powder, and salt
- Cream Butter and Eggs: In a large mixing bowl, using an electric mixer, cream the softened unsalted butter until light and fluffy. Gradually beat in the large eggs, one at a time, mixing well after each addition. Scrape down the sides of the bowl as needed to incorporate everything fully
- Alternate Dry and Wet: With the mixer on low speed, slowly add about one-third of the dry ingredient mixture to the butter mixture, mixing until just combined. Next, pour in half of the whole milk and vanilla extract, mixing until just incorporated. Repeat this process: add another third of the dry ingredients, then the remaining milk, and finally the last third of the dry ingredients. Mix until just combined, being careful not to overmix
- Divide and Bake: Divide the batter evenly between the two prepared cake pans. Smooth the tops with a spatula. Bake for 28-32 minutes, or until a wooden skewer inserted into the center comes out clea
- Cool: Let the cakes cool in their pans on a wire rack for 10-15 minutes. Then, carefully invert them onto the wire rack to cool completely
- Cream Butter: In a very large mixing bowl, beat the softened unsalted butter with an electric mixer on medium-high speed for 3-5 minutes until it becomes very pale and fluffy
- Add Powdered Sugar: Gradually add the sifted powdered sugar, about 2 cups at a time, beating on low speed until combined, then increasing to medium speed. Continue until all sugar is incorporated
- Add Liquid and Flavor: Pour in the heavy cream (or milk) and vanilla extract. Beat on high speed for another 2-3 minutes, until the frosting is light, fluffy, and smooth. If it’s too thick, add more cream a teaspoon at a time. If it’s too thin, add more powdered sugar a tablespoon at a time
- Divide and Color: Divide the buttercream into several bowls, depending on how many shades of blue/green you want for your Cake with Waves Design. Leave one portion white. Use gel food coloring to tint the remaining portions varying shades of blue and green. Start with a tiny drop and add more for deeper colors. Mix each color thoroughly
- Level Your Cakes: Once completely cool, use a serrated knife to level the tops of your cake layers if they domed during baking. This creates a flat surface for stable stacking
- Crumb Coat: Place one cake layer on your serving plate or cake stand. Spread about ¾ cup of white buttercream evenly over the top. Place the second cake layer on top. Apply a thin, even layer of white buttercream all over the entire cake (top and sides). This is the "crumb coat," which traps any loose crumbs and provides a smooth base. Chill the cake in the refrigerator for 20-30 minutes until the crumb coat is firm
- Apply Colored Frosting: Once the crumb coat is firm, apply thick dollops or stripes of your colored buttercreams (blue, green, white) randomly around the sides and top of the cake. Don't worry about neatness here; a random placement works best for a natural "ocean wave cake."
- Create the Waves: Using a long offset spatula or a bench scraper, gently drag it across the surface of the cake, starting from the bottom and working your way up, or from one side to the other. Apply light pressure and create small, undulating motions, mimicking the movement of waves. Continue going around the cake, slightly overlapping your strokes, until you achieve your desired "waves design." For the top, you can use the same technique or simply swirl the colors with your spatula
- Final Chill: Chill the finished Cake with Waves Design in the refrigerator for at least 30 minutes to allow the frosting to set. This also ensures the waves hold their shape beautifully
Notes
Room Temperature Ingredients are Key: For both the cake and the buttercream, ensure your butter, eggs, and milk are at room temperature. This allows them to emulsify properly.
Don't Overmix: When making the cake batter, mix until just combined. Overmixing develops gluten, leading to a dense, chewy cake.
Sift Your Powdered Sugar: For the smoothest, lump-free buttercream, always sift your powdered sugar.
Use Gel Food Coloring: For vibrant colors without adding too much liquid to your frosting, opt for gel food coloring instead of liquid dyes.
Achieve the Right Frosting Consistency: Your buttercream needs to be the right consistency for creating the waves. Adjust with a teaspoon of heavy cream or powdered sugar as needed.
Chill, Chill, Chill: Chilling your cake at various stages is a game-changer. Chill the layers before crumb coating, chill after the crumb coat, and chill the final Cake with Waves Design.
Storage at Room Temperature: If your kitchen is cool (below 70°F/21°C), the frosted Cake with Waves Design can sit at room temperature for up to 2 days, loosely covered.
Storage in the Refrigerator: For longer storage, cover the entire Cake with Waves Design loosely and store in the refrigerator for up to 5-7 days.
Freezing Frosted Cake: Freeze the cake (uncovered) for about an hour until the frosting is firm. Then, wrap it tightly in several layers of plastic wrap and aluminum foil. Keeps for up to 2-3 months.
Thawing Tips: If serving a refrigerated Cake with Waves Design, always let it come to room temperature for at least 30 minutes to an hour before serving. For frozen cake, thaw it overnight in the refrigerator (still wrapped), then let it sit at room temperature for an hour or two before serving.
- Prep Time: 45 mins
- Cook Time: 30 mins
- Category: Dessert
- Method: Baking
- Cuisine: American
Nutrition
- Serving Size: 1 slice
- Calories: 580 kcal
- Sugar: 50 g
- Sodium: 250 mg
- Fat: 35 g
- Saturated Fat: 21 g
- Unsaturated Fat: 14 g
- Trans Fat: 0 g
- Carbohydrates: 65 g
- Fiber: 1 g
- Protein: 6 g
- Cholesterol: 120 mg