Easy Boneless Chicken Wings Recipe
Introduction
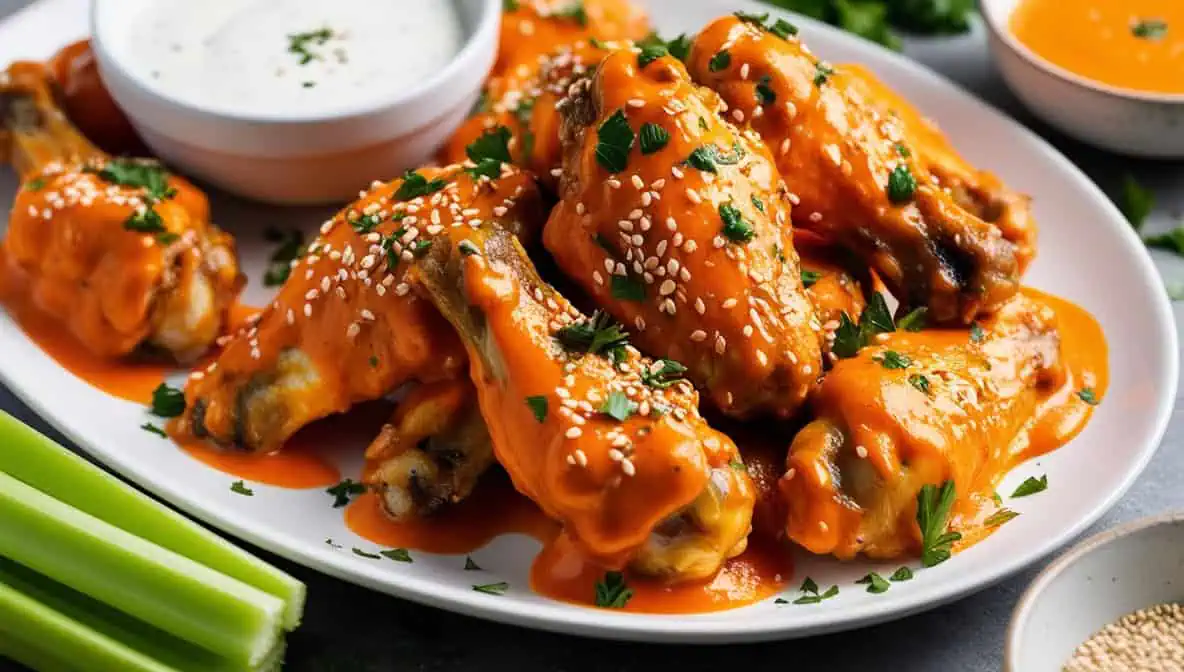
Boneless chicken wings are a crowd-pleaser and a must-have for any gathering. This boneless chicken wings recipe delivers crispy, juicy bites packed with flavor, making it perfect for parties, game days, or casual family dinners. Unlike traditional bone-in wings, boneless chicken wings are made from tender chicken breast or tenderloin, coated in a crispy crust, and tossed in your favorite sauces. Whether you love the classic Buffalo style or prefer sweet and tangy flavors, this recipe is easy to customize and ensures you’ll never miss the bones.
Table of Contents
By making this boneless chicken wings recipe at home, you can control the ingredients, experiment with healthier cooking methods, and create wings that rival your favorite restaurant version. Get ready to learn all the tips and tricks for mastering this delicious dish!
Ingredients
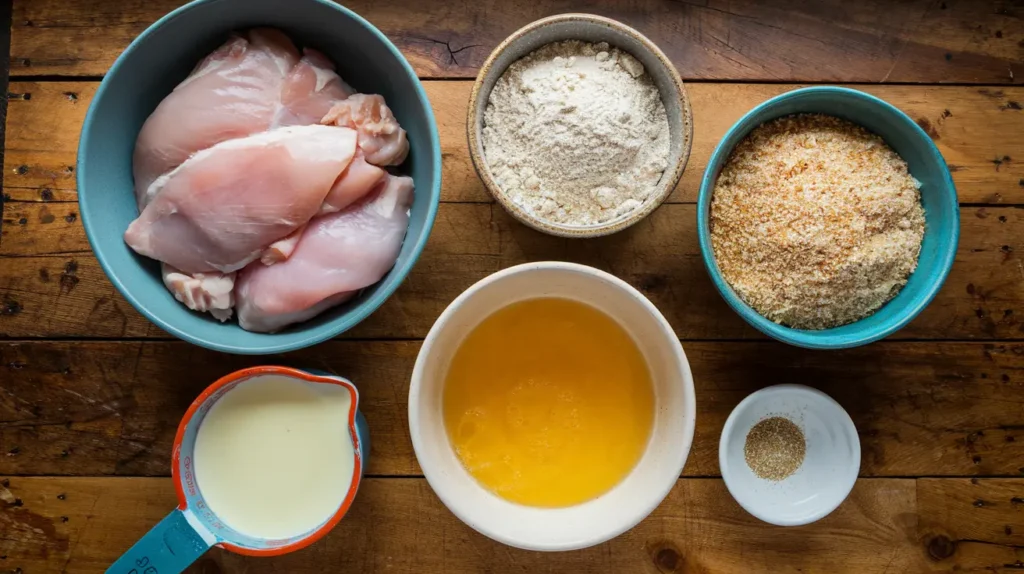
Main Ingredients:
- 1.5 lbs chicken breast or tenderloin
- 2 cups buttermilk
- 1 cup all-purpose flour
- 1 teaspoon garlic powder
- 1 teaspoon onion powder
- 1 teaspoon paprika
- 1 teaspoon salt
- 1/2 teaspoon black pepper
- Vegetable oil (for frying)
Optional Add-ons:
- Buffalo sauce
- Honey mustard
- Ranch or blue cheese dressing
To ensure your boneless chicken wings turn out perfectly crispy and flavorful, having the right tools and equipment is essential. Here’s a detailed list of what you’ll need, along with why each item is important and how it contributes to the process:
1. Mixing Bowls
- Why You Need Them: Mixing bowls are essential for marinating the chicken, preparing the seasoned flour coating, and tossing the chicken in sauces. Opt for at least two medium-to-large bowls to keep the process smooth and organized.
- Tip: Stainless steel or glass bowls are ideal as they’re easy to clean and don’t retain odors.
2. Deep Fryer or Heavy-Bottomed Pot
- Why You Need Them: A deep fryer ensures consistent oil temperature, which is crucial for achieving evenly fried, crispy chicken. If you don’t have a deep fryer, a heavy-bottomed pot works just as well.
- What to Look For: A pot with a thick base helps distribute heat evenly and maintain the desired frying temperature.
- Tip: Use a thermometer to monitor the oil temperature (aim for 350°F/175°C) and prevent undercooked or overly greasy chicken.
3. Tongs or Slotted Spoon
- Why You Need Them: These tools are necessary for safely lowering chicken pieces into the hot oil and removing them once fried. They also help minimize splattering and ensure you handle the chicken gently to avoid breaking the crispy coating.
- Tip: Silicone or stainless-steel tongs with a good grip are ideal for precision handling.
4. Baking Tray with Wire Rack
- Why You Need Them: After frying, placing the chicken on a wire rack allows excess oil to drain away while keeping the chicken crispy. This is better than placing it on paper towels, which can trap steam and make the coating soggy.
- Tip: Line the baking tray with foil or parchment paper for easier cleanup.
5. Air Fryer (Optional)
- Why You Need It: An air fryer is a fantastic alternative for a healthier version of boneless chicken wings. It requires little to no oil and delivers a crispy texture without the added calories from deep frying.
- How to Use It: Preheat the air fryer to 375°F (190°C), place the coated chicken in a single layer, and cook for 12–15 minutes, flipping halfway through.
6. Thermometer
- Why You Need It: A food thermometer is critical to ensure the chicken is fully cooked. The internal temperature should reach 165°F (74°C) to guarantee it’s safe to eat.
- Tip: Use an instant-read thermometer for quick and accurate readings.
7. Whisk and Measuring Tools
- Why You Need Them: A whisk helps evenly combine ingredients for the marinade and the flour coating. Accurate measurements are vital to maintaining the right balance of spices and flavors.
- Tip: Invest in a set of dry and liquid measuring cups for precision.
8. Saucepan
- Why You Need It: A small saucepan is ideal for preparing your favorite sauces, like classic Buffalo or sweet and spicy glazes. It allows you to simmer and mix the ingredients evenly before tossing the chicken in the sauce.
- Tip: Use a non-stick or stainless-steel saucepan for easy stirring and cleanup.
9. Cutting Board and Knife
- Why You Need Them: A sturdy cutting board and a sharp knife are essential for cutting the chicken into evenly sized pieces, ensuring they cook uniformly.
- Tip: Use a separate cutting board for raw chicken to prevent cross-contamination.
10. Kitchen Towels or Paper Towels
- Why You Need Them: Keeping your workspace clean is crucial when handling raw chicken and frying oil. Towels also come in handy for patting the chicken dry before marinating, which helps the buttermilk and flour adhere better.
- Tip: Have a designated towel for handling raw chicken to avoid accidental contamination.
11. Oil Splatter Guard (Optional)
- Why You Need It: If you’re frying on the stovetop, a splatter guard minimizes mess and keeps hot oil from splashing onto your countertops and hands.
- Tip: Choose a guard that fits snugly over your pot or pan.
12. Storage Containers
- Why You Need Them: If you’re making the wings ahead of time or storing leftovers, airtight containers help keep them fresh.
- Tip: Reheat leftovers in an air fryer or oven to restore crispiness.
With these tools and equipment in hand, your cooking process will be smoother, safer, and more enjoyable. Investing in quality tools not only enhances your cooking experience but also helps you achieve consistent, professional-quality results every time you make boneless chicken wings.
Preparing the Chicken
Step 1: Brining the Chicken To enhance the juiciness and flavor, consider brining the chicken. This step is optional but highly recommended.
Step 2: Marinating
- Cut the chicken breast or tenderloin into bite-sized pieces.
- In a bowl, combine the buttermilk with a pinch of garlic powder and paprika.
- Submerge the chicken pieces in the buttermilk mixture. Cover and refrigerate for at least 2 hours (or overnight for better flavor).
Coating and Frying
Step 1: Preparing the Coating
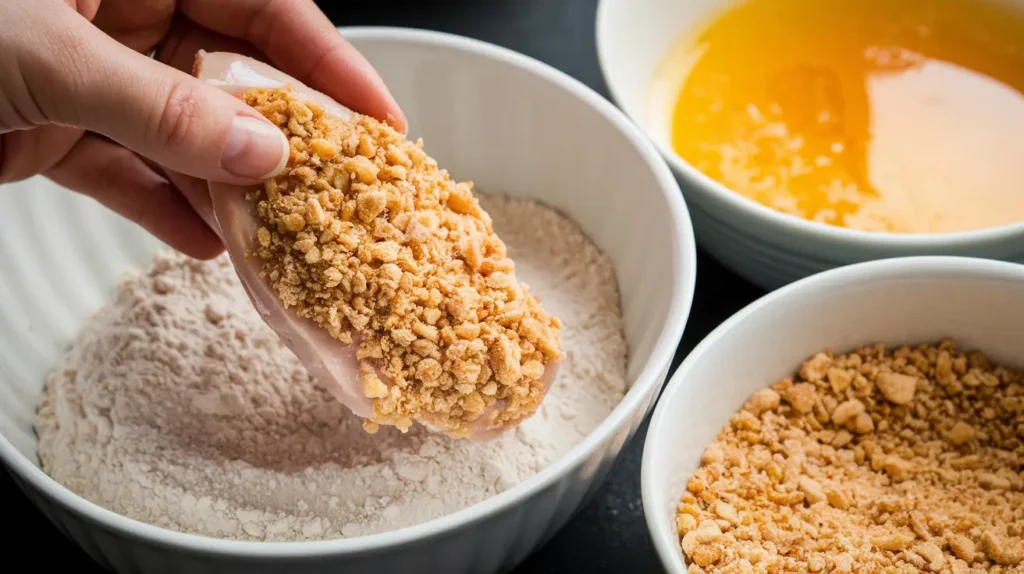
- In a separate bowl, mix the flour, garlic powder, onion powder, paprika, salt, and pepper.
- Remove the chicken pieces from the buttermilk, letting the excess drip off, and dredge them in the flour mixture. Ensure each piece is thoroughly coated.
Step 2: Frying
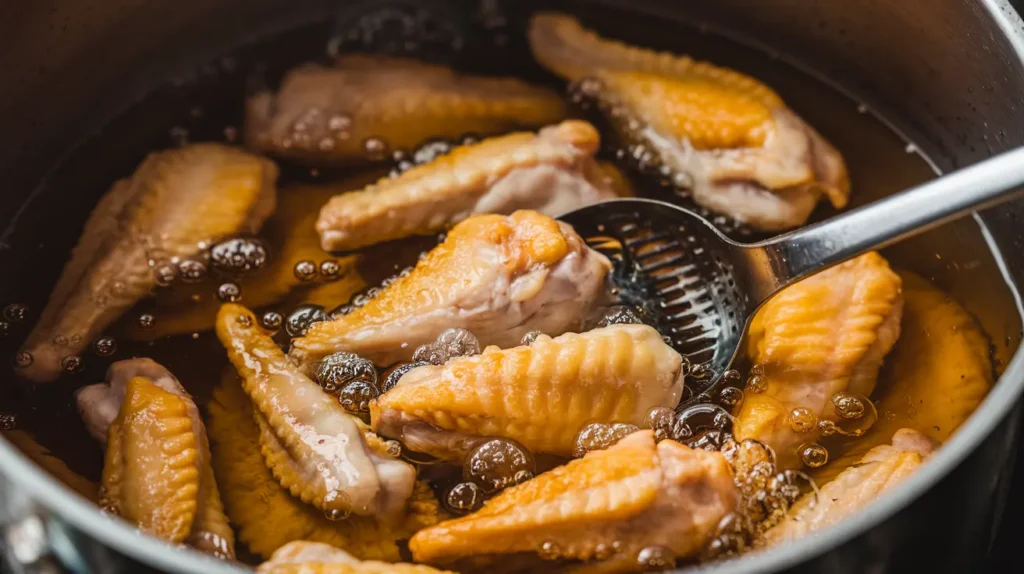
- Heat vegetable oil in a deep fryer or pot to 350°F (175°C).
- Fry the chicken pieces in batches, ensuring not to overcrowd the pot. Cook for about 4-5 minutes, or until golden brown and fully cooked (internal temperature of 165°F/74°C).
- Place the fried chicken on a wire rack to drain excess oil.
For a healthier alternative, consider using an air fryer. Learn more about air fryer techniques in Air Fryer Dinner Recipes.
Saucing Options
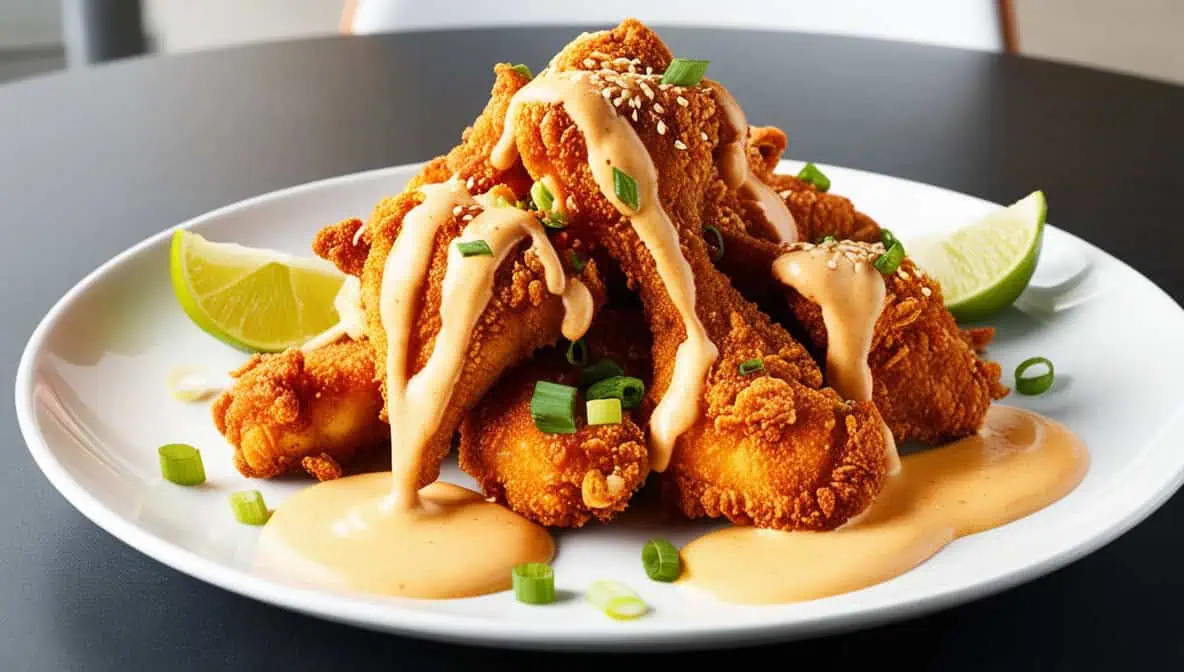
Boneless chicken wings are versatile and pair beautifully with a variety of sauces. Here are a few popular options:
Classic Buffalo Sauce
- Ingredients: Butter, hot sauce, and a splash of vinegar.
- Method: Melt the butter in a saucepan, add hot sauce, and stir well. Toss the fried chicken pieces in the sauce until evenly coated.
Sweet and Spicy Glaze
- Ingredients: Honey, sriracha, and soy sauce.
- Method: Combine the ingredients in a saucepan and simmer until slightly thickened. Coat the chicken evenly.
Garlic Parmesan Sauce
- Ingredients: Minced garlic, butter, Parmesan cheese, and heavy cream.
- Method: Sauté garlic in butter, then add heavy cream and Parmesan. Toss the chicken in the sauce for a rich and creamy finish.
Serving Suggestions
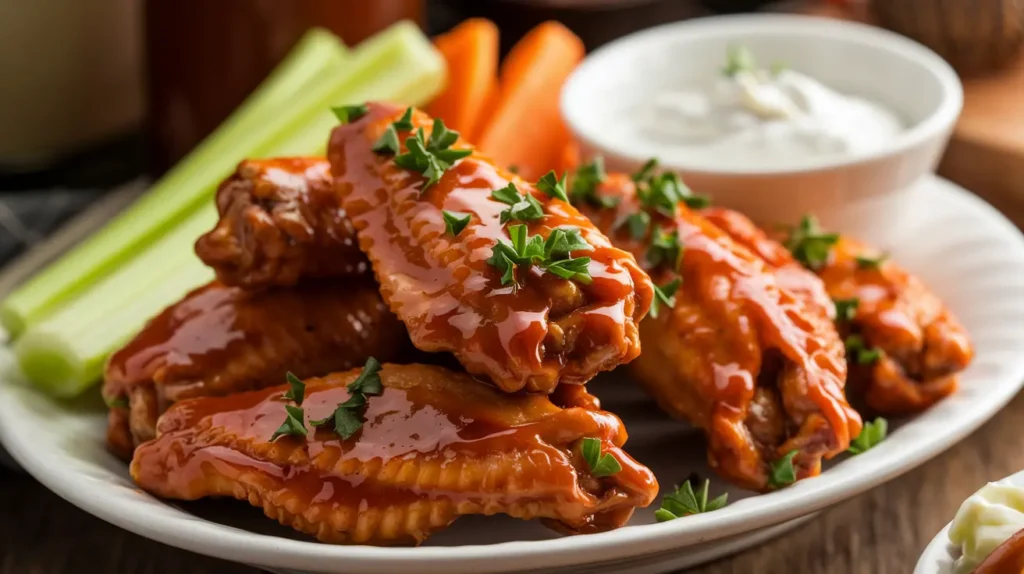
Boneless chicken wings are best served fresh and hot. Here are some ideas to elevate your presentation:
- Arrange the wings on a platter with celery and carrot sticks.
- Offer a variety of dipping sauces such as ranch, blue cheese, or honey mustard.
- Pair the wings with sides like fries, coleslaw, or a fresh salad for a complete meal.
Looking for healthier meal inspiration? Explore Healthy Lunch Recipes.
Tips and Tricks for Perfect Boneless Chicken Wings
Mastering the art of boneless chicken wings is easier when you have a few expert tips and tricks up your sleeve. These small adjustments can make a big difference in the flavor, texture, and overall success of your dish.
1. Achieving Maximum Crispiness
- Rest the Coated Chicken Before Frying: After dredging the chicken in the flour mixture, let it rest for 5–10 minutes. This allows the coating to adhere better, resulting in a crispier exterior.
- Double Coat for Extra Crunch: For an ultra-crispy texture, dip the chicken back into the buttermilk and flour mixture for a second coat before frying.
- Preheat the Oil: Always make sure your oil is fully heated to 350°F (175°C) before frying. Cold oil can make the coating greasy and soggy.
2. Marination Secrets
- Use Buttermilk for Tender Chicken: Buttermilk not only enhances flavor but also tenderizes the chicken, ensuring juicy bites.
- Add Spices to the Marinade: Enhance the flavor by adding garlic powder, onion powder, paprika, or cayenne to the buttermilk. The spices infuse the chicken with layers of taste.
- Marinate Overnight for Maximum Flavor: While two hours is sufficient, letting the chicken sit in the marinade overnight will make it even more flavorful and tender.
3. Frying Techniques
- Don’t Overcrowd the Pot: Fry in small batches to maintain consistent oil temperature. Overcrowding lowers the oil temperature, leading to uneven cooking.
- Keep Oil Temperature Consistent: Use a thermometer to monitor the oil. If the temperature drops too low, the chicken will absorb excess oil; if it gets too high, the coating may burn.
- Drain Properly: After frying, place the chicken on a wire rack instead of paper towels. This prevents the wings from steaming and losing their crispiness.
4. Air Fryer Tips
- Preheat the Air Fryer: Just like an oven, preheating your air fryer ensures even cooking and a crispy exterior.
- Use a Light Oil Spray: Lightly spray the coated chicken with cooking oil before air frying. This helps the coating crisp up without excess grease.
- Flip for Even Cooking: Turn the chicken halfway through the cooking time to ensure all sides are crispy and golden.
5. Saucing Like a Pro
- Toss While Hot: Always toss your chicken in the sauce while it’s still hot. The heat helps the sauce adhere better and absorb into the coating.
- Serve Sauces on the Side: For gatherings, consider serving a variety of dipping sauces on the side, allowing guests to customize their flavors.
6. Healthier Alternatives
- Bake Instead of Frying: For a healthier option, bake the chicken on a wire rack at 400°F (200°C) for 20–25 minutes. Spray with oil for a crispy finish.
- Opt for Whole Wheat Flour: Substitute all-purpose flour with whole wheat or gluten-free flour to make the recipe more nutritious and suitable for dietary restrictions.
7. Adding Flavors to the Coating
- Experiment with Spices: Add a pinch of chili powder, smoked paprika, or dried herbs to the flour mixture for extra flavor.
- Use Cornstarch for Extra Crispiness: Replace a portion of the flour with cornstarch to make the coating lighter and crispier.
- Incorporate Parmesan Cheese: For a unique twist, mix grated Parmesan into the flour coating for a savory, cheesy flavor.
8. Serving and Presentation Tips
- Keep Wings Warm: If you’re frying in batches, keep the cooked wings warm in a 200°F (93°C) oven while finishing the rest.
- Garnish for Appeal: Sprinkle freshly chopped parsley, grated Parmesan, or a dash of smoked paprika over the wings before serving for a professional touch.
- Pair with Refreshing Sides: Serve with celery sticks, carrot sticks, and a creamy ranch or blue cheese dip to balance the flavors.
9. Storing and Reheating Leftovers
- Refrigerate Properly: Store leftovers in an airtight container in the refrigerator for up to three days.
- Reheat Without Losing Crispiness: Reheat wings in an air fryer or oven to restore their crunchy texture. Avoid microwaving, as it can make the coating soggy.
10. Troubleshooting Common Issues
- Coating Falls Off: Ensure the chicken is well-dried before marinating and press the flour coating firmly onto the chicken pieces.
- Chicken Is Dry: Avoid overcooking. Use a thermometer to check the internal temperature (165°F/74°C) and remove the chicken immediately once it’s done.
- Oil Splattering: Pat the chicken dry before dredging to minimize excess moisture, which causes splattering during frying.
Frequently Asked Questions
Q: Can I make this recipe gluten-free?
Yes! Substitute all-purpose flour with a gluten-free flour blend for a delicious gluten-free version.
Q: What’s the best oil for frying?
Vegetable oil or canola oil works best for frying due to their high smoke points.
Q: How can I store boneless chicken wings?
Store them in an airtight container in the fridge for up to 3 days. Reheat in the oven or air fryer to maintain texture.
Conclusion
Making boneless chicken wings at home is easy and rewarding. This recipe offers the perfect balance of crispiness and flavor, with plenty of options for customization. Whether you prefer classic Buffalo wings or something sweeter, this guide has you covered.
For more easy and delicious chicken recipes, check out Easy Chicken Recipes. Happy cooking!

1 Comment
[…] more flavor-forward ideas like Boneless Chicken Wings for perfect game-night […]
Comments are closed.