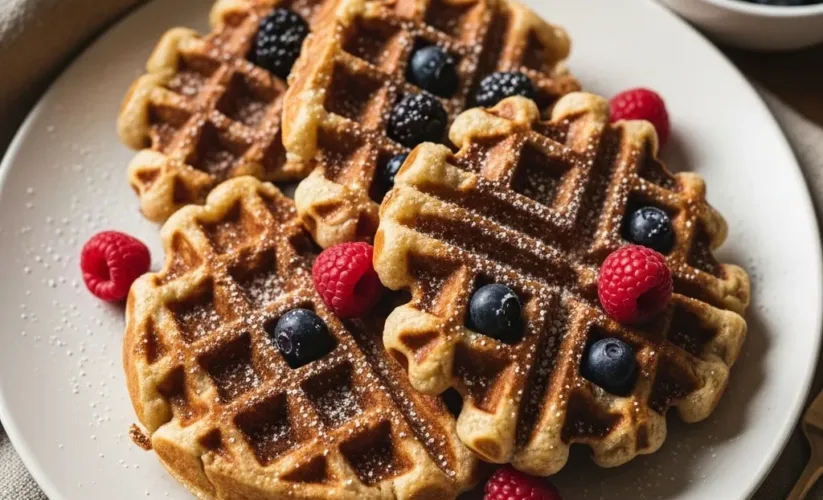
Gluten Free Waffles
The aroma of warm, vanilla-scented batter sizzling on a hot iron always transports me back to my childhood kitchen. Now, as a mom of three, those memories are even more precious, especially since discovering that my youngest has a gluten sensitivity. For a while, I thought our Sunday waffle tradition was over, but then I found it – the perfect recipe for *gluten free waffles*.
It took some experimenting, a few flat batches, and some really dense ones, but eventually, I perfected a recipe that delivers light, fluffy, and absolutely delicious *gluten free waffles* every single time. My kids don’t even notice the difference! They just know they’re getting a stack of love, drizzled with syrup and piled high with berries.
These aren’t just *gluten free waffles*; they’re a symbol of how food can adapt, how love can find a way, and how everyone can still enjoy those cherished breakfast moments together. Forget everything you thought you knew about gluten-free baking – this recipe for easy *gluten free waffles* will change your mind and become a family favorite.
Why You’ll Love These Fluffy Gluten Free Waffles
You will adore this recipe for so many reasons. First, these are the *best gluten free waffles* you will ever make. Seriously!
They taste just like classic waffles, only without the gluten. No one will guess they’re gluten-free. Secondly, they are incredibly easy to prepare.
My goal in the kitchen is always simple, nourishing, and delicious food, and these homemade *gluten free waffles* fit that bill perfectly. You likely have most of the ingredients in your pantry right now. Furthermore, this recipe is incredibly versatile.
You can customize them with your favorite mix-ins or toppings. We make these fluffy *gluten free waffles* for weekend brunch, special occasions, or even a quick weekday breakfast. They freeze beautifully, making meal prep a breeze.
Imagine having a stack of amazing *gluten free waffles* ready to go on a busy morning! This recipe brings joy and deliciousness to your breakfast table, making everyone happy.
Ingredients You’ll Need
Gathering your ingredients is the first step to making these wonderful *gluten free waffles*. You will find many common items on this list. Using a good quality gluten-free all-purpose flour blend is key for the best texture. Make sure it contains xanthan gum, or add a quarter teaspoon if it doesn’t.

| Ingredient | Quantity |
|---|---|
| Gluten-Free All-Purpose Flour Blend | 1 ½ cups |
| Granulated Sugar | 2 tablespoons |
| Baking Powder | 1 tablespoon |
| Salt | ½ teaspoon |
| Large Eggs | 2 |
| Milk (dairy or non-dairy) | 1 ¼ cups |
| Melted Unsalted Butter (or coconut oil) | ¼ cup |
| Vanilla Extract | 1 teaspoon |
Substitutions & Variations
This *gluten free waffles* recipe offers excellent flexibility. You can easily adapt it to suit different dietary needs or taste preferences.
* Dairy-Free: Simply swap the regular milk for your favorite non-dairy alternative. Almond milk, soy milk, or oat milk work beautifully. For the butter, use melted coconut oil or a dairy-free butter substitute.
Your *gluten free waffles* will still be incredibly tasty.
* Egg-Free: For an egg allergy, try using flax eggs. Combine 2 tablespoons ground flaxseed with 6 tablespoons water.
Let it sit for 5 minutes until it thickens. This substitution creates slightly denser *gluten free waffles*, but they remain delicious.
* Flour Blend: While I recommend a good quality gluten-free all-purpose flour blend with xanthan gum for optimal results, you can experiment.
Some blends might absorb liquid differently, so you might need to adjust the milk slightly. Ensure your blend is designed for baking.
* Flavor Boosts: Elevate your *gluten free waffles* with extra flavors.
Add a pinch of cinnamon, nutmeg, or cardamom to the dry ingredients. A teaspoon of almond extract instead of vanilla offers a lovely change. Citrus zest, like lemon or orange, brightens the flavor profile.
* Mix-Ins: The possibilities are endless! Fold in ½ cup of chocolate chips for a sweet treat. Fresh berries like blueberries or raspberries are fantastic additions.
Diced apples or bananas also work wonderfully. Just be careful not to overmix the batter once you add them. These easy *gluten free waffles* welcome creativity.
* Savory Waffles: Omit the sugar entirely. Add a pinch of garlic powder, onion powder, and dried herbs like chives or thyme to the batter. Serve them with fried chicken, a poached egg, or smoked salmon. Savory *gluten free waffles* are a delightful dinner option.
Just as these gluten-free waffles offer a delightful canvas for customization, consider exploring other indulgent and adaptable desserts. For a sweet treat that allows for creative twists and appeals to all ages, learn how to make a luscious no-churn banana split ice cream that’s perfect for any occasion.
Step-by-Step Instructions
Making these *gluten free waffles* is straightforward. Follow these simple steps for perfect results every time.
Note: This video is for demonstration purposes and may use a slightly different method.
1. Prepare Your Waffle Iron: Plug in your waffle iron. Preheat it according to the manufacturer’s instructions.
Lightly grease the grids with cooking spray or melted butter, even if it’s non-stick. This ensures your *gluten free waffles* release easily.
2.
Combine Dry Ingredients: In a large mixing bowl, whisk together the gluten-free all-purpose flour blend, granulated sugar, baking powder, and salt. Make sure there are no lumps.
3.
Mix Wet Ingredients: In a separate medium bowl, whisk the eggs until light and frothy. Then, add the milk, melted butter (or coconut oil), and vanilla extract. Whisk until well combined.
4. Combine Wet and Dry: Pour the wet ingredients into the dry ingredients. Stir gently with a whisk or spatula until just combined.
A few small lumps are perfectly fine. Do not overmix the batter; overmixing can make your *gluten free waffles* tough. This is a crucial step for light, fluffy *gluten free waffles*.
5. Rest the Batter (Optional but Recommended): Let the batter rest for 5-10 minutes. This allows the gluten-free flour to hydrate fully, leading to a better texture.
While not strictly necessary, it truly improves your *gluten free waffles*.
6. Cook the Waffles: Pour about ½ to ¾ cup of batter onto the hot waffle iron.
Adjust the amount based on your iron’s size. Close the lid and cook according to your waffle iron’s settings, usually for 3-5 minutes, or until golden brown and steam stops escaping.
7.
Serve Immediately: Carefully remove the cooked waffle with a fork or tongs. Serve your delicious *gluten free waffles* hot with your favorite toppings.
8.
Repeat: Continue cooking the remaining batter, greasing the iron between batches if necessary. Keep finished waffles warm on a baking rack in a low oven (around 200°F/90°C) while you cook the rest. Enjoy your homemade *gluten free waffles*!
Pro Tips for Success
Achieving perfect *gluten free waffles* consistently involves a few key techniques. These tips will help you create light, crispy, and flavorful waffles every time.

* Do Not Overmix: This is perhaps the most important rule for any waffle or pancake batter, especially for gluten-free versions. Overmixing develops toughness. Mix until just combined; a few lumps are fine.
This ensures your *gluten free waffles* stay tender.
* Let the Batter Rest: Give your gluten-free batter a short rest, 5-10 minutes. This allows the gluten-free flour to fully absorb the liquids.
This step makes a significant difference in the texture, resulting in fluffier *gluten free waffles*.
* Proper Waffle Iron Temperature: Ensure your waffle iron is fully preheated before adding batter. A hot iron helps create that desirable crispy exterior.
If your iron has a “ready” light, wait for it.
* Grease Your Iron: Even if your waffle iron is non-stick, a light coat of cooking spray or melted butter before each waffle prevents sticking and helps create a beautiful golden crust. This is particularly helpful for *gluten free waffles* which can sometimes be more prone to sticking.
* Don’t Overfill: Resist the urge to pour too much batter. Overfilling results in unevenly cooked waffles and messy overflow. Learn the correct amount for your specific waffle iron.
* Keep Them Warm: If you are cooking multiple batches, preheat your oven to 200°F (90°C). Place cooked *gluten free waffles* directly onto a wire rack set over a baking sheet in the warm oven. This keeps them warm and prevents them from getting soggy.
* Use Fresh Baking Powder: Baking powder loses its potency over time. Always use fresh baking powder for maximum lift. This ensures your *gluten free waffles* rise beautifully.
* Adjust Liquid if Needed: Different gluten-free flour blends absorb liquid differently. If your batter seems too thick, add milk a tablespoon at a time until it reaches a pourable but not watery consistency. If it seems too thin, a tablespoon or two more of flour might help. You want a thick yet pourable batter for perfect *gluten free waffles*.
Mastering these crucial techniques for your gluten-free waffles is just one step towards a perfect morning meal. If you’re looking to host an unforgettable spread and impress your guests, ensure your entire breakfast experience is flawless with our guide to elevating your Sunday brunch.
Storage & Reheating Tips
Having leftover *gluten free waffles* is a wonderful thing! They store incredibly well and reheat to crispy perfection, making them ideal for quick breakfasts or snacks.
* Cool Completely: Before storing, let your cooked *gluten free waffles* cool completely on a wire rack. Stacking warm waffles will trap steam, making them soggy.
* Short-Term Storage (Refrigerator): Place cooled *gluten free waffles* in an airtight container or a resealable bag.
They will stay fresh in the refrigerator for up to 3-4 days.
* Long-Term Storage (Freezer): For longer storage, flash freeze the cooled waffles first. Arrange them in a single layer on a baking sheet and freeze for about 30 minutes, or until solid.
Then, transfer them to a freezer-safe bag or airtight container. They will last for up to 3 months. Freezing individually prevents them from sticking together, allowing you to grab just one or two *gluten free waffles* as needed.
* Reheating in Toaster/Toaster Oven: This is my favorite method! Place frozen or thawed *gluten free waffles* directly into the toaster or toaster oven. Toast on a medium setting until heated through and crispy.
This method brings back that fresh-off-the-iron texture.
* Reheating in the Oven: Preheat your oven to 350°F (175°C). Arrange *gluten free waffles* in a single layer on a baking sheet.
Heat for 5-10 minutes, or until warmed through and slightly crispy.
* Reheating in Air Fryer: Place waffles in a single layer in your air fryer basket. Air fry at 350°F (175°C) for 3-5 minutes, flipping halfway through, until hot and crispy.
This method is excellent for frozen *gluten free waffles*.
* Microwave (Not Recommended for Crispy): While you can microwave *gluten free waffles* to warm them, they will likely turn out soft, not crispy. Only use this method if crispness isn’t a priority.
What to Serve With This Recipe
These light and fluffy *gluten free waffles* are a blank canvas for so many delicious toppings and sides. Whether you prefer sweet or savory, there’s something for everyone!

* Classic Sweet Toppings:
* Maple Syrup: A timeless choice! Pure maple syrup is always the best.
* Fresh Berries: Strawberries, blueberries, raspberries, or a mixed berry medley add freshness and natural sweetness.
* Whipped Cream: Homemade or store-bought, whipped cream is a luxurious addition.
* Powdered Sugar: A simple dusting provides an elegant touch.
* Fruit Compote: Warm berry or apple compote offers a burst of flavor.
* Chocolate Sauce or Nutella: For the ultimate indulgence, drizzle with your favorite chocolate sauce.
* Nut Butters: Peanut butter, almond butter, or cashew butter spread on warm waffles adds protein and richness.
* Savory Pairings:
* Crispy Bacon or Sausage: A perfect salty complement to the slightly sweet waffles.
* Fried Chicken: Waffles and fried chicken are a match made in heaven.
* Scrambled or Poached Eggs: Make it a full breakfast platter with your favorite egg preparation.
* Avocado: Sliced avocado with a sprinkle of everything bagel seasoning for a healthy, savory twist.
* Side Dishes:
* Fresh Fruit Salad: A light and refreshing side.
* Yogurt: A dollop of Greek yogurt with a drizzle of honey provides protein.
* Breakfast Potatoes: Roasted or pan-fried potatoes complete the brunch experience.
No matter what you choose, these tender *gluten free waffles* will be the star of your meal.
While your freshly made gluten-free waffles are ideal, sometimes a quick solution is needed for busy mornings. For those times when convenience is key but taste remains a priority, discover the best options and tips for delicious frozen breakfast foods that save time without sacrificing quality.
FAQs
Why are my gluten free waffles not crispy?
Several factors affect crispiness. Ensure your waffle iron is fully preheated. Don’t overfill the iron; too much batter can lead to steamed, not crispy, waffles.
Additionally, allow your waffles to cook long enough; wait until steam stops escaping. For extra crispiness, try letting the cooked *gluten free waffles* rest on a wire rack in a warm oven for a few minutes after cooking. Reheating in a toaster is also great for crispiness.
Can I make this dairy-free?
Absolutely! This recipe is easily adaptable for dairy-free diets. Simply substitute the milk with your favorite non-dairy milk, such as almond, soy, or oat milk.
For the melted butter, use an equal amount of melted coconut oil or a dairy-free butter alternative. Your *gluten free waffles* will still be delicious and moist.
Can I use a different gluten-free flour blend?
Yes, but be aware that different gluten-free flour blends absorb liquid differently. I recommend a good quality all-purpose gluten-free flour blend that contains xanthan gum. If your blend doesn’t include xanthan gum, add ¼ teaspoon to the dry ingredients. You might need to adjust the amount of milk slightly to achieve the desired batter consistency – thick yet pourable for your *gluten free waffles*.
How long do gluten free waffles last?
Cooked *gluten free waffles* store well. In an airtight container in the refrigerator, they will remain fresh for 3-4 days. If you freeze them properly in a freezer-safe bag or container, they can last for up to 3 months. Always ensure they are completely cooled before storing to prevent sogginess.
Can I make gluten free waffles ahead of time?
Yes, you can. You can prepare the batter a day in advance and store it in an airtight container in the refrigerator. Just give it a good stir before using, as it might thicken slightly.
Alternatively, cook the *gluten free waffles* entirely, then cool and store them. Reheat them using your favorite method for a quick and easy breakfast.
Why do my gluten free waffles stick to the iron?
Several reasons can cause sticking. First, ensure your waffle iron is properly preheated. Second, lightly grease the iron grids with cooking spray or melted butter before each batch, even if it’s a non-stick surface.
Sometimes, insufficient fat in the batter can also contribute to sticking. Make sure you’re using the recommended amount of butter or oil. Finally, don’t open the iron too early; let the waffles cook fully until they easily release.
Gluten-free waffles provide a delicious alternative for individuals managing celiac disease or gluten sensitivity, allowing them to enjoy a classic breakfast without discomfort. This dietary approach, which involves avoiding proteins found in wheat, barley, and rye, has become increasingly prevalent, leading to a wide array of specialized products and recipes. The goal of a gluten-free diet is to alleviate symptoms and promote gut health, demonstrating how culinary innovation supports diverse nutritional needs.
Nutrition Information (per serving)
(Estimates are based on approximately 8 servings per recipe, without toppings.)
| Nutrient | Amount |
|---|---|
| Calories | 180 kcal |
| Total Fat | 8g |
| Saturated Fat | 4g |
| Cholesterol | 55mg |
| Sodium | 270mg |
| Total Carbohydrates | 24g |
| Dietary Fiber | 1g |
| Total Sugars | 6g |
| Protein | 4g |
gluten free waffles

A cherished family recipe for light, fluffy, and delicious gluten-free waffles, perfected to ensure everyone can enjoy Sunday breakfast traditions without gluten. These easy-to-make waffles taste just like classic ones, making them a family favorite even for those without sensitivities.
- Prep Time: 20 mins
- Cook Time: 20 mins
- Total Time: 40 mins
- Yield: 8 servings 1x
- Category: Breakfast
- Method: Cooking
- Cuisine: American
- Diet: Gluten Free
Ingredients
1 ½ cups Gluten-Free All-Purpose Flour Blend
2 tablespoons Granulated Sugar
1 tablespoon Baking Powder
½ teaspoon Salt
2 Large Eggs
1 ¼ cups Milk (dairy or non-dairy)
¼ cup Melted Unsalted Butter (or coconut oil)
1 teaspoon Vanilla Extract
Instructions
- Prepare Your Waffle Iron: Plug in your waffle iron. Preheat it according to the manufacturer's instructions. Lightly grease the grids with cooking spray or melted butter, even if it's non-stick. This ensures your gluten free waffles release easily
- Combine Dry Ingredients: In a large mixing bowl, whisk together the gluten-free all-purpose flour blend, granulated sugar, baking powder, and salt. Make sure there are no lumps
- Mix Wet Ingredients: In a separate medium bowl, whisk the eggs until light and frothy. Then, add the milk, melted butter (or coconut oil), and vanilla extract. Whisk until well combined
- Combine Wet and Dry: Pour the wet ingredients into the dry ingredients. Stir gently with a whisk or spatula until just combined. A few small lumps are perfectly fine. Do not overmix the batter; overmixing can make your gluten free waffles tough. This is a crucial step for light, fluffy gluten free waffles
- Rest the Batter (Optional but Recommended): Let the batter rest for 5-10 minutes. This allows the gluten-free flour to hydrate fully, leading to a better texture. While not strictly necessary, it truly improves your gluten free waffles
- Cook the Waffles: Pour about ½ to ¾ cup of batter onto the hot waffle iron. Adjust the amount based on your iron's size. Close the lid and cook according to your waffle iron's settings, usually for 3-5 minutes, or until golden brown and steam stops escaping
- Serve Immediately: Carefully remove the cooked waffle with a fork or tongs. Serve your delicious gluten free waffles hot with your favorite toppings
- Repeat: Continue cooking the remaining batter, greasing the iron between batches if necessary. Keep finished waffles warm on a baking rack in a low oven (around 200°F/90°C) while you cook the rest. Enjoy your homemade gluten free waffles!
Notes
Do not overmix the batter; mix until just combined for tender waffles.
Let the batter rest for 5-10 minutes before cooking to allow the gluten-free flour to hydrate, resulting in a better, fluffier texture.
Ensure your waffle iron is fully preheated and lightly greased before each waffle for a crispy exterior and easy release.
Leftover cooked waffles can be stored in an airtight container in the refrigerator for 3-4 days or frozen for up to 3 months. Reheat them in a toaster or oven for the best crispy results.
Nutrition
- Serving Size: 1 serving
- Calories: 180 kcal
- Sugar: 6g
- Sodium: 270mg
- Fat: 8g
- Saturated Fat: 4g
- Unsaturated Fat: 4g
- Trans Fat: 0g
- Carbohydrates: 24g
- Fiber: 1g
- Protein: 4g
- Cholesterol: 55mg