Sweet 16 Birthday Cake
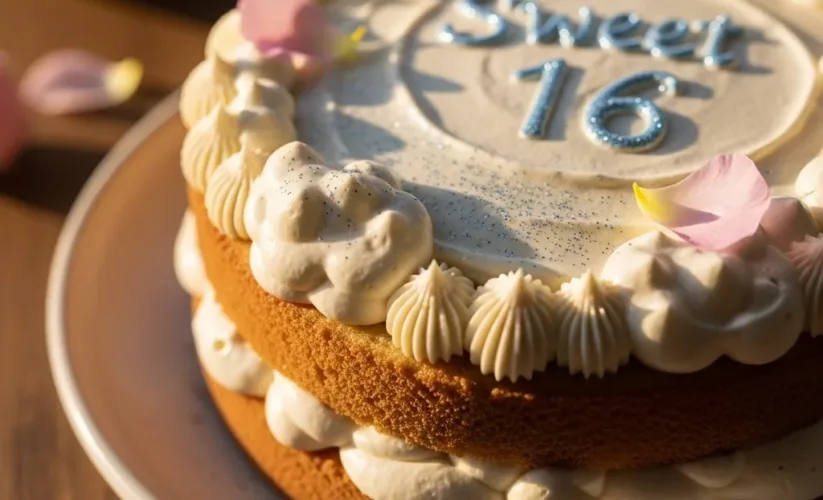
Growing up, my kitchen was always the heart of our home. It wasn’t just a place to cook; it was where memories baked, where laughter bubbled, and where every special occasion found its sweet centerpiece. I remember my own Sweet 16 like it was yesterday—a whirlwind of pink streamers, terrible 90s music, and a somewhat lopsided, but incredibly delicious, homemade birthday cake.
It wasn’t perfect, but it was made with love, and that’s what mattered most. Now, as a mom of three, I carry that same tradition forward. Crafting a beautiful, heartfelt Sweet 16 Birthday Cake for your child, niece, or friend is more than just baking; it’s about celebrating a monumental milestone, marking the exciting journey into young adulthood.
This isn’t just any cake; it’s a symbol of dreams, growth, and the sweet promise of what’s to come. This recipe for a Sweet 16 Birthday Cake is designed to be approachable yet impressive, ensuring you create a show-stopping dessert that tastes as good as it looks, making those precious memories last a lifetime.
Why You’ll Love This Recipe
As a mom, I always look for recipes that deliver big on flavor and presentation without demanding a full day in the kitchen. This Sweet 16 Birthday Cake recipe absolutely hits the mark! You will adore how simple yet elegant this cake turns out.
It features a wonderfully moist vanilla sponge, perfectly tender and fluffy, which serves as the ideal canvas for any decoration. Furthermore, the light and creamy buttercream frosting is incredibly easy to whip up and pipes beautifully, allowing even novice bakers to achieve a professional-looking finish. We focus on nourishing ingredients that taste fantastic, ensuring everyone enjoys a slice.
This cake isn’t just for eating; it’s for celebrating, for creating those cherished moments you and your loved ones will talk about for years. Making this special Sweet 16 Birthday Cake brings so much joy, and you will feel so proud presenting this homemade masterpiece.
Ingredients You’ll Need
Making this spectacular Sweet 16 Birthday Cake starts with quality ingredients. Gather these simple items, and you will be well on your way to baking a masterpiece. You likely have many of these staples already in your pantry!

| For the Cake | For the Vanilla Buttercream Frosting |
|---|---|
| 2 ½ cups all-purpose flour | 1 cup (2 sticks) unsalted butter, softened |
| 1 ½ cups granulated sugar | 4 cups powdered sugar, sifted |
| 1 tablespoon baking powder | 2-3 tablespoons whole milk or heavy cream |
| ½ teaspoon salt | 2 teaspoons pure vanilla extract |
| 1 cup (2 sticks) unsalted butter, softened | Pinch of salt |
| 1 cup whole milk, at room temperature | |
| 2 large eggs, at room temperature | |
| 2 teaspoons pure vanilla extract |
Substitutions & Variations
You can easily customize this Sweet 16 Birthday Cake to suit any preference or dietary need. That’s the beauty of baking at home!
* Flour Alternatives: For a gluten-free Sweet 16 Birthday Cake, substitute the all-purpose flour with a 1:1 gluten-free baking blend that contains xanthan gum. Ensure you measure by weight for best results.
* Dairy-Free Options: Swap the butter for a good quality plant-based butter alternative in both the cake and frosting.
Use unsweetened almond milk or oat milk instead of whole milk. The texture remains surprisingly similar.
* Flavor Boosts:
* Lemon Sweet 16 Birthday Cake: Add the zest of 2 lemons to the cake batter and 1-2 tablespoons of lemon juice to the buttercream for a bright, tangy twist.
* Chocolate Sweet 16 Birthday Cake: Reduce the flour by ¼ cup and add ¾ cup unsweetened cocoa powder to the dry ingredients. You can also add a teaspoon of instant espresso powder to enhance the chocolate flavor.
* Berry Delight: Fold ½ cup of fresh mashed berries (strawberries, raspberries) into the batter just before baking, or add a few tablespoons of berry puree to the buttercream for a vibrant hue and flavor.
* Almond Essence: Swap half of the vanilla extract for almond extract in both the cake and frosting for a sophisticated almond flavor.
* Frosting Fun:
* Cream Cheese Frosting: Replace vanilla buttercream with a decadent cream cheese frosting for a tangier, richer profile.
* Chocolate Ganache: Drizzle or pour a homemade chocolate ganache over your finished Sweet 16 Birthday Cake for an elegant touch.
* Tinted Frosting: Use gel food coloring to match the birthday girl’s favorite colors or party theme. Pink, purple, or teal frosting instantly elevates any Sweet 16 Birthday Cake.
* Additional Fillings: Consider adding a layer of fruit curd (lemon, raspberry), jam, or even chocolate ganache between your cake layers for an extra surprise.
Even with these thoughtful dietary adjustments, your Sweet 16 Birthday Cake can be a showstopper that aligns with current trends. Discover how to incorporate adaptable recipes into the most sought-after aesthetics by exploring Popular Cake Designs 2025.
Step-by-Step Instructions
Baking this celebratory Sweet 16 Birthday Cake is a fun and rewarding process. Follow these clear steps, and you will create a stunning dessert.
Note: This video is for demonstration purposes and may use a slightly different method.
Prepare Your Baking Pans:
1. Preheat your oven to 350°F (175°C). Grease and flour two 8-inch round cake pans or line them with parchment paper circles. This prevents sticking and ensures your Sweet 16 Birthday Cake layers come out perfectly.
Mix the Dry Ingredients:
2. In a large bowl, whisk together the all-purpose flour, granulated sugar, baking powder, and salt. Make sure these dry ingredients are well combined; this ensures even leavening throughout your cake.
Combine Wet Ingredients:
3. In a separate medium bowl, whisk together the whole milk, large eggs, and pure vanilla extract. These wet ingredients are at room temperature for optimal emulsification, which creates a smoother batter for your Sweet 16 Birthday Cake.
Cream Butter and Sugar:
4. In the bowl of a stand mixer fitted with the paddle attachment (or using a hand mixer), cream the softened unsalted butter until light and fluffy, about 2-3 minutes. Gradually add the granulated sugar and beat on medium-high speed for another 3-5 minutes, until the mixture is pale and airy. Scrape down the sides of the bowl often.
Alternate Wet and Dry:
5. With the mixer on low speed, slowly add about one-third of the dry ingredients to the butter mixture, mixing until just combined. Next, pour in half of the wet ingredients, mixing until incorporated.
Repeat this process, ending with the remaining dry ingredients. Do not overmix; overmixing develops gluten, making the cake tough. Mix until just combined and smooth.
Bake the Cake Layers:
6. Divide the batter evenly between your two prepared cake pans. Smooth the tops with a spatula.
7. Bake for 28-32 minutes, or until a wooden skewer inserted into the center of the cake comes out clean. The top should be golden brown and spring back when gently pressed.
8. Remove the cakes from the oven and let them cool in their pans on a wire rack for 10-15 minutes. Then, carefully invert the cakes onto the wire rack to cool completely. Cooling completely is crucial before frosting this Sweet 16 Birthday Cake.
Make the Vanilla Buttercream Frosting:
9. In the bowl of a stand mixer with the paddle attachment (or using a hand mixer), beat the softened unsalted butter on medium speed until creamy, about 2 minutes.
10.
Gradually add the sifted powdered sugar, one cup at a time, mixing on low speed until combined, then increasing to medium-high.
11. Add 2 tablespoons of milk or cream, pure vanilla extract, and a pinch of salt.
Beat on medium-high speed for 3-5 minutes until the frosting is light, fluffy, and smooth. If the frosting seems too thick, add more milk or cream one teaspoon at a time until you reach your desired consistency.
Assemble and Decorate the Sweet 16 Birthday Cake:
12. Once the cake layers are completely cool, level them if necessary using a serrated knife.
13.
Place one cake layer on your serving plate or cake stand. Spread about 1 cup of buttercream evenly over the top.
14.
Carefully place the second cake layer on top.
15. Apply a thin layer of frosting all over the cake (top and sides) – this is your “crumb coat.” It traps any loose crumbs, ensuring a smooth final finish for your Sweet 16 Birthday Cake.
Refrigerate for 15-20 minutes to set the crumb coat.
16. After chilling, apply the remaining buttercream frosting generously over the entire cake.
Use an offset spatula or bench scraper to smooth the sides and top for a polished look.
17. Decorate your Sweet 16 Birthday Cake as desired!
Consider sprinkles, fresh flowers, edible glitter, or custom toppers. This makes your Sweet 16 Birthday Cake truly unique.
Pro Tips for Success
Crafting the perfect Sweet 16 Birthday Cake is all about those small details. These professional tips will ensure your baking experience is smooth and your final cake is absolutely stunning.

* Room Temperature Ingredients are Key: Always bring your butter, eggs, and milk to room temperature before baking. This helps them emulsify better, creating a smoother batter and a more uniform cake texture for your Sweet 16 Birthday Cake. Cold ingredients will result in a lumpy batter and a denser cake.
* Measure Accurately: Baking is a science! Use a kitchen scale for flour and sugar for the most precise measurements. If using measuring cups, spoon the flour into the cup and level it off with a straight edge; never scoop directly from the bag, as this compacts the flour.
* Do Not Overmix: Once you add the dry ingredients to the wet, mix only until just combined. Overmixing develops gluten, which leads to a tough, dry cake. A few small lumps are better than a dense cake.
* Cool Cakes Completely: Resist the urge to frost warm cakes. Warm cakes will melt your frosting, causing it to slide right off. Allow the cake layers to cool completely on a wire rack, which can take a couple of hours.
This patience results in a beautiful Sweet 16 Birthday Cake.
* The Crumb Coat is Your Friend: This thin initial layer of frosting locks in any loose crumbs, preventing them from mixing into your final, smooth frosting layer. It creates a clean canvas for your masterpiece.
Chill the cake for 15-20 minutes after the crumb coat for best results.
* Sift Powdered Sugar: For the smoothest, lump-free buttercream, always sift your powdered sugar. This step makes a huge difference in the final texture of your frosting, crucial for a professional-looking Sweet 16 Birthday Cake.
* Invest in a Turntable: A simple cake turntable makes frosting and decorating so much easier, allowing you to rotate the cake smoothly as you apply frosting and decorations. This tool transforms your ability to create a polished Sweet 16 Birthday Cake.
* Decorate with Confidence: Don’t be afraid to get creative!
Piping bags with different tips, sprinkles, edible glitter, fresh berries, or even edible flowers can transform a simple cake into a spectacular Sweet 16 Birthday Cake. Practice your piping on parchment paper first if you are new to it.
Mastering these foundational baking techniques will set you up for success, allowing you to create cakes with intricate details and flawlessly smooth finishes. Learn how these professional principles can be applied to achieve stunning thematic designs like Elegant Ocean Inspired Cakes.
Storage & Reheating Tips
Proper storage ensures your beautiful Sweet 16 Birthday Cake stays fresh and delicious for as long as possible. Leftovers are a true treat!
You should store a frosted Sweet 16 Birthday Cake covered at room temperature for up to 2 days if your home is cool (below 70°F/21°C) and not too humid. If your home is warmer or you need to store it longer, place the cake in an airtight container or under a cake dome in the refrigerator for up to 5 days. Ensure it is well-covered to prevent drying out and absorbing other fridge odors.
For serving a refrigerated Sweet 16 Birthday Cake, allow it to sit at room temperature for at least 30-60 minutes before slicing. This brings the buttercream to a softer, more enjoyable consistency and enhances the cake’s flavor and moisture. You generally do not “reheat” a cake, but rather bring it to an optimal serving temperature.
If you have individual slices left, wrap them tightly in plastic wrap and then place them in an airtight container. They will last 3-4 days in the refrigerator. For longer storage, slices can be frozen.
Wrap each slice tightly in plastic wrap, then aluminum foil, and store in a freezer-safe bag for up to 1 month. Thaw frozen slices overnight in the refrigerator before bringing to room temperature to enjoy.
What to Serve With This Recipe
A glorious Sweet 16 Birthday Cake often takes center stage at a celebration, but complementing it with a few thoughtful additions elevates the entire experience.

* Fresh Fruit Platter: Offer a vibrant array of fresh berries (strawberries, raspberries, blueberries), sliced kiwi, and grapes. The natural sweetness and slight tartness of the fruit provide a refreshing contrast to the richness of the Sweet 16 Birthday Cake.
* Ice Cream Bar: Set up a simple ice cream bar with vanilla bean ice cream and a few other popular flavors.
Guests can add a scoop alongside their slice of Sweet 16 Birthday Cake, creating a classic dessert pairing.
* Coffee and Tea Station: Provide hot coffee, decaf options, and a selection of herbal teas. Many adults appreciate a warm beverage to accompany their dessert.
* Sparkling Cider or Punch: For a festive, non-alcoholic drink option, serve chilled sparkling cider or a colorful fruit punch. These bubbly drinks perfectly complement the celebratory nature of a Sweet 16 Birthday Cake.
* Light Finger Foods: Balance the sweetness with some savory light bites before dessert.
Think mini quiches, bruschetta, or a simple cheese and cracker platter. This prepares everyone’s palate for the highlight: your amazing Sweet 16 Birthday Cake!
* A Simple Sorbet: For those who might prefer a lighter dessert or an alternative, a scoop of a refreshing fruit sorbet offers a nice contrast.
While a beautiful cake takes center stage, don’t underestimate how much a unique presentation can enhance the entire dessert experience. For another charming idea that truly captures hearts, consider making a Heart Shaped Ocean Cake.
FAQs
Can I make this Sweet 16 Birthday Cake ahead of time?
Absolutely! You can bake the cake layers up to 2 days in advance. Once completely cooled, wrap them tightly in plastic wrap and store them at room temperature, or freeze them for up to 2 months.
Make the buttercream frosting 1-2 days ahead and store it in an airtight container in the refrigerator; bring it to room temperature and re-whip before frosting. Assemble and frost the Sweet 16 Birthday Cake the day before the event for optimal freshness.
How do I level my cake layers for an even Sweet 16 Birthday Cake?
After your cake layers cool completely, use a long, serrated knife (like a bread knife). Place the cake on a flat surface and hold the knife parallel to the counter. Use a gentle sawing motion to carefully slice off any domed top, creating a flat surface for easy stacking. This ensures a stable and beautiful Sweet 16 Birthday Cake.
What if my buttercream is too stiff or too runny for this Sweet 16 Birthday Cake?
If your buttercream is too stiff, add milk or heavy cream, one teaspoon at a time, beating after each addition until it reaches the desired consistency. If it’s too runny, add more sifted powdered sugar, one tablespoon at a time, until it thickens. Temperature also affects consistency; if it’s too warm, chill it for 10-15 minutes, then re-whip. This adjustment is crucial for a perfectly frosted Sweet 16 Birthday Cake.
Can I use different size cake pans for this Sweet 16 Birthday Cake recipe?
Yes, you can! This recipe works well in three 6-inch round pans (bake for 25-30 minutes) for a taller cake, or in a 9×13 inch rectangular pan (bake for 30-35 minutes) for a sheet cake format. Adjust baking times accordingly and always check for doneness with a wooden skewer. This versatility allows you to create the ideal Sweet 16 Birthday Cake for your guest count.
How do I transport my Sweet 16 Birthday Cake safely?
For safe transport, ensure your Sweet 16 Birthday Cake is well-chilled, especially if it’s a hot day. Place the cake in a sturdy cake box, which prevents it from shifting. If driving, place the cake box on a flat surface in your car, like the floorboard of the passenger seat, to minimize movement.
Drive carefully, avoiding sudden stops or turns. This protects your beautiful Sweet 16 Birthday Cake on its journey.
The Sweet Sixteen celebration is a significant coming-of-age milestone primarily observed in the United States and Canada, typically marking a girl’s transition into young adulthood. A beautifully crafted Sweet 16 Birthday Cake often serves as the grand centerpiece, symbolizing this important rite of passage and reflecting the celebrant’s personality and dreams.
Nutrition Information (per serving)
Please note: Nutritional information is an estimate based on ingredients used and a typical slice size from a two-layer 8-inch cake, divided into 12 servings. Actual values may vary based on specific brands, ingredient substitutions, and exact portion sizes for your Sweet 16 Birthday Cake.
| Nutrient | Amount |
|---|---|
| Calories | 450 kcal |
| Total Fat | 22g |
| Saturated Fat | 13g |
| Cholesterol | 70mg |
| Sodium | 200mg |
| Total Carbohydrates | 60g |
| Dietary Fiber | 1g |
| Total Sugars | 45g |
| Protein | 4g |
Sweet 16 Birthday Cake

Crafting a beautiful, heartfelt Sweet 16 Birthday Cake for your child, niece, or friend is more than just baking; it’s about celebrating a monumental milestone, marking the exciting journey into young adulthood. This recipe is designed to be approachable yet impressive, ensuring you create a show-stopping dessert that tastes as good as it looks, making those precious memories last a lifetime.
- Prep Time: 45 mins
- Cook Time: 30 mins
- Total Time: 3h 45m
- Yield: 12 servings 1x
- Category: Dessert
- Method: Baking
- Cuisine: American
- Diet: Standard
Ingredients
2.5 cups all-purpose flour
1.5 cups granulated sugar
1 tablespoon baking powder
0.5 teaspoon salt
1 cup unsalted butter, softened
1 cup whole milk, at room temperature
2 large eggs, at room temperature
2 teaspoons pure vanilla extract
1 cup unsalted butter, softened
4 cups powdered sugar, sifted
2 tablespoons whole milk or heavy cream
2 teaspoons pure vanilla extract
Pinch salt
Instructions
- Preheat your oven to 350°F (175°C). Grease and flour two 8-inch round cake pans or line them with parchment paper circles
- In a large bowl, whisk together the all-purpose flour, granulated sugar, baking powder, and salt
- In a separate medium bowl, whisk together the whole milk, large eggs, and pure vanilla extract
- In the bowl of a stand mixer fitted with the paddle attachment (or using a hand mixer), cream the softened unsalted butter until light and fluffy, about 2-3 minutes. Gradually add the granulated sugar and beat on medium-high speed for another 3-5 minutes, until the mixture is pale and airy. Scrape down the sides of the bowl ofte
- With the mixer on low speed, slowly add about one-third of the dry ingredients to the butter mixture, mixing until just combined. Next, pour in half of the wet ingredients, mixing until incorporated. Repeat this process, ending with the remaining dry ingredients. Do not overmix; mix until just combined and smooth
- Divide the batter evenly between your two prepared cake pans. Smooth the tops with a spatula
- Bake for 28-32 minutes, or until a wooden skewer inserted into the center of the cake comes out clean. The top should be golden brown and spring back when gently pressed
- Remove the cakes from the oven and let them cool in their pans on a wire rack for 10-15 minutes. Then, carefully invert the cakes onto the wire rack to cool completely
- In the bowl of a stand mixer with the paddle attachment (or using a hand mixer), beat the softened unsalted butter on medium speed until creamy, about 2 minutes
- Gradually add the sifted powdered sugar, one cup at a time, mixing on low speed until combined, then increasing to medium-high
- Add 2 tablespoons of milk or cream, pure vanilla extract, and a pinch of salt. Beat on medium-high speed for 3-5 minutes until the frosting is light, fluffy, and smooth. If the frosting seems too thick, add more milk or cream one teaspoon at a time until you reach your desired consistency
- Once the cake layers are completely cool, level them if necessary using a serrated knife
- Place one cake layer on your serving plate or cake stand. Spread about 1 cup of buttercream evenly over the top
- Carefully place the second cake layer on top
- Apply a thin layer of frosting all over the cake (top and sides) – this is your "crumb coat." Refrigerate for 15-20 minutes to set the crumb coat
- After chilling, apply the remaining buttercream frosting generously over the entire cake. Use an offset spatula or bench scraper to smooth the sides and top for a polished look
- Decorate your Sweet 16 Birthday Cake as desired!
Notes
Always bring your butter, eggs, and milk to room temperature before baking to help them emulsify better, creating a smoother batter and a more uniform cake texture.
Do not overmix the batter once dry ingredients are added; overmixing develops gluten, leading to a tough, dry cake.
Allow cake layers to cool completely on a wire rack for a couple of hours before frosting to prevent the frosting from melting.
Apply a thin crumb coat of frosting and chill for 15-20 minutes to trap loose crumbs, ensuring a smooth final finish.
Sift powdered sugar for the smoothest, lump-free buttercream.
Nutrition
- Serving Size: 1 slice
- Calories: 450 kcal
- Sugar: 45g
- Sodium: 200mg
- Fat: 22g
- Saturated Fat: 13g
- Unsaturated Fat: N/A
- Trans Fat: N/A
- Carbohydrates: 60g
- Fiber: 1g
- Protein: 4g
- Cholesterol: 70mg