Banana Ice Cream (2 Ingredients)
Banana Ice Cream (2 Ingredients) Easy Recipe (5 Steps)
Introduction to Banana Ice Cream
Why Choose Banana Ice Cream?
Banana ice cream is a simple, healthy, and delicious dessert that requires only two ingredients. This naturally sweet treat is perfect for those looking for a dairy-free, refined sugar-free, and easy-to-make alternative to traditional ice cream. Unlike store-bought options that often contain preservatives and artificial flavors, homemade banana ice cream allows you to enjoy a fresh and wholesome dessert.
If you’re interested in more light and nutritious recipes, check out these Cooking Light Recipes: Healthy Eating for inspiration.
Additionally, banana ice cream can be a fantastic way to use overripe bananas, reducing food waste while creating a satisfying snack or dessert. If you love banana-based recipes, you might also enjoy these Best Banana Bread Recipes for another creative way to enjoy this nutritious fruit.
Benefits of Homemade Ice Cream
Making banana ice cream at home comes with several benefits, from health advantages to cost savings.
- Healthier Alternative
Homemade banana ice cream is free from artificial additives, excessive sugar, and unhealthy fats often found in commercial ice cream. Bananas provide natural sweetness, vitamins, and fiber, making this dessert a more nutritious choice. If you’re looking for additional Easy Healthy Breakfast Recipes, this ice cream can be a great morning treat when paired with granola or nuts. - Weight Management Friendly
Since this ice cream is naturally sweetened and low in calories, it can be a great option for those focusing on weight management. If you’re following a balanced diet, you may also be interested in these Healthy Lunches for Weight Loss for more meal ideas that support your health goals. - Dietary Flexibility
Banana ice cream can easily be customized to fit various dietary preferences. Whether you’re vegan, lactose-intolerant, or simply looking for a guilt-free dessert, this two-ingredient recipe is an excellent choice. For those who enjoy nutrient-dense smoothies, this Kale and Avocado Anti-inflammatory Smoothie is another fantastic option to incorporate into a healthy diet. - Budget-Friendly and Easy to Make
With just bananas and a milk alternative, you can create a creamy and satisfying dessert without breaking the bank. Plus, this recipe requires minimal effort—just freeze, blend, and enjoy! If you’re looking for more simple yet delicious treats, these Easy Desserts for Kids Recipes provide more ideas for quick and healthy homemade sweets.
Making banana ice cream at home ensures you’re in control of the ingredients, flavors, and nutritional value. Whether you’re preparing a refreshing summer treat or a post-workout snack, this two-ingredient dessert is a fantastic option.
Ingredients Needed
 1")
To make this delicious banana ice cream, you only need two simple ingredients: bananas and milk or a milk alternative. These natural ingredients create a creamy, naturally sweet dessert without the need for added sugars or preservatives.
Bananas
Bananas are the star ingredient of this recipe, providing natural sweetness and a smooth, creamy texture when blended. They are also packed with essential nutrients like potassium, fiber, and vitamin B6, making this ice cream a healthier alternative to traditional desserts.
For the best results, use ripe or overripe bananas—the more brown spots, the sweeter your ice cream will be! If you love bananas and want to explore more recipes featuring this versatile fruit, check out these Best Banana Bread Recipes for another way to enjoy them.
Milk or Milk Alternative
Adding a small amount of liquid helps blend the frozen bananas into a smooth, creamy texture. Depending on your dietary preferences, you can choose from a variety of milk options:
- Dairy Milk – Provides extra creaminess and a rich flavor.
- Almond Milk – A light, nutty option that complements bananas well.
- Oat Milk – Naturally sweet and smooth, making it a great choice.
- Coconut Milk – Adds a tropical twist and extra creaminess.
- Cashew Milk – Offers a mild, creamy texture similar to dairy.
If you’re looking for more healthy and dairy-free alternatives in your meals, explore these Cooking Light Recipes: Healthy Eating for additional inspiration.
Choosing the Right Milk
The choice of milk can affect the final texture and flavor of your banana ice cream:
- For a richer, creamier consistency, use full-fat coconut milk or whole dairy milk.
- For a light and refreshing taste, almond or oat milk is an excellent choice.
- For a nutty undertone, cashew or macadamia milk enhances the flavor.
If you’re following a weight-conscious diet, you might also find these Healthy Lunches for Weight Loss useful in maintaining balanced eating habits.
By selecting the right milk or milk alternative, you can customize your banana ice cream to match your taste and dietary needs perfectly.
Equipment Required
Making banana ice cream at home is incredibly easy, and you only need two essential kitchen tools: a blender or food processor and a freezer-safe container. These will ensure that your ice cream turns out smooth, creamy, and perfectly frozen.
Blender or Food Processor
A high-speed blender or food processor is necessary to blend the frozen bananas into a smooth, creamy consistency. Since bananas are naturally starchy, they require a powerful motor to break them down properly without adding too much liquid.
Which One Should You Use?
- Blender – Best for those who prefer a super smooth and creamy texture. Ideal for small batches.
- Food Processor – Works well for larger batches and can handle frozen bananas more easily without requiring extra liquid.
If you’re looking for additional recipes that make use of blenders or food processors, check out these Kale and Avocado Anti-inflammatory Smoothies for another nutritious and easy-to-make treat.
Freezer-Safe Container
Once blended, the banana ice cream needs to be stored in a freezer-safe container to set properly. A good container will help maintain the creamy texture and prevent ice crystals from forming.
Best Options for Storage
- Airtight Glass or Plastic Containers – Helps preserve freshness and prevents freezer burn.
- Metal Loaf Pan – Conducts cold quickly, freezing the ice cream faster.
- Silicone Ice Cream Containers – Flexible and easy to scoop from.
For more healthy and homemade meal ideas, check out these Easy Healthy Breakfast Recipes for inspiration.
With the right equipment, making banana ice cream is effortless, and you’ll have a delicious, homemade treat ready in no time!
Step-by-Step Recipe
 2")
Making banana ice cream at home is simple and requires just a few easy steps. Follow this guide to achieve the perfect creamy texture every time.
Step 1: Preparing Bananas
Start by selecting ripe or overripe bananas—the riper they are, the sweeter your ice cream will be.
- Peel the bananas and cut them into small slices.
- Place the slices on a parchment-lined tray or plate to prevent them from sticking together during freezing.
- If you love banana-based recipes, you might also enjoy these Best Banana Bread Recipes for another creative way to use bananas.
Step 2: Freezing Bananas
 3")
For the best creamy texture, the bananas need to be completely frozen before blending.
- Spread the banana slices in a single layer on a baking sheet.
- Freeze for at least 2–3 hours, or until they are solid.
- Once frozen, transfer them to a resealable bag or container for easy storage.
For other frozen and refreshing meal ideas, explore these Easy Healthy Breakfast Recipes for nutritious and delicious options.
Step 3: Blending Ingredients
Now it’s time to blend your frozen bananas into a smooth, ice-cream-like consistency.
- Place the frozen banana slices into a high-speed blender or food processor.
- Add a splash of milk or milk alternative to help with blending. You can refer back to the Choosing the Right Milk section to find the best option for your dietary needs.
- Blend until the mixture is creamy and smooth. Scrape down the sides as needed.
If you’re a fan of blended recipes, you may also enjoy these Kale and Avocado Anti-inflammatory Smoothies for another nutritious treat.
Step 4: Freezing the Mixture
Once blended, you can either enjoy your banana ice cream immediately as a soft-serve treat or freeze it for a firmer consistency.
- Transfer the blended ice cream into a freezer-safe container.
- Smooth the surface and cover it with a lid or plastic wrap to prevent ice crystals from forming.
- Freeze for 1–2 hours to firm up.
If you’re looking for more easy homemade dessert ideas, check out these Easy Desserts for Kids Recipes for simple and delicious sweet treats.
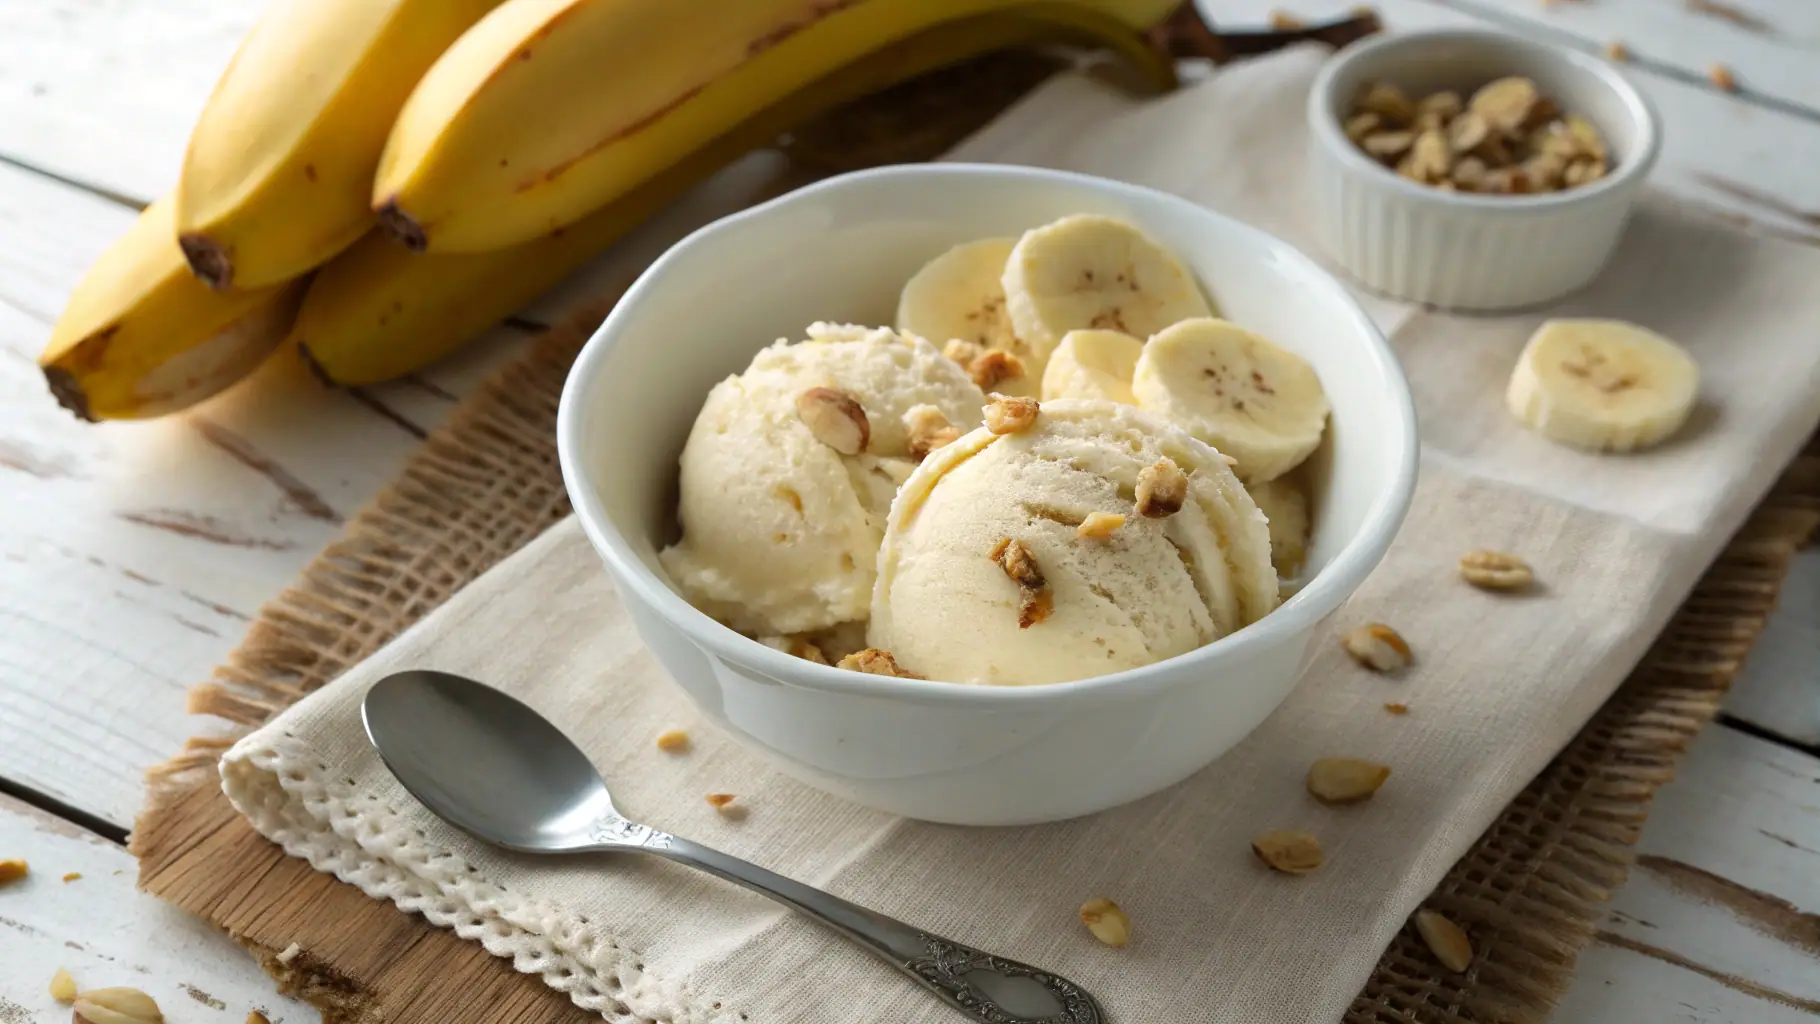
Step 5: Serving Suggestions
Now that your banana ice cream is ready, it’s time to serve and enjoy!
- Scoop the ice cream into bowls or cones.
- Add toppings like fresh fruits, nuts, or dark chocolate for extra flavor.
- Pair it with a light and nutritious meal, such as these Healthy Lunches for Weight Loss, to maintain a balanced diet.
Tips for Perfect Banana Ice Cream
Creating banana ice cream is simple, but a few expert tips can help you achieve the best consistency and flavor. Whether you want a silky smooth texture or exciting variations, these tricks will take your homemade ice cream to the next level.
Consistency Tips
Getting the perfect creamy consistency is key to making banana ice cream as delicious as traditional ice cream. Here’s how to ensure a smooth and scoopable texture:
- Use ripe bananas – Overripe bananas blend more easily and provide natural sweetness, eliminating the need for added sugar. If you enjoy banana-based treats, check out these Best Banana Bread Recipes for another great way to use ripe bananas.
- Freeze bananas properly – Slice them before freezing to make blending easier and prevent a chunky texture.
- Blend in short pulses – Over-blending can cause the mixture to become too soft and soupy. Use short pulses and scrape down the sides for even consistency.
- Adjust liquid as needed – Adding too much milk or milk alternative can make the mixture too runny. Start with a small splash and increase if necessary. If you’re interested in using healthier milk options, check out Cooking Light Recipes: Healthy Eating for more ideas.
- Freeze for the right amount of time – If you prefer a firmer ice cream, freeze it for 1–2 hours after blending. If it becomes too hard, let it sit at room temperature for a few minutes before serving.
Flavor Variations
 4")
While classic banana ice cream is delicious on its own, you can easily add flavors to customize your treat. Here are two of the most popular variations:
Chocolate Banana Ice Cream
For a rich, chocolatey twist, follow these steps:
- Blend 1 tablespoon of unsweetened cocoa powder or melted dark chocolate with the frozen bananas.
- Add a splash of almond or oat milk for extra creaminess.
- Top with cacao nibs, dark chocolate shavings, or chopped nuts for added crunch.
If you love chocolate desserts but want to keep things healthy, explore these Easy Desserts for Kids Recipes for more simple and nutritious sweet treats.
Peanut Butter Banana Ice Cream
For a creamy, nutty variation, try this:
- Blend 1–2 tablespoons of natural peanut butter with the frozen bananas.
- Add a small pinch of cinnamon for extra depth of flavor.
- Top with crushed peanuts, granola, or a drizzle of honey for added texture.
If you’re looking for more high-protein snacks, check out Healthy Lunches for Weight Loss for additional meal ideas that fit into a balanced diet.
With these tips and flavor variations, your banana ice cream will always turn out creamy, delicious, and full of natural goodness!
Nutritional Information
Banana ice cream is not only delicious but also a healthier alternative to traditional ice cream. Made with just bananas and a milk alternative, it is naturally sweet, free from added sugars, and packed with essential nutrients. Below, we break down its calories, macronutrients, and health benefits to show why this dessert is a guilt-free treat.
Calories and Macronutrients
The nutritional content of banana ice cream depends on the ingredients used, but here’s a general estimate for a one-cup serving (made with just bananas and unsweetened almond milk):
- Calories: ~150 kcal
- Carbohydrates: 35g (natural sugars from bananas)
- Fiber: 4g (supports digestion and keeps you full)
- Protein: 2g
- Fat: 0.5g (if using almond or oat milk)
- Potassium: ~450mg (important for heart health and muscle function)
If you add peanut butter or cocoa powder for extra flavor, the calorie and fat content will increase slightly. Looking for more nutritious meal ideas? Check out these Healthy Lunches for Weight Loss for balanced and satisfying options.
Health Benefits
Eating banana ice cream isn’t just about satisfying your sweet tooth—it also provides a variety of health benefits:
1. Naturally Sweet with No Added Sugar
Unlike store-bought ice creams loaded with refined sugars, banana ice cream is naturally sweet and won’t cause a sharp spike in blood sugar levels. If you’re interested in more naturally sweet options, check out these Easy Desserts for Kids Recipes for wholesome treats.
2. Supports Digestion and Gut Health
Bananas are a great source of fiber, which helps support healthy digestion and promotes gut health. A single serving of banana ice cream contains about 4g of fiber, which aids in maintaining a healthy metabolism.
3. Rich in Potassium for Heart and Muscle Health
Bananas are naturally high in potassium, which helps regulate blood pressure, muscle function, and hydration levels. For more potassium-rich meal ideas, check out these Cooking Light Recipes: Healthy Eating for well-balanced options.
4. Dairy-Free and Vegan-Friendly
By using plant-based milk, banana ice cream becomes an excellent vegan and dairy-free dessert option. This makes it a great alternative for those with lactose intolerance or those following a plant-based diet.
If you love dairy-free recipes, you might enjoy these Kale and Avocado Anti-inflammatory Smoothies for another nutritious and refreshing option.
Common Mistakes to Avoid
Making banana ice cream is simple, but a few common mistakes can affect its texture, flavor, and overall quality. To ensure your homemade ice cream turns out creamy and delicious, avoid these pitfalls.
Over-Blending
One of the most frequent mistakes is over-blending the frozen bananas, which can lead to a runny consistency instead of a thick, creamy texture.
How to Avoid It:
- Blend in short pulses – Instead of running the blender continuously, use short pulses to control the texture.
- Use just enough liquid – Adding too much milk or milk alternative can make the ice cream too soft. Start with a small splash and add more only if needed.
- Scrape down the sides – This helps blend the bananas evenly without over-processing them.
If you’re interested in more tips for making smooth and healthy recipes, check out these Cooking Light Recipes: Healthy Eating for inspiration.
Improper Storage
Even though banana ice cream is best enjoyed fresh, you may want to store leftovers for later. However, improper storage can lead to ice crystals and a hard, icy texture instead of the creamy consistency you want.
How to Avoid It:
- Use an airtight container – This prevents ice crystals from forming and keeps the ice cream fresh.
- Press plastic wrap over the surface – Before sealing the container, place a piece of plastic wrap directly on top of the ice cream to reduce exposure to air.
- Let it soften before serving – If the ice cream becomes too hard, let it sit at room temperature for 5–10 minutes before scooping.
For more freezer-friendly meal ideas, check out these Easy Healthy Breakfast Recipes that can be prepared ahead of time.
Frequently Asked Questions (FAQs)
If you’re new to making banana ice cream, you may have a few questions about the process. Below are answers to some of the most common questions to help you make the perfect creamy treat every time.
Can I use ripe bananas?
Yes! Ripe or overripe bananas are best for making banana ice cream because they are naturally sweeter and easier to blend. The more brown spots on the peel, the better! Using ripe bananas eliminates the need for added sugar while ensuring a smooth texture.
If you love using bananas in different ways, check out these Best Banana Bread Recipes for another delicious way to enjoy them.
How long does banana ice cream last?
Homemade banana ice cream can be stored in the freezer for up to 2 weeks. However, for the best texture and flavor, it’s best to enjoy it within the first few days.
Storage Tips:
- Store it in an airtight, freezer-safe container to prevent freezer burn.
- Place a layer of plastic wrap directly on top of the ice cream before sealing the container to reduce ice crystal formation.
- Let it sit at room temperature for 5–10 minutes before scooping if it becomes too hard.
For more freezer-friendly meal prep ideas, check out these Healthy Lunches for Weight Loss for easy and nutritious meals.
Can I add sugar?
Banana ice cream is naturally sweet, so additional sugar isn’t necessary. However, if you prefer a sweeter taste, you can add:
- A drizzle of honey or maple syrup
- A few dates blended in
- A sprinkle of coconut sugar
If you’re looking for more naturally sweet dessert ideas, check out these Easy Desserts for Kids Recipes for wholesome and kid-friendly treats.
Is banana ice cream vegan?
Yes! Banana ice cream is naturally vegan when made with plant-based milk alternatives like almond, oat, or coconut milk. Just be sure to use dairy-free mix-ins if you choose to add flavors.
For more plant-based recipe inspiration, explore these Kale and Avocado Anti-inflammatory Smoothies for another delicious dairy-free option.
Can I make this without a blender?
Yes, but it requires a bit more effort. If you don’t have a blender or food processor, try these alternative methods:
- Mash the bananas by hand – Use a fork or potato masher to create a smooth puree.
- Whisk vigorously – After mashing, whisk in a small amount of plant-based milk for a creamy texture.
- Freeze and stir – Pour the mixture into a shallow dish, freeze it, and stir every 30 minutes until it reaches an ice-cream-like consistency.
For more no-blender meal ideas, check out these Cooking Light Recipes: Healthy Eating for simple and nutritious options.
Why is my ice cream icy?
If your banana ice cream turns out icy instead of creamy, it may be due to:
- Adding too much liquid – Use just a small splash of milk to help with blending.
- Not blending enough – Make sure the bananas are fully processed into a smooth texture.
- Freezing for too long – Let it soften at room temperature for a few minutes before serving.
- Not using an airtight container – Proper storage prevents ice crystals from forming.
If you enjoy frozen treats but want more variety, check out these Easy Healthy Breakfast Recipes for refreshing and nutritious options.
Conclusion
Making banana ice cream is an easy, healthy, and delicious way to enjoy a frozen dessert with only two ingredients. Whether you keep it simple or experiment with flavors like chocolate or peanut butter, this dairy-free and naturally sweet treat is perfect for any occasion.
By following the tips in this guide, you’ll achieve a smooth, creamy, and delicious banana ice cream every time. Plus, with its high fiber, potassium, and antioxidant content, this dessert is not just tasty but also nutritious!
If you’re looking for more healthy, homemade recipes, explore Healthy Lunches for Weight Loss or Cooking Light Recipes: Healthy Eating for more nutritious meal ideas.
 9")
 – Easy & Delicious Recipe 10")


1 Comment
[…] treats often minimize additives and processed sugars as well. For example, a dessert like banana ice cream offers a creamy texture and natural sweetness using just bananas—no refined sugar needed. It’s […]
Comments are closed.